Upper Passageway - Caves (Resident Evil 5)

Image of Upper Passageway - Caves

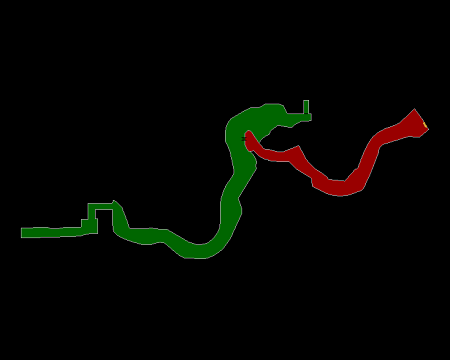
This place is linked to the following locations:

Location Chapter 4-1   | Show on map

Contents

Chapter 4-1

  • Image of Bui Kichwa

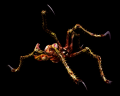
    1 Bui Kichwa

    Amateur
    Emerges from the ground next to the ladder when you enter this area.

    View detail | Show on map
  • Image of Bui Kichwa

    1 Bui Kichwa

    Normal
    Emerges from the ground next to the ladder when you enter this area.
    View detail | Show on map
  • Image of Bui Kichwa

    1 Bui Kichwa

    Veteran
    Emerges from the ground next to the ladder when you enter this area.
    View detail | Show on map
  • Image of Bui Kichwa

    1 Bui Kichwa

    Professional
    Emerges from the ground next to the ladder when you enter this area.
    View detail | Show on map
  • Image of Large Clay Vase

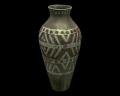
    2 Large Clay Vases

    Amateur
    On the bridge on the west side of the passage.
    View detail | Show on map
  • Image of Large Clay Vase

    2 Large Clay Vases

    Normal
    On the bridge on the west side of the passage.
    View detail | Show on map
  • Image of Large Clay Vase

    2 Large Clay Vases

    Veteran
    On the bridge on the west side of the passage.
    View detail | Show on map
  • Image of Large Clay Vase

    2 Large Clay Vases

    Professional
    On the bridge on the west side of the passage.
    View detail | Show on map
  • Image of BSAA Emblem

    BSAA Emblem

    Amateur
    Halfway along the bridge on the west side of the passage, if you look over the right side of the bridge and look down, you will see the emblem amongst the rocks of the small waterfall.
    View detail | Show on map
  • Image of BSAA Emblem

    BSAA Emblem

    Normal
    Halfway along the bridge on the west side of the passage, if you look over the right side of the bridge and look down, you will see the emblem amongst the rocks of the small waterfall.
    View detail | Show on map
  • Image of BSAA Emblem

    BSAA Emblem

    Veteran
    Halfway along the bridge on the west side of the passage, if you look over the right side of the bridge and look down, you will see the emblem amongst the rocks of the small waterfall.
    View detail | Show on map
  • Image of BSAA Emblem

    BSAA Emblem

    Professional
    Halfway along the bridge on the west side of the passage, if you look over the right side of the bridge and look down, you will see the emblem amongst the rocks of the small waterfall.
    View detail | Show on map
  • Image of Emerald (Pear)

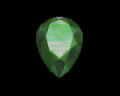
    1 × Emerald (Pear)

    Amateur
    Inside the brazier of the first torch, located just beyond the bridge.
    View detail | Show on map
  • Image of Emerald (Pear)

    1 × Emerald (Pear)

    Normal
    Inside the brazier of the first torch, located just beyond the bridge.
    View detail | Show on map
  • Image of Emerald (Pear)

    1 × Emerald (Pear)

    Veteran
    Inside the brazier of the first torch, located just beyond the bridge.
    View detail | Show on map
  • Image of Emerald (Pear)

    1 × Emerald (Pear)

    Professional
    Inside the brazier of the first torch, located just beyond the bridge.
    View detail | Show on map
  • Image of Bui Kichwa

    8 Bui Kichwas

    Amateur
    Scuttling around in the middle of the passage.
    View detail | Show on map
  • Image of Bui Kichwa

    8 Bui Kichwas

    Normal
    Scuttling around in the middle of the passage.
    View detail | Show on map
  • Image of Bui Kichwa

    8 Bui Kichwas

    Veteran
    Scuttling around in the middle of the passage.
    View detail | Show on map
  • Image of Bui Kichwa

    8 Bui Kichwas

    Professional
    Scuttling around in the middle of the passage.
    View detail | Show on map
  • Image of Bui Kichwa

    4 Bui Kichwas

    Amateur
    Scuttling around in the east side of the passage.
    View detail | Show on map
  • Image of Bui Kichwa

    4 Bui Kichwas

    Normal
    Scuttling around in the east side of the passage.
    View detail | Show on map
  • Image of Bui Kichwa

    4 Bui Kichwas

    Veteran
    Scuttling around in the east side of the passage.
    View detail | Show on map
  • Image of Bui Kichwa

    4 Bui Kichwas

    Professional
    Scuttling around in the east side of the passage.
    View detail | Show on map
  • Image of Sapphire (Square)

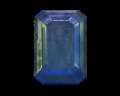
    1 × Sapphire (Square)

    Amateur
    Inside the brazier of the second torch, located just beyond the middle section of the passage.
    View detail | Show on map
  • Image of Sapphire (Square)

    1 × Sapphire (Square)

    Normal
    Inside the brazier of the second torch, located just beyond the middle section of the passage.
    View detail | Show on map
  • Image of Sapphire (Square)

    1 × Sapphire (Square)

    Veteran
    Inside the brazier of the second torch, located just beyond the middle section of the passage.
    View detail | Show on map
  • Image of Sapphire (Square)

    1 × Sapphire (Square)

    Professional
    Inside the brazier of the second torch, located just beyond the middle section of the passage.
    View detail | Show on map
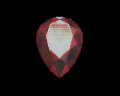
  • Image of Ruby (Pear)

    1 Ruby (Pear)

    Amateur
    Attached to the animal skull on the ground next to the exit door at the east end of the passage.
    View detail | Show on map
  • Image of Ruby (Pear)

    1 Ruby (Pear)

    Normal
    Attached to the animal skull on the ground next to the exit door at the east end of the passage.
    View detail | Show on map
  • Image of Ruby (Pear)

    1 Ruby (Pear)

    Veteran
    Attached to the animal skull on the ground next to the exit door at the east end of the passage.
    View detail | Show on map
  • Image of Ruby (Pear)

    1 Ruby (Pear)

    Professional
    Attached to the animal skull on the ground next to the exit door at the east end of the passage.
    View detail | Show on map
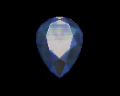
  • Image of Sapphire (Pear)

    1 × Sapphire (Pear)

    Amateur
    Attached to the animal skull on the ground next to the exit door at the east end of the passage.
    View detail | Show on map
  • Image of Sapphire (Pear)

    1 × Sapphire (Pear)

    Normal
    Attached to the animal skull on the ground next to the exit door at the east end of the passage.
    View detail | Show on map
  • Image of Sapphire (Pear)

    1 × Sapphire (Pear)

    Veteran
    Attached to the animal skull on the ground next to the exit door at the east end of the passage.
    View detail | Show on map
  • Image of Sapphire (Pear)

    1 × Sapphire (Pear)

    Professional
    Attached to the animal skull on the ground next to the exit door at the east end of the passage.
    View detail | Show on map
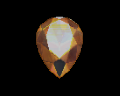
  • Image of Topaz (Pear)

    1 × Topaz (Pear)

    Amateur
    Inside the brazier of the third torch, located next to the exit door at the east end of the passage.
    View detail | Show on map
  • Image of Topaz (Pear)

    1 × Topaz (Pear)

    Normal
    Inside the brazier of the third torch, located next to the exit door at the east end of the passage.
    View detail | Show on map
  • Image of Topaz (Pear)

    1 × Topaz (Pear)

    Veteran
    Inside the brazier of the third torch, located next to the exit door at the east end of the passage.
    View detail | Show on map
  • Image of Topaz (Pear)

    1 × Topaz (Pear)

    Professional
    Inside the brazier of the third torch, located next to the exit door at the east end of the passage.
    View detail | Show on map

There are no contents to show for this game mode. The following game modes are applicable:

Related product

Resident Evil Requiem Deluxe Edition

Buy the Resident Evil Requiem Deluxe Edition on Amazon