Ruby (Pear) (Resident Evil 5)

Image of Ruby (Pear)

A small, red gem.

A rare treasure that can be sold for money.
Category Treasure
Sell price ₦1,000

Related product

Resident Evil 2 Keys Collection Set

Buy the Resident Evil 2 Keys Collection Set on Amazon

Location

Chapter 2-2

  • Image of Entrance Tunnel - The Mines

    Entrance Tunnel - The Mines

    Amateur
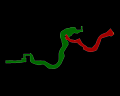
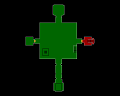
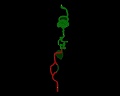
    1 Ruby (Pear) - In the ceiling of the tunnel near the southern starting point. This jewel is invisible, so you need to proceed along the tunnel until you come across two sandbags on the left side just before the tunnel first splits (you will pass three sandbags first). When you see the two sandbags, step back and aim upwards so your crosshair is is aimed at the middle of the roof, almost exactly in line as the sandbags and between the wooden rafters of the tunnel. Your crosshair will turn red when you're aiming at the jewel.
    1 Ruby (Pear) - In the ceiling of the tunnel at the end of the first partially flooded section.
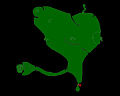
    1 Ruby (Pear) - On the north side of the waterfall area, above the doorway leading out of this area.
    View location | Show on map
  • Image of Entrance Tunnel - The Mines

    Entrance Tunnel - The Mines

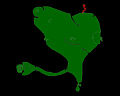
    Normal
    1 Ruby (Pear) - In the ceiling of the tunnel near the southern starting point. This jewel is invisible, so you need to proceed along the tunnel until you come across two sandbags on the left side just before the tunnel first splits (you will pass three sandbags first). When you see the two sandbags, step back and aim upwards so your crosshair is is aimed at the middle of the roof, almost exactly in line as the sandbags and between the wooden rafters of the tunnel. Your crosshair will turn red when you're aiming at the jewel.
    1 Ruby (Pear) - In the ceiling of the tunnel at the end of the first partially flooded section.
    1 Ruby (Pear) - On the north side of the waterfall area, above the doorway leading out of this area.
    View location | Show on map
  • Image of Entrance Tunnel - The Mines

    Entrance Tunnel - The Mines

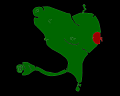
    Veteran
    1 Ruby (Pear) - In the ceiling of the tunnel near the southern starting point. This jewel is invisible, so you need to proceed along the tunnel until you come across two sandbags on the left side just before the tunnel first splits (you will pass three sandbags first). When you see the two sandbags, step back and aim upwards so your crosshair is is aimed at the middle of the roof, almost exactly in line as the sandbags and between the wooden rafters of the tunnel. Your crosshair will turn red when you're aiming at the jewel.
    1 Ruby (Pear) - In the ceiling of the tunnel at the end of the first partially flooded section.
    1 Ruby (Pear) - On the north side of the waterfall area, above the doorway leading out of this area.
    View location | Show on map
  • Image of Entrance Tunnel - The Mines

    Entrance Tunnel - The Mines

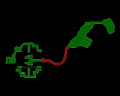
    Professional
    1 Ruby (Pear) - In the ceiling of the tunnel near the southern starting point. This jewel is invisible, so you need to proceed along the tunnel until you come across two sandbags on the left side just before the tunnel first splits (you will pass three sandbags first). When you see the two sandbags, step back and aim upwards so your crosshair is is aimed at the middle of the roof, almost exactly in line as the sandbags and between the wooden rafters of the tunnel. Your crosshair will turn red when you're aiming at the jewel.
    1 Ruby (Pear) - In the ceiling of the tunnel at the end of the first partially flooded section.
    1 Ruby (Pear) - On the north side of the waterfall area, above the doorway leading out of this area.
    View location | Show on map

Chapter 3-1

  • Image of South Dock - Marshlands

    South Dock - Marshlands

    Amateur
    1 Ruby (Pear) - On the displayed animal skull on the north east side of the area.
    View location | Show on map
  • Image of South Dock - Marshlands

    South Dock - Marshlands

    Normal
    1 Ruby (Pear) - On the displayed animal skull on the north east side of the area.
    View location | Show on map
  • Image of South Dock - Marshlands

    South Dock - Marshlands

    Veteran
    1 Ruby (Pear) - On the displayed animal skull on the north east side of the area.
    View location | Show on map
  • Image of South Dock - Marshlands

    South Dock - Marshlands

    Professional
    1 Ruby (Pear) - On the displayed animal skull on the north east side of the area.
    View location | Show on map
  • Image of North East Dock - Marshlands

    North East Dock - Marshlands

    Amateur
    1 Ruby (Pear) - On the animal skull on the pole at the entrance to the east hut.
    View location | Show on map
  • Image of North East Dock - Marshlands

    North East Dock - Marshlands

    Normal
    1 Ruby (Pear) - On the animal skull on the pole at the entrance to the east hut.
    View location | Show on map
  • Image of North East Dock - Marshlands

    North East Dock - Marshlands

    Veteran
    1 Ruby (Pear) - On the animal skull on the pole at the entrance to the east hut.
    View location | Show on map
  • Image of North East Dock - Marshlands

    North East Dock - Marshlands

    Professional
    1 Ruby (Pear) - On the animal skull on the pole at the entrance to the east hut.
    View location | Show on map
  • Image of East Dock - Marshlands

    East Dock - Marshlands

    Amateur
    1 Ruby (Pear) - On the right post leading into the structure on the east side of the water pool.
    View location | Show on map
  • Image of East Dock - Marshlands

    East Dock - Marshlands

    Normal
    1 Ruby (Pear) - On the right post leading into the structure on the east side of the water pool.
    View location | Show on map
  • Image of East Dock - Marshlands

    East Dock - Marshlands

    Veteran
    1 Ruby (Pear) - On the right post leading into the structure on the east side of the water pool.
    View location | Show on map
  • Image of East Dock - Marshlands

    East Dock - Marshlands

    Professional
    1 Ruby (Pear) - On the right post leading into the structure on the east side of the water pool.
    View location | Show on map

Chapter 3-2

  • Image of Tunnel - Execution Ground

    Tunnel - Execution Ground

    Amateur
    1 Ruby (Pear) - Inside the first lantern hanging from the roof of the tunnel.
    View location | Show on map
  • Image of Tunnel - Execution Ground

    Tunnel - Execution Ground

    Normal
    1 Ruby (Pear) - Inside the first lantern hanging from the roof of the tunnel.
    View location | Show on map
  • Image of Tunnel - Execution Ground

    Tunnel - Execution Ground

    Veteran
    1 Ruby (Pear) - Inside the first lantern hanging from the roof of the tunnel.
    View location | Show on map
  • Image of Tunnel - Execution Ground

    Tunnel - Execution Ground

    Professional
    1 Ruby (Pear) - Inside the first lantern hanging from the roof of the tunnel.
    View location | Show on map

Chapter 4-1

  • Image of Upper Passageway - Caves

    Upper Passageway - Caves

    Amateur
    1 Ruby (Pear) - Attached to the animal skull on the ground next to the exit door at the east end of the passage.
    View location | Show on map
  • Image of Upper Passageway - Caves

    Upper Passageway - Caves

    Normal
    1 Ruby (Pear) - Attached to the animal skull on the ground next to the exit door at the east end of the passage.
    View location | Show on map
  • Image of Upper Passageway - Caves

    Upper Passageway - Caves

    Veteran
    1 Ruby (Pear) - Attached to the animal skull on the ground next to the exit door at the east end of the passage.
    View location | Show on map
  • Image of Upper Passageway - Caves

    Upper Passageway - Caves

    Professional
    1 Ruby (Pear) - Attached to the animal skull on the ground next to the exit door at the east end of the passage.
    View location | Show on map
  • Image of Tomb 2 - Ancient Village - Upper

    Tomb 2 - Ancient Village - Upper

    Amateur
    1 Ruby (Pear) - On the mummified remains inside the open sarcophagus leaning against the north east corner of the room.
    View location | Show on map
  • Image of Tomb 2 - Ancient Village - Upper

    Tomb 2 - Ancient Village - Upper

    Normal
    1 Ruby (Pear) - On the mummified remains inside the open sarcophagus leaning against the north east corner of the room.
    View location | Show on map
  • Image of Tomb 2 - Ancient Village - Upper

    Tomb 2 - Ancient Village - Upper

    Veteran
    1 Ruby (Pear) - On the mummified remains inside the open sarcophagus leaning against the north east corner of the room.
    View location | Show on map
  • Image of Tomb 2 - Ancient Village - Upper

    Tomb 2 - Ancient Village - Upper

    Professional
    1 Ruby (Pear) - On the mummified remains inside the open sarcophagus leaning against the north east corner of the room.
    View location | Show on map
  • Image of North East Quadrant 1F - Labyrinth - Lower

    North East Quadrant 1F - Labyrinth - Lower

    Amateur
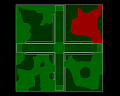
    1 Ruby (Pear) - Underneath the purple statue in the north east corner. This treasure becomes accessible once you pull its rope along with the rope of the purple statue in the upper north east quadrant to move the statues and reconfigure the labyrinth.
    View location | Show on map
  • Image of North East Quadrant 1F - Labyrinth - Lower

    North East Quadrant 1F - Labyrinth - Lower

    Normal
    1 Ruby (Pear) - Underneath the purple statue in the north east corner. This treasure becomes accessible once you pull its rope along with the rope of the purple statue in the upper north east quadrant to move the statues and reconfigure the labyrinth.
    View location | Show on map
  • Image of North East Quadrant 1F - Labyrinth - Lower

    North East Quadrant 1F - Labyrinth - Lower

    Veteran
    1 Ruby (Pear) - Underneath the purple statue in the north east corner. This treasure becomes accessible once you pull its rope along with the rope of the purple statue in the upper north east quadrant to move the statues and reconfigure the labyrinth.
    View location | Show on map
  • Image of North East Quadrant 1F - Labyrinth - Lower

    North East Quadrant 1F - Labyrinth - Lower

    Professional
    1 Ruby (Pear) - Underneath the purple statue in the north east corner. This treasure becomes accessible once you pull its rope along with the rope of the purple statue in the upper north east quadrant to move the statues and reconfigure the labyrinth.
    View location | Show on map

Chapter 4-2

  • Image of Northern Path - Worship Area

    Northern Path - Worship Area

    Amateur
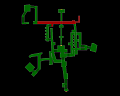
    1 Ruby (Pear) - On the underside of the exit staircase in the center of the path.
    View location | Show on map
  • Image of Northern Path - Worship Area

    Northern Path - Worship Area

    Normal
    1 Ruby (Pear) - On the underside of the exit staircase in the center of the path.
    View location | Show on map
  • Image of Northern Path - Worship Area

    Northern Path - Worship Area

    Veteran
    1 Ruby (Pear) - On the underside of the exit staircase in the center of the path.
    View location | Show on map
  • Image of Northern Path - Worship Area

    Northern Path - Worship Area

    Professional
    1 Ruby (Pear) - On the underside of the exit staircase in the center of the path.
    View location | Show on map
  • Image of Main Room - Pyramid B1

    Main Room - Pyramid B1

    Amateur
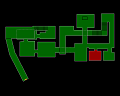
    1 Ruby (Pear) - On the ground of the platform on the east side of the room.
    View location | Show on map
  • Image of Main Room - Pyramid B1

    Main Room - Pyramid B1

    Normal
    1 Ruby (Pear) - On the ground of the platform on the east side of the room.
    View location | Show on map
  • Image of Main Room - Pyramid B1

    Main Room - Pyramid B1

    Veteran
    1 Ruby (Pear) - On the ground of the platform on the east side of the room.
    View location | Show on map
  • Image of Main Room - Pyramid B1

    Main Room - Pyramid B1

    Professional
    1 Ruby (Pear) - On the ground of the platform on the east side of the room.
    View location | Show on map
  • Image of Treasure Room East - Pyramid B2

    Treasure Room East - Pyramid B2

    Amateur
    1 Ruby (Pear) - On the animal skull on the east wall in the south east corner of the room.
    View location | Show on map
  • Image of Treasure Room East - Pyramid B2

    Treasure Room East - Pyramid B2

    Normal
    1 Ruby (Pear) - On the animal skull on the east wall in the south east corner of the room.
    View location | Show on map
  • Image of Treasure Room East - Pyramid B2

    Treasure Room East - Pyramid B2

    Veteran
    1 Ruby (Pear) - On the animal skull on the east wall in the south east corner of the room.
    View location | Show on map
  • Image of Treasure Room East - Pyramid B2

    Treasure Room East - Pyramid B2

    Professional
    1 Ruby (Pear) - On the animal skull on the east wall in the south east corner of the room.
    View location | Show on map

There are no locations to show for this game mode. The following game modes are applicable:

Related product

Resident Evil Village Replica House Crest Medallion Set

Buy the Resident Evil Village Replica House Crest Medallion Set on Amazon

Explore further