Base Majini (Resident Evil 5)

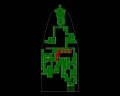
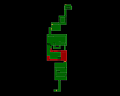
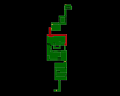
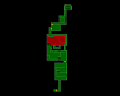
Image of Base Majini
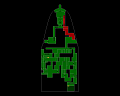
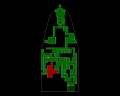
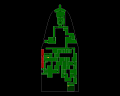
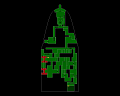
These highly-skilled Majini have been organised into elite squadrons.Their main duty is to stand guard over the Tricell base. They have been given training that far surpasses normal Majini, and can skillfully wield handguns and grenades, in addition to heavier firepower like stun rods and rocket launchers. They can supplement their already high resilience with armour and shields, making them tough enemies to beat from any angle.
Category Enemy

Related product

Resident Evil Village Replica Iron Insignia Key

Buy the Resident Evil Village Replica Iron Insignia Key on Amazon

Location

Chapter 5-2

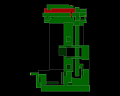
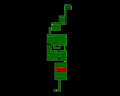
  • Image of Maintenance Passage - Power Station

    Maintenance Passage - Power Station

    Amateur
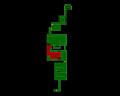
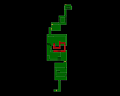
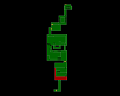
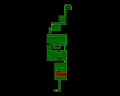
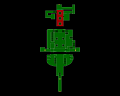
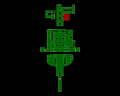
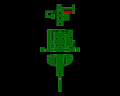
    3 Base Majinis - Standing around in the middle section of the passage.
    2 Base Majinis - Enter through the door from the Boiler Room as you approach.

    View location | Show on map
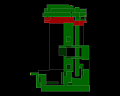
  • Image of Maintenance Passage - Power Station

    Maintenance Passage - Power Station

    Normal
    3 Base Majinis - Standing around in the middle section of the passage.
    2 Base Majinis - Enter through the door from the Boiler Room as you approach.
    View location | Show on map
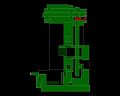
  • Image of Maintenance Passage - Power Station

    Maintenance Passage - Power Station

    Veteran
    3 Base Majinis - Standing around in the middle section of the passage.
    2 Base Majinis - Enter through the door from the Boiler Room as you approach.
    View location | Show on map
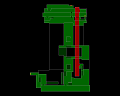
  • Image of Maintenance Passage - Power Station

    Maintenance Passage - Power Station

    Professional
    3 Base Majinis - Standing around in the middle section of the passage.
    2 Base Majinis - Enter through the door from the Boiler Room as you approach.
    View location | Show on map
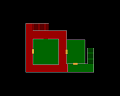
  • Image of Boiler Room - Power Station

    Boiler Room - Power Station

    Amateur
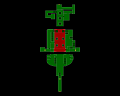
    3 Base Majinis - Taking cover behind the various structures in the room.
    6 Base Majinis - Enter the room from the dilapidated stairway area as you explore the room.
    View location | Show on map
  • Image of Boiler Room - Power Station

    Boiler Room - Power Station

    Normal
    3 Base Majinis - Taking cover behind the various structures in the room.
    6 Base Majinis - Enter the room from the dilapidated stairway area as you explore the room.
    View location | Show on map
  • Image of Boiler Room - Power Station

    Boiler Room - Power Station

    Veteran
    3 Base Majinis - Taking cover behind the various structures in the room.
    6 Base Majinis - Enter the room from the dilapidated stairway area as you explore the room.
    View location | Show on map
  • Image of Boiler Room - Power Station

    Boiler Room - Power Station

    Professional
    3 Base Majinis - Taking cover behind the various structures in the room.
    6 Base Majinis - Enter the room from the dilapidated stairway area as you explore the room.
    View location | Show on map
  • Image of Dilapidated Stairway - Power Station

    Dilapidated Stairway - Power Station

    Amateur
    1 Base Majini - Appears at the top of the collapsed stairs.
    View location | Show on map
  • Image of Dilapidated Stairway - Power Station

    Dilapidated Stairway - Power Station

    Normal
    1 Base Majini - Appears at the top of the collapsed stairs.
    View location | Show on map
  • Image of Dilapidated Stairway - Power Station

    Dilapidated Stairway - Power Station

    Veteran
    1 Base Majini - Appears at the top of the collapsed stairs.
    View location | Show on map
  • Image of Dilapidated Stairway - Power Station

    Dilapidated Stairway - Power Station

    Professional
    1 Base Majini - Appears at the top of the collapsed stairs.
    View location | Show on map
  • Image of Construction Zone - Power Station

    Construction Zone - Power Station

    Amateur
    13 Base Majinis - Hiding behind various structures throughout the area.
    View location | Show on map
  • Image of Construction Zone - Power Station

    Construction Zone - Power Station

    Normal
    13 Base Majinis - Hiding behind various structures throughout the area.
    View location | Show on map
  • Image of Construction Zone - Power Station

    Construction Zone - Power Station

    Veteran
    13 Base Majinis - Hiding behind various structures throughout the area.
    View location | Show on map
  • Image of Construction Zone - Power Station

    Construction Zone - Power Station

    Professional
    13 Base Majinis - Hiding behind various structures throughout the area.
    View location | Show on map
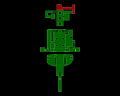
  • Image of North Assembly Line Aisle - Missile Area 1st Floor

    North Assembly Line Aisle - Missile Area 1st Floor

    Amateur
    2 Base Majinis - Standing around.
    View location | Show on map
  • Image of North Assembly Line Aisle - Missile Area 1st Floor

    North Assembly Line Aisle - Missile Area 1st Floor

    Normal
    2 Base Majinis - Standing around.
    View location | Show on map
  • Image of North Assembly Line Aisle - Missile Area 1st Floor

    North Assembly Line Aisle - Missile Area 1st Floor

    Veteran
    2 Base Majinis - Standing around.
    View location | Show on map
  • Image of North Assembly Line Aisle - Missile Area 1st Floor

    North Assembly Line Aisle - Missile Area 1st Floor

    Professional
    2 Base Majinis - Standing around.
    View location | Show on map
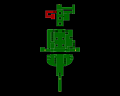
  • Image of North Assembly Line Access - Missile Area 1st Floor

    North Assembly Line Access - Missile Area 1st Floor

    Amateur
    5 Base Majinis - Appear here if you are detected whilst navigating around the northern areas.
    2 Base Majinis - Appear on the inaccessible walkways overhead and structures behind this area if you are detected whilst navigating around the northern areas.
    View location | Show on map
  • Image of North Assembly Line Access - Missile Area 1st Floor

    North Assembly Line Access - Missile Area 1st Floor

    Normal
    5 Base Majinis - Appear here if you are detected whilst navigating around the northern areas.
    2 Base Majinis - Appear on the inaccessible walkways overhead and structures behind this area if you are detected whilst navigating around the northern areas.
    View location | Show on map
  • Image of North Assembly Line Access - Missile Area 1st Floor

    North Assembly Line Access - Missile Area 1st Floor

    Veteran
    5 Base Majinis - Appear here if you are detected whilst navigating around the northern areas.
    2 Base Majinis - Appear on the inaccessible walkways overhead and structures behind this area if you are detected whilst navigating around the northern areas.
    View location | Show on map
  • Image of North Assembly Line Access - Missile Area 1st Floor

    North Assembly Line Access - Missile Area 1st Floor

    Professional
    5 Base Majinis - Appear here if you are detected whilst navigating around the northern areas.
    2 Base Majinis - Appear on the inaccessible walkways overhead and structures behind this area if you are detected whilst navigating around the northern areas.
    View location | Show on map
  • Image of North Steps - Missile Area 1st Floor

    North Steps - Missile Area 1st Floor

    Amateur
    1 Base Majini - Appears in front of the doorway at the top of the steps if you are detected whilst navigating around the northern areas.
    View location | Show on map
  • Image of North Steps - Missile Area 1st Floor

    North Steps - Missile Area 1st Floor

    Normal
    1 Base Majini - Appears in front of the doorway at the top of the steps if you are detected whilst navigating around the northern areas.
    View location | Show on map
  • Image of North Steps - Missile Area 1st Floor

    North Steps - Missile Area 1st Floor

    Veteran
    1 Base Majini - Appears in front of the doorway at the top of the steps if you are detected whilst navigating around the northern areas.
    View location | Show on map
  • Image of North Steps - Missile Area 1st Floor

    North Steps - Missile Area 1st Floor

    Professional
    1 Base Majini - Appears in front of the doorway at the top of the steps if you are detected whilst navigating around the northern areas.
    View location | Show on map
  • Image of East Assembly Line - Missile Area 1st Floor

    East Assembly Line - Missile Area 1st Floor

    Amateur
    3 Base Majinis - Appear on the overhead walkways throughout the area.
    14 Base Majinis - Appear in groups of three at the south end of the conveyor belt from the south steps as you approach. A maximum of fourteen will appear before they stop spawning.
    2 Base Majinis - Appear on the overhead walkway at the south end of the conveyor belt as you approach.
    View location | Show on map
  • Image of East Assembly Line - Missile Area 1st Floor

    East Assembly Line - Missile Area 1st Floor

    Normal
    3 Base Majinis - Appear on the overhead walkways throughout the area.
    14 Base Majinis - Appear in groups of three at the south end of the conveyor belt from the south steps as you approach. A maximum of fourteen will appear before they stop spawning.
    2 Base Majinis - Appear on the overhead walkway at the south end of the conveyor belt as you approach.
    View location | Show on map
  • Image of East Assembly Line - Missile Area 1st Floor

    East Assembly Line - Missile Area 1st Floor

    Veteran
    3 Base Majinis - Appear on the overhead walkways throughout the area.
    14 Base Majinis - Appear in groups of three at the south end of the conveyor belt from the south steps as you approach. A maximum of fourteen will appear before they stop spawning.
    2 Base Majinis - Appear on the overhead walkway at the south end of the conveyor belt as you approach.
    View location | Show on map
  • Image of East Assembly Line - Missile Area 1st Floor

    East Assembly Line - Missile Area 1st Floor

    Professional
    3 Base Majinis - Appear on the overhead walkways throughout the area.
    14 Base Majinis - Appear in groups of three at the south end of the conveyor belt from the south steps as you approach. A maximum of fourteen will appear before they stop spawning.
    2 Base Majinis - Appear on the overhead walkway at the south end of the conveyor belt as you approach.
    View location | Show on map

Chapter 5-3

  • Image of North Walkway - Missile Area 2nd Floor

    North Walkway - Missile Area 2nd Floor

    Amateur
    4 Base Majinis - Wandering around.
    5 Base Majinis - Emerge from the power room as you approach the middle section of the walkway.
    View location | Show on map
  • Image of North Walkway - Missile Area 2nd Floor

    North Walkway - Missile Area 2nd Floor

    Normal
    4 Base Majinis - Wandering around.
    5 Base Majinis - Emerge from the power room as you approach the middle section of the walkway.
    View location | Show on map
  • Image of North Walkway - Missile Area 2nd Floor

    North Walkway - Missile Area 2nd Floor

    Veteran
    4 Base Majinis - Wandering around.
    5 Base Majinis - Emerge from the power room as you approach the middle section of the walkway.
    View location | Show on map
  • Image of North Walkway - Missile Area 2nd Floor

    North Walkway - Missile Area 2nd Floor

    Professional
    4 Base Majinis - Wandering around.
    5 Base Majinis - Emerge from the power room as you approach the middle section of the walkway.
    View location | Show on map
  • Image of South Walkway - Missile Area 2nd Floor

    South Walkway - Missile Area 2nd Floor

    Amateur
    3 Base Majinis - Appear here after restoring the power to the platform inside the power room.
    3 Base Majinis - Appear when you or your partner enter the area via the moveable platform.
    6 Base Majinis - Emerge from the control room as you approach once both you and your partner are here.
    View location | Show on map
  • Image of South Walkway - Missile Area 2nd Floor

    South Walkway - Missile Area 2nd Floor

    Normal
    3 Base Majinis - Appear here after restoring the power to the platform inside the power room.
    3 Base Majinis - Appear when you or your partner enter the area via the moveable platform.
    6 Base Majinis - Emerge from the control room as you approach once both you and your partner are here.
    View location | Show on map
  • Image of South Walkway - Missile Area 2nd Floor

    South Walkway - Missile Area 2nd Floor

    Veteran
    3 Base Majinis - Appear here after restoring the power to the platform inside the power room.
    3 Base Majinis - Appear when you or your partner enter the area via the moveable platform.
    6 Base Majinis - Emerge from the control room as you approach once both you and your partner are here.
    View location | Show on map
  • Image of South Walkway - Missile Area 2nd Floor

    South Walkway - Missile Area 2nd Floor

    Professional
    3 Base Majinis - Appear here after restoring the power to the platform inside the power room.
    3 Base Majinis - Appear when you or your partner enter the area via the moveable platform.
    6 Base Majinis - Emerge from the control room as you approach once both you and your partner are here.
    View location | Show on map
  • Image of Control Room - Missile Area 2nd Floor

    Control Room - Missile Area 2nd Floor

    Amateur
    4 Base Majinis - Standing around.
    View location | Show on map
  • Image of Control Room - Missile Area 2nd Floor

    Control Room - Missile Area 2nd Floor

    Normal
    4 Base Majinis - Standing around.
    View location | Show on map
  • Image of Control Room - Missile Area 2nd Floor

    Control Room - Missile Area 2nd Floor

    Veteran
    4 Base Majinis - Standing around.
    View location | Show on map
  • Image of Control Room - Missile Area 2nd Floor

    Control Room - Missile Area 2nd Floor

    Professional
    4 Base Majinis - Standing around.
    View location | Show on map
  • Image of West Walkway - Moving Platform

    West Walkway - Moving Platform

    Amateur
    3 Base Majinis - Appear on the walkway when you pull the switches on the central platform and start ascending.
    View location | Show on map
  • Image of West Walkway - Moving Platform

    West Walkway - Moving Platform

    Normal
    3 Base Majinis - Appear on the walkway when you pull the switches on the central platform and start ascending.
    View location | Show on map
  • Image of West Walkway - Moving Platform

    West Walkway - Moving Platform

    Veteran
    3 Base Majinis - Appear on the walkway when you pull the switches on the central platform and start ascending.
    View location | Show on map
  • Image of West Walkway - Moving Platform

    West Walkway - Moving Platform

    Professional
    3 Base Majinis - Appear on the walkway when you pull the switches on the central platform and start ascending.
    View location | Show on map
  • Image of Central Platform - Moving Platform

    Central Platform - Moving Platform

    Amateur
    3 Base Majinis - Appear on a platform on the east side of the overall room as you are ascending. One of them pulls a switch that slows down the platform.
    3 Base Majinis - Appear on a platform on the north side of the overall room as you are ascending.
    2 Base Majinis - Appear on a platform on the west side of the overall room as you are ascending. One of them pulls a switch that slows down the platform.
    View location | Show on map
  • Image of Central Platform - Moving Platform

    Central Platform - Moving Platform

    Normal
    3 Base Majinis - Appear on a platform on the east side of the overall room as you are ascending. One of them pulls a switch that slows down the platform.
    3 Base Majinis - Appear on a platform on the north side of the overall room as you are ascending.
    2 Base Majinis - Appear on a platform on the west side of the overall room as you are ascending. One of them pulls a switch that slows down the platform.
    View location | Show on map
  • Image of Central Platform - Moving Platform

    Central Platform - Moving Platform

    Veteran
    3 Base Majinis - Appear on a platform on the east side of the overall room as you are ascending. One of them pulls a switch that slows down the platform.
    3 Base Majinis - Appear on a platform on the north side of the overall room as you are ascending.
    2 Base Majinis - Appear on a platform on the west side of the overall room as you are ascending. One of them pulls a switch that slows down the platform.
    View location | Show on map
  • Image of Central Platform - Moving Platform

    Central Platform - Moving Platform

    Professional
    3 Base Majinis - Appear on a platform on the east side of the overall room as you are ascending. One of them pulls a switch that slows down the platform.
    3 Base Majinis - Appear on a platform on the north side of the overall room as you are ascending.
    2 Base Majinis - Appear on a platform on the west side of the overall room as you are ascending. One of them pulls a switch that slows down the platform.
    View location | Show on map
  • Image of East Walkway - Moving Platform

    East Walkway - Moving Platform

    Amateur
    5 Base Majinis - Appear on the walkway when the central platform has nearly finished ascending.
    View location | Show on map
  • Image of East Walkway - Moving Platform

    East Walkway - Moving Platform

    Normal
    5 Base Majinis - Appear on the walkway when the central platform has nearly finished ascending.
    View location | Show on map
  • Image of East Walkway - Moving Platform

    East Walkway - Moving Platform

    Veteran
    5 Base Majinis - Appear on the walkway when the central platform has nearly finished ascending.
    View location | Show on map
  • Image of East Walkway - Moving Platform

    East Walkway - Moving Platform

    Professional
    5 Base Majinis - Appear on the walkway when the central platform has nearly finished ascending.
    View location | Show on map

Chapter 6-1

  • Image of Walkway - Ship Deck

    Walkway - Ship Deck

    Amateur
    2 Base Majinis - Wandering around.
    View location | Show on map
  • Image of Walkway - Ship Deck

    Walkway - Ship Deck

    Normal
    2 Base Majinis - Wandering around.
    View location | Show on map
  • Image of Walkway - Ship Deck

    Walkway - Ship Deck

    Veteran
    2 Base Majinis - Wandering around.
    View location | Show on map
  • Image of Walkway - Ship Deck

    Walkway - Ship Deck

    Professional
    2 Base Majinis - Wandering around.
    View location | Show on map
  • Image of Foredeck Platform - Ship Deck

    Foredeck Platform - Ship Deck

    Amateur
    3 Base Majinis - Wandering around.
    View location | Show on map
  • Image of Foredeck Platform - Ship Deck

    Foredeck Platform - Ship Deck

    Normal
    3 Base Majinis - Wandering around.
    View location | Show on map
  • Image of Foredeck Platform - Ship Deck

    Foredeck Platform - Ship Deck

    Veteran
    3 Base Majinis - Wandering around.
    View location | Show on map
  • Image of Foredeck Platform - Ship Deck

    Foredeck Platform - Ship Deck

    Professional
    3 Base Majinis - Wandering around.
    View location | Show on map
  • Image of Observation Platform - Ship Deck

    Observation Platform - Ship Deck

    Amateur
    1 Base Majini - Standing around.
    View location | Show on map
  • Image of Observation Platform - Ship Deck

    Observation Platform - Ship Deck

    Normal
    1 Base Majini - Standing around.
    View location | Show on map
  • Image of Observation Platform - Ship Deck

    Observation Platform - Ship Deck

    Veteran
    1 Base Majini - Standing around.
    View location | Show on map
  • Image of Observation Platform - Ship Deck

    Observation Platform - Ship Deck

    Professional
    1 Base Majini - Standing around.
    View location | Show on map
  • Image of Side Deck - Ship Deck

    Side Deck - Ship Deck

    Amateur
    2 Base Majinis - Appear on the northern walkway section when you enter the area.
    2 Base Majinis - Enter from the Cargo Area Entry.
    View location | Show on map
  • Image of Side Deck - Ship Deck

    Side Deck - Ship Deck

    Normal
    2 Base Majinis - Appear on the northern walkway section when you enter the area.
    2 Base Majinis - Enter from the Cargo Area Entry.
    View location | Show on map
  • Image of Side Deck - Ship Deck

    Side Deck - Ship Deck

    Veteran
    2 Base Majinis - Appear on the northern walkway section when you enter the area.
    2 Base Majinis - Enter from the Cargo Area Entry.
    View location | Show on map
  • Image of Side Deck - Ship Deck

    Side Deck - Ship Deck

    Professional
    2 Base Majinis - Appear on the northern walkway section when you enter the area.
    2 Base Majinis - Enter from the Cargo Area Entry.
    View location | Show on map
  • Image of Cargo Area C - Ship Deck

    Cargo Area C - Ship Deck

    Amateur
    7 Base Majinis - Drop into the west side of the area if you trigger the trap with the cage.
    View location | Show on map
  • Image of Cargo Area C - Ship Deck

    Cargo Area C - Ship Deck

    Normal
    7 Base Majinis - Drop into the west side of the area if you trigger the trap with the cage.
    View location | Show on map
  • Image of Cargo Area C - Ship Deck

    Cargo Area C - Ship Deck

    Veteran
    7 Base Majinis - Drop into the west side of the area if you trigger the trap with the cage.
    View location | Show on map
  • Image of Cargo Area C - Ship Deck

    Cargo Area C - Ship Deck

    Professional
    7 Base Majinis - Drop into the west side of the area if you trigger the trap with the cage.
    View location | Show on map
  • Image of Crane Access Walkway - Ship Deck

    Crane Access Walkway - Ship Deck

    Amateur
    1 Base Majini - Standing on the north side of the walkway.
    View location | Show on map
  • Image of Crane Access Walkway - Ship Deck

    Crane Access Walkway - Ship Deck

    Normal
    1 Base Majini - Standing on the north side of the walkway.
    View location | Show on map
  • Image of Crane Access Walkway - Ship Deck

    Crane Access Walkway - Ship Deck

    Veteran
    1 Base Majini - Standing on the north side of the walkway.
    View location | Show on map
  • Image of Crane Access Walkway - Ship Deck

    Crane Access Walkway - Ship Deck

    Professional
    1 Base Majini - Standing on the north side of the walkway.
    View location | Show on map
  • Image of Crane - Ship Deck

    Crane - Ship Deck

    Amateur
    1 Base Majini - Standing on the platform halfway up the crane.
    1 Base Majini - Standing on the control platform at the top of the crane.
    2 Base Majinis - Standing on top of the arm of the crane.
    View location | Show on map
  • Image of Crane - Ship Deck

    Crane - Ship Deck

    Normal
    1 Base Majini - Standing on the platform halfway up the crane.
    1 Base Majini - Standing on the control platform at the top of the crane.
    2 Base Majinis - Standing on top of the arm of the crane.
    View location | Show on map
  • Image of Crane - Ship Deck

    Crane - Ship Deck

    Veteran
    1 Base Majini - Standing on the platform halfway up the crane.
    1 Base Majini - Standing on the control platform at the top of the crane.
    2 Base Majinis - Standing on top of the arm of the crane.
    View location | Show on map
  • Image of Crane - Ship Deck

    Crane - Ship Deck

    Professional
    1 Base Majini - Standing on the platform halfway up the crane.
    1 Base Majini - Standing on the control platform at the top of the crane.
    2 Base Majinis - Standing on top of the arm of the crane.
    View location | Show on map
  • Image of Upper Cargo Area A - Ship Deck

    Upper Cargo Area A - Ship Deck

    Amateur
    4 Base Majinis - Emerge from one of the overhead containers as you jump across the containers.
    View location | Show on map
  • Image of Upper Cargo Area A - Ship Deck

    Upper Cargo Area A - Ship Deck

    Normal
    4 Base Majinis - Emerge from one of the overhead containers as you jump across the containers.
    View location | Show on map
  • Image of Upper Cargo Area A - Ship Deck

    Upper Cargo Area A - Ship Deck

    Veteran
    4 Base Majinis - Emerge from one of the overhead containers as you jump across the containers.
    View location | Show on map
  • Image of Upper Cargo Area A - Ship Deck

    Upper Cargo Area A - Ship Deck

    Professional
    4 Base Majinis - Emerge from one of the overhead containers as you jump across the containers.
    View location | Show on map
  • Image of Main Hold South Walkway - Ship Hold

    Main Hold South Walkway - Ship Hold

    Amateur
    1 Base Majini - Standing around on the section of walkway overlooking the main hold north area.
    View location | Show on map
  • Image of Main Hold South Walkway - Ship Hold

    Main Hold South Walkway - Ship Hold

    Normal
    1 Base Majini - Standing around on the section of walkway overlooking the main hold north area.
    View location | Show on map
  • Image of Main Hold South Walkway - Ship Hold

    Main Hold South Walkway - Ship Hold

    Veteran
    1 Base Majini - Standing around on the section of walkway overlooking the main hold north area.
    View location | Show on map
  • Image of Main Hold South Walkway - Ship Hold

    Main Hold South Walkway - Ship Hold

    Professional
    1 Base Majini - Standing around on the section of walkway overlooking the main hold north area.
    View location | Show on map
  • Image of Main Hold North Walkway - Ship Hold

    Main Hold North Walkway - Ship Hold

    Amateur
    1 Base Majini - Standing behind the barrier on the east side of the walkway.
    View location | Show on map
  • Image of Main Hold North Walkway - Ship Hold

    Main Hold North Walkway - Ship Hold

    Normal
    1 Base Majini - Standing behind the barrier on the east side of the walkway.
    View location | Show on map
  • Image of Main Hold North Walkway - Ship Hold

    Main Hold North Walkway - Ship Hold

    Veteran
    1 Base Majini - Standing behind the barrier on the east side of the walkway.
    View location | Show on map
  • Image of Main Hold North Walkway - Ship Hold

    Main Hold North Walkway - Ship Hold

    Professional
    1 Base Majini - Standing behind the barrier on the east side of the walkway.
    View location | Show on map
  • Image of Main Hold North - Ship Hold

    Main Hold North - Ship Hold

    Amateur
    1 Base Majini - Standing above the area on the south side.
    3 Base Majinis - Standing around.
    4 Base Majinis - Appear here when the alarm sounds.
    2 Base Majinis - Emerge from one of the overhead containers on the south side of the area as you approach.
    View location | Show on map
  • Image of Main Hold North - Ship Hold

    Main Hold North - Ship Hold

    Normal
    1 Base Majini - Standing above the area on the south side.
    3 Base Majinis - Standing around.
    4 Base Majinis - Appear here when the alarm sounds.
    2 Base Majinis - Emerge from one of the overhead containers on the south side of the area as you approach.
    View location | Show on map
  • Image of Main Hold North - Ship Hold

    Main Hold North - Ship Hold

    Veteran
    1 Base Majini - Standing above the area on the south side.
    3 Base Majinis - Standing around.
    4 Base Majinis - Appear here when the alarm sounds.
    2 Base Majinis - Emerge from one of the overhead containers on the south side of the area as you approach.
    View location | Show on map
  • Image of Main Hold North - Ship Hold

    Main Hold North - Ship Hold

    Professional
    1 Base Majini - Standing above the area on the south side.
    3 Base Majinis - Standing around.
    4 Base Majinis - Appear here when the alarm sounds.
    2 Base Majinis - Emerge from one of the overhead containers on the south side of the area as you approach.
    View location | Show on map
  • Image of Main Hold North Walkway - Ship Hold

    Main Hold North Walkway - Ship Hold

    Amateur
    2 Base Majinis - Appear on the walkway when you drop into the main hold north area.
    View location | Show on map
  • Image of Main Hold North Walkway - Ship Hold

    Main Hold North Walkway - Ship Hold

    Normal
    2 Base Majinis - Appear on the walkway when you drop into the main hold north area.
    View location | Show on map
  • Image of Main Hold North Walkway - Ship Hold

    Main Hold North Walkway - Ship Hold

    Veteran
    2 Base Majinis - Appear on the walkway when you drop into the main hold north area.
    View location | Show on map
  • Image of Main Hold North Walkway - Ship Hold

    Main Hold North Walkway - Ship Hold

    Professional
    2 Base Majinis - Appear on the walkway when you drop into the main hold north area.
    View location | Show on map
  • Image of Main Hold South - Ship Hold

    Main Hold South - Ship Hold

    Amateur
    2 Base Majinis - Appear standing next to the pile of equipment blocking access to the main hold north as you're exploring that area.
    View location | Show on map
  • Image of Main Hold South - Ship Hold

    Main Hold South - Ship Hold

    Normal
    2 Base Majinis - Appear standing next to the pile of equipment blocking access to the main hold north as you're exploring that area.
    View location | Show on map
  • Image of Main Hold South - Ship Hold

    Main Hold South - Ship Hold

    Veteran
    2 Base Majinis - Appear standing next to the pile of equipment blocking access to the main hold north as you're exploring that area.
    View location | Show on map
  • Image of Main Hold South - Ship Hold

    Main Hold South - Ship Hold

    Professional
    2 Base Majinis - Appear standing next to the pile of equipment blocking access to the main hold north as you're exploring that area.
    View location | Show on map
  • Image of Main Hold North - Ship Hold

    Main Hold North - Ship Hold

    Amateur
    2 Base Majinis - Emerge from the overhead container in the north west corner as you approach.
    View location | Show on map
  • Image of Main Hold North - Ship Hold

    Main Hold North - Ship Hold

    Normal
    2 Base Majinis - Emerge from the overhead container in the north west corner as you approach.
    View location | Show on map
  • Image of Main Hold North - Ship Hold

    Main Hold North - Ship Hold

    Veteran
    2 Base Majinis - Emerge from the overhead container in the north west corner as you approach.
    View location | Show on map
  • Image of Main Hold North - Ship Hold

    Main Hold North - Ship Hold

    Professional
    2 Base Majinis - Emerge from the overhead container in the north west corner as you approach.
    View location | Show on map
  • Image of Main Hold Lower Passage - Ship Hold

    Main Hold Lower Passage - Ship Hold

    Amateur
    6 Base Majinis - Standing around. Two will likely exit into the main hold north area.
    View location | Show on map
  • Image of Main Hold Lower Passage - Ship Hold

    Main Hold Lower Passage - Ship Hold

    Normal
    6 Base Majinis - Standing around. Two will likely exit into the main hold north area.
    View location | Show on map
  • Image of Main Hold Lower Passage - Ship Hold

    Main Hold Lower Passage - Ship Hold

    Veteran
    6 Base Majinis - Standing around. Two will likely exit into the main hold north area.
    View location | Show on map
  • Image of Main Hold Lower Passage - Ship Hold

    Main Hold Lower Passage - Ship Hold

    Professional
    6 Base Majinis - Standing around. Two will likely exit into the main hold north area.
    View location | Show on map
  • Image of Main Hold South - Ship Hold

    Main Hold South - Ship Hold

    Amateur
    2 Base Majinis - Appear in this area if you wait around in the main hold north area for some time.
    View location | Show on map
  • Image of Main Hold South - Ship Hold

    Main Hold South - Ship Hold

    Normal
    2 Base Majinis - Appear in this area if you wait around in the main hold north area for some time.
    View location | Show on map
  • Image of Main Hold South - Ship Hold

    Main Hold South - Ship Hold

    Veteran
    2 Base Majinis - Appear in this area if you wait around in the main hold north area for some time.
    View location | Show on map
  • Image of Main Hold South - Ship Hold

    Main Hold South - Ship Hold

    Professional
    2 Base Majinis - Appear in this area if you wait around in the main hold north area for some time.
    View location | Show on map
  • Image of Secondary Hold Upper Level - Ship Hold

    Secondary Hold Upper Level - Ship Hold

    Amateur
    1 Base Majini - Standing in the middle of the area wielding a rocket launcher.
    View location | Show on map
  • Image of Secondary Hold Upper Level - Ship Hold

    Secondary Hold Upper Level - Ship Hold

    Normal
    1 Base Majini - Standing in the middle of the area wielding a rocket launcher.
    View location | Show on map
  • Image of Secondary Hold Upper Level - Ship Hold

    Secondary Hold Upper Level - Ship Hold

    Veteran
    1 Base Majini - Standing in the middle of the area wielding a rocket launcher.
    View location | Show on map
  • Image of Secondary Hold Upper Level - Ship Hold

    Secondary Hold Upper Level - Ship Hold

    Professional
    1 Base Majini - Standing in the middle of the area wielding a rocket launcher.
    View location | Show on map
  • Image of Secondary Hold Mid Level - Ship Hold

    Secondary Hold Mid Level - Ship Hold

    Amateur
    1 Base Majini - Standing in the middle of the area wielding a rocket launcher.
    View location | Show on map
  • Image of Secondary Hold Mid Level - Ship Hold

    Secondary Hold Mid Level - Ship Hold

    Normal
    1 Base Majini - Standing in the middle of the area wielding a rocket launcher.
    View location | Show on map
  • Image of Secondary Hold Mid Level - Ship Hold

    Secondary Hold Mid Level - Ship Hold

    Veteran
    1 Base Majini - Standing in the middle of the area wielding a rocket launcher.
    View location | Show on map
  • Image of Secondary Hold Mid Level - Ship Hold

    Secondary Hold Mid Level - Ship Hold

    Professional
    1 Base Majini - Standing in the middle of the area wielding a rocket launcher.
    View location | Show on map
  • Image of Secondary Hold Lower Level - Ship Hold

    Secondary Hold Lower Level - Ship Hold

    Amateur
    1 Base Majini - Standing in the middle of the area wielding a rocket launcher.
    View location | Show on map
  • Image of Secondary Hold Lower Level - Ship Hold

    Secondary Hold Lower Level - Ship Hold

    Normal
    1 Base Majini - Standing in the middle of the area wielding a rocket launcher.
    View location | Show on map
  • Image of Secondary Hold Lower Level - Ship Hold

    Secondary Hold Lower Level - Ship Hold

    Veteran
    1 Base Majini - Standing in the middle of the area wielding a rocket launcher.
    View location | Show on map
  • Image of Secondary Hold Lower Level - Ship Hold

    Secondary Hold Lower Level - Ship Hold

    Professional
    1 Base Majini - Standing in the middle of the area wielding a rocket launcher.
    View location | Show on map

Chapter 6-2

Chapter 6-3

  • Image of Entrance Walkway - Engine Room

    Entrance Walkway - Engine Room

    Amateur
    1 Base Majini - On the east side of the walkway, and will be immediately consumed by flames when observed.
    View location | Show on map
  • Image of Entrance Walkway - Engine Room

    Entrance Walkway - Engine Room

    Normal
    1 Base Majini - On the east side of the walkway, and will be immediately consumed by flames when observed.
    View location | Show on map
  • Image of Entrance Walkway - Engine Room

    Entrance Walkway - Engine Room

    Veteran
    1 Base Majini - On the east side of the walkway, and will be immediately consumed by flames when observed.
    View location | Show on map
  • Image of Entrance Walkway - Engine Room

    Entrance Walkway - Engine Room

    Professional
    1 Base Majini - On the east side of the walkway, and will be immediately consumed by flames when observed.
    View location | Show on map
  • Image of Bulkhead 1 Control Platform - Engine Room

    Bulkhead 1 Control Platform - Engine Room

    Amateur
    1 Base Majini - Standing around next to the control lever.
    View location | Show on map
  • Image of Bulkhead 1 Control Platform - Engine Room

    Bulkhead 1 Control Platform - Engine Room

    Normal
    1 Base Majini - Standing around next to the control lever.
    View location | Show on map
  • Image of Bulkhead 1 Control Platform - Engine Room

    Bulkhead 1 Control Platform - Engine Room

    Veteran
    1 Base Majini - Standing around next to the control lever.
    View location | Show on map
  • Image of Bulkhead 1 Control Platform - Engine Room

    Bulkhead 1 Control Platform - Engine Room

    Professional
    1 Base Majini - Standing around next to the control lever.
    View location | Show on map
  • Image of Compartment A - Engine Room

    Compartment A - Engine Room

    Amateur
    2 Base Majinis - Standing around.
    View location | Show on map
  • Image of Compartment A - Engine Room

    Compartment A - Engine Room

    Normal
    2 Base Majinis - Standing around.
    View location | Show on map
  • Image of Compartment A - Engine Room

    Compartment A - Engine Room

    Veteran
    2 Base Majinis - Standing around.
    View location | Show on map
  • Image of Compartment A - Engine Room

    Compartment A - Engine Room

    Professional
    2 Base Majinis - Standing around.
    View location | Show on map
  • Image of Compartment A Lower (Starboard) - Engine Room

    Compartment A Lower (Starboard) - Engine Room

    Amateur
    1 Base Majini - Standing around.
    View location | Show on map
  • Image of Compartment A Lower (Starboard) - Engine Room

    Compartment A Lower (Starboard) - Engine Room

    Normal
    1 Base Majini - Standing around.
    View location | Show on map
  • Image of Compartment A Lower (Starboard) - Engine Room

    Compartment A Lower (Starboard) - Engine Room

    Veteran
    1 Base Majini - Standing around.
    View location | Show on map
  • Image of Compartment A Lower (Starboard) - Engine Room

    Compartment A Lower (Starboard) - Engine Room

    Professional
    1 Base Majini - Standing around.
    View location | Show on map
  • Image of Bulkhead 1 Control Platform - Engine Room

    Bulkhead 1 Control Platform - Engine Room

    Amateur
    3 Base Majinis - Drop onto the platform when you pull the lever to open the bulkhead.
    View location | Show on map
  • Image of Bulkhead 1 Control Platform - Engine Room

    Bulkhead 1 Control Platform - Engine Room

    Normal
    3 Base Majinis - Drop onto the platform when you pull the lever to open the bulkhead.
    View location | Show on map
  • Image of Bulkhead 1 Control Platform - Engine Room

    Bulkhead 1 Control Platform - Engine Room

    Veteran
    3 Base Majinis - Drop onto the platform when you pull the lever to open the bulkhead.
    View location | Show on map
  • Image of Bulkhead 1 Control Platform - Engine Room

    Bulkhead 1 Control Platform - Engine Room

    Professional
    3 Base Majinis - Drop onto the platform when you pull the lever to open the bulkhead.
    View location | Show on map
  • Image of Compartment A - Engine Room

    Compartment A - Engine Room

    Amateur
    6 Base Majinis - Enter the area when you pull the lever in the control platform to open the bulkhead.
    View location | Show on map
  • Image of Compartment A - Engine Room

    Compartment A - Engine Room

    Normal
    6 Base Majinis - Enter the area when you pull the lever in the control platform to open the bulkhead.
    View location | Show on map
  • Image of Compartment A - Engine Room

    Compartment A - Engine Room

    Veteran
    6 Base Majinis - Enter the area when you pull the lever in the control platform to open the bulkhead.
    View location | Show on map
  • Image of Compartment A - Engine Room

    Compartment A - Engine Room

    Professional
    6 Base Majinis - Enter the area when you pull the lever in the control platform to open the bulkhead.
    View location | Show on map
  • Image of Compartment A Walkway (Starboard) - Engine Room

    Compartment A Walkway (Starboard) - Engine Room

    Amateur
    1 Base Majini - Appears on the walkway when you pull the lever in the control platform to open the bulkhead.
    View location | Show on map
  • Image of Compartment A Walkway (Starboard) - Engine Room

    Compartment A Walkway (Starboard) - Engine Room

    Normal
    1 Base Majini - Appears on the walkway when you pull the lever in the control platform to open the bulkhead.
    View location | Show on map
  • Image of Compartment A Walkway (Starboard) - Engine Room

    Compartment A Walkway (Starboard) - Engine Room

    Veteran
    1 Base Majini - Appears on the walkway when you pull the lever in the control platform to open the bulkhead.
    View location | Show on map
  • Image of Compartment A Walkway (Starboard) - Engine Room

    Compartment A Walkway (Starboard) - Engine Room

    Professional
    1 Base Majini - Appears on the walkway when you pull the lever in the control platform to open the bulkhead.
    View location | Show on map
  • Image of Compartment B - Engine Room

    Compartment B - Engine Room

    Amateur
    8 Base Majinis - Standing around, and appear as you're exploring the area.
    View location | Show on map
  • Image of Compartment B - Engine Room

    Compartment B - Engine Room

    Normal
    8 Base Majinis - Standing around, and appear as you're exploring the area.
    View location | Show on map
  • Image of Compartment B - Engine Room

    Compartment B - Engine Room

    Veteran
    8 Base Majinis - Standing around, and appear as you're exploring the area.
    View location | Show on map
  • Image of Compartment B - Engine Room

    Compartment B - Engine Room

    Professional
    8 Base Majinis - Standing around, and appear as you're exploring the area.
    View location | Show on map
  • Image of Compartment B Walkway - Engine Room

    Compartment B Walkway - Engine Room

    Amateur
    1 Base Majini - Standing around wielding a rocket launcher.
    6 Base Majinis - Appear as you explore compartment B.
    View location | Show on map
  • Image of Compartment B Walkway - Engine Room

    Compartment B Walkway - Engine Room

    Normal
    1 Base Majini - Standing around wielding a rocket launcher.
    6 Base Majinis - Appear as you explore compartment B.
    View location | Show on map
  • Image of Compartment B Walkway - Engine Room

    Compartment B Walkway - Engine Room

    Veteran
    1 Base Majini - Standing around wielding a rocket launcher.
    6 Base Majinis - Appear as you explore compartment B.
    View location | Show on map
  • Image of Compartment B Walkway - Engine Room

    Compartment B Walkway - Engine Room

    Professional
    1 Base Majini - Standing around wielding a rocket launcher.
    6 Base Majinis - Appear as you explore compartment B.
    View location | Show on map
  • Image of Compartment B - Engine Room

    Compartment B - Engine Room

    Amateur
    5 Base Majinis - Appear here once the bulkhead to compartment C is fully open.
    View location | Show on map
  • Image of Compartment B - Engine Room

    Compartment B - Engine Room

    Normal
    5 Base Majinis - Appear here once the bulkhead to compartment C is fully open.
    View location | Show on map
  • Image of Compartment B - Engine Room

    Compartment B - Engine Room

    Veteran
    5 Base Majinis - Appear here once the bulkhead to compartment C is fully open.
    View location | Show on map
  • Image of Compartment B - Engine Room

    Compartment B - Engine Room

    Professional
    5 Base Majinis - Appear here once the bulkhead to compartment C is fully open.
    View location | Show on map

There are no locations to show for this game mode. The following game modes are applicable:

Related product

Welcome to Raccoon City Sign

Buy the Welcome to Raccoon City Sign on Amazon

Explore further