Pesetas (medium) (Resident Evil 4)

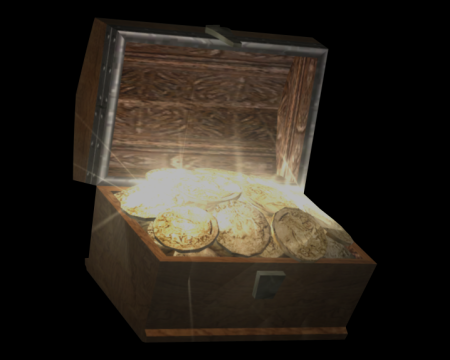
Image of Pesetas (medium)
The currency of Spain. Throughout the game you find various chest strewn containing a varying amount of pesetas. This money can be used to buy new equipment from the Merchant or upgrade your weaponry. You also receive pesetas for selling any treasures you find.

This is a medium bundle of pesetas. You can also acquire them in small and large quantities.
Category Treasure

Related product

Resident Evil Village Replica House Crest Medallion Set

Buy the Resident Evil Village Replica House Crest Medallion Set on Amazon

Location

  • Image of Prison - Castle Bailey 1

    Prison - Castle Bailey 1

    Normal
    Pesetas (medium) (1×15000) - Dropped by the Garrador when defeated.
    View location | Show on map
  • Image of Prison - Castle Bailey 1

    Prison - Castle Bailey 1

    Professional
    Pesetas (medium) (1×15000) - Dropped by the Garrador when defeated.
    View location | Show on map
  • Image of Water Hall - Castle Bailey 1

    Water Hall - Castle Bailey 1

    Normal
    Pesetas (medium) (1×2000) - On the semi-circular table on the eastern wall in the south east area of the room.
    View location | Show on map
  • Image of Water Hall - Castle Bailey 1

    Water Hall - Castle Bailey 1

    Professional
    Pesetas (medium) (1×2000) - On the semi-circular table on the eastern wall in the south east area of the room.
    View location | Show on map
  • Image of Gallery Side Passage - Castle Bailey 2

    Gallery Side Passage - Castle Bailey 2

    Normal
    Pesetas (medium) (4×1000) - On the shelves in the north east corner.
    View location | Show on map
  • Image of Gallery Side Passage - Castle Bailey 2

    Gallery Side Passage - Castle Bailey 2

    Professional
    Pesetas (medium) (4×1000) - On the shelves in the north east corner.
    View location | Show on map
  • Image of Display Room - Castle Bailey 2

    Display Room - Castle Bailey 2

    Normal
    Pesetas (medium) (1×15000) - Dropped by Garrador when defeated.
    View location | Show on map
  • Image of Display Room - Castle Bailey 2

    Display Room - Castle Bailey 2

    Professional
    Pesetas (medium) (1×15000) - Dropped by Garrador when defeated.
    View location | Show on map
  • Image of Exhibition Room North Landing - Castle Bailey 2

    Exhibition Room North Landing - Castle Bailey 2

    Normal
    Pesetas (medium) (1×1800) - On the table in the middle of the area.
    View location | Show on map
  • Image of Exhibition Room North Landing - Castle Bailey 2

    Exhibition Room North Landing - Castle Bailey 2

    Professional
    Pesetas (medium) (1×1800) - On the table in the middle of the area.
    View location | Show on map
  • Image of Servant's Quarters - Castle Bailey 2

    Servant's Quarters - Castle Bailey 2

    Normal
    Pesetas (medium) (1×2500) - Inside the cabinet on the south side of the room.
    View location | Show on map
  • Image of Servant's Quarters - Castle Bailey 2

    Servant's Quarters - Castle Bailey 2

    Professional
    Pesetas (medium) (1×2500) - Inside the cabinet on the south side of the room.
    View location | Show on map
  • Image of Storeroom Access - Castle Bailey 2

    Storeroom Access - Castle Bailey 2

    Normal
    Pesetas (medium) (1×1800) - Inside the cabinet on the north side of the room.
    View location | Show on map
  • Image of Storeroom Access - Castle Bailey 2

    Storeroom Access - Castle Bailey 2

    Professional
    Pesetas (medium) (1×1800) - Inside the cabinet on the north side of the room.
    View location | Show on map
  • Image of Ballroom Access - Castle Bailey 3

    Ballroom Access - Castle Bailey 3

    Normal
    Pesetas (medium) (1×1800) - Inside the first cabinet lining the west wall of the hallway.
    Pesetas (medium) (1×2800) - Inside the second cabinet lining the west wall of the hallway.
    View location | Show on map
  • Image of Ballroom Access - Castle Bailey 3

    Ballroom Access - Castle Bailey 3

    Professional
    Pesetas (medium) (1×1800) - Inside the first cabinet lining the west wall of the hallway.
    Pesetas (medium) (1×2800) - Inside the second cabinet lining the west wall of the hallway.
    View location | Show on map
  • Image of Antechamber - Castle Bailey 3

    Antechamber - Castle Bailey 3

    Normal
    Pesetas (medium) (2×15000) - Dropped by each of the Garrador's when defeated.
    View location | Show on map
  • Image of Antechamber - Castle Bailey 3

    Antechamber - Castle Bailey 3

    Professional
    Pesetas (medium) (2×15000) - Dropped by each of the Garrador's when defeated.
    View location | Show on map
  • Image of Mine - Castle Mines

    Mine - Castle Mines

    Normal
    Pesetas (medium) (1×2800) - On the stacks of boxes on the west side of the room.
    Pesetas (medium) (1×10000) - Dropped by Dr. Salvador when defeated.
    View location | Show on map
  • Image of Mine - Castle Mines

    Mine - Castle Mines

    Professional
    Pesetas (medium) (1×2800) - On the stacks of boxes on the west side of the room.
    Pesetas (medium) (1×10000) - Dropped by Dr. Salvador when defeated.
    View location | Show on map
  • Image of Melting Furnace - Castle Mines

    Melting Furnace - Castle Mines

    Normal
    Pesetas (medium) (2×15000) - Dropped by each of the El Gigante when defeated.
    View location | Show on map
  • Image of Melting Furnace - Castle Mines

    Melting Furnace - Castle Mines

    Professional
    Pesetas (medium) (2×15000) - Dropped by each of the El Gigante when defeated.
    View location | Show on map
  • Image of Dilapidated Entrance Hall - Castle Ruins

    Dilapidated Entrance Hall - Castle Ruins

    Normal
    Pesetas (medium) (1×2200) - On the small table on the north side of the ruin.
    View location | Show on map
  • Image of Dilapidated Entrance Hall - Castle Ruins

    Dilapidated Entrance Hall - Castle Ruins

    Professional
    Pesetas (medium) (1×2200) - On the small table on the north side of the ruin.
    View location | Show on map
  • Image of Dilapidated Building - Castle Ruins

    Dilapidated Building - Castle Ruins

    Normal
    Pesetas (medium) (1×1800) - In the north west corner of the building.
    View location | Show on map
  • Image of Dilapidated Building - Castle Ruins

    Dilapidated Building - Castle Ruins

    Professional
    Pesetas (medium) (1×1800) - In the north west corner of the building.
    View location | Show on map
  • Image of Dwelling - Castle Sand Ruins

    Dwelling - Castle Sand Ruins

    Normal
    Pesetas (medium) (2×10000) - Dropped by each of the Dr. Salvador's when defeated.
    View location | Show on map
  • Image of Dwelling - Castle Sand Ruins

    Dwelling - Castle Sand Ruins

    Professional
    Pesetas (medium) (2×10000) - Dropped by each of the Dr. Salvador's when defeated.
    View location | Show on map
  • Image of Trap Room - Castle Sand Ruins

    Trap Room - Castle Sand Ruins

    Normal
    Pesetas (medium) (1×1800) - Inside the sarcophagus on the south side of the room.
    Pesetas (medium) (1×2000) - Inside the sarcophagus on the south side of the room.
    Pesetas (medium) (1×1500) - Inside the sarcophagus on the south side of the room.
    View location | Show on map
  • Image of Trap Room - Castle Sand Ruins

    Trap Room - Castle Sand Ruins

    Professional
    Pesetas (medium) (1×1800) - Inside the sarcophagus on the south side of the room.
    Pesetas (medium) (1×2000) - Inside the sarcophagus on the south side of the room.
    Pesetas (medium) (1×1500) - Inside the sarcophagus on the south side of the room.
    View location | Show on map
  • Image of Sand Mine Rail Track - Castle Sand Ruins

    Sand Mine Rail Track - Castle Sand Ruins

    Normal
    Pesetas (medium) (1×10000) - Held by the Dr. Salvador that shows up on the platform you are forced to stop at halfway through. He will drop this when defeated.
    Pesetas (medium) (1×10000) - Held by the Dr. Salvador that shows up on the second wooden platform you pass after the halfway point as you're riding in the mine cart.. He will drop this when defeated.
    View location | Show on map
  • Image of Sand Mine Rail Track - Castle Sand Ruins

    Sand Mine Rail Track - Castle Sand Ruins

    Professional
    Pesetas (medium) (1×10000) - Held by the Dr. Salvador that shows up on the platform you are forced to stop at halfway through. He will drop this when defeated.
    Pesetas (medium) (1×10000) - Held by the Dr. Salvador that shows up on the second wooden platform you pass after the halfway point as you're riding in the mine cart.. He will drop this when defeated.
    View location | Show on map
  • Image of Tower 1F - Castle Cathedral, Tower 1F & Docks

    Tower 1F - Castle Cathedral, Tower 1F & Docks

    Normal
    Pesetas (medium) (1×5500) - Held by the Leader Zealot that enters the room when you ascend to the Tower 3F. He will drop this when defeated.
    View location | Show on map
  • Image of Tower 1F - Castle Cathedral, Tower 1F & Docks

    Tower 1F - Castle Cathedral, Tower 1F & Docks

    Professional
    Pesetas (medium) (1×5500) - Held by the Leader Zealot that enters the room when you ascend to the Tower 3F. He will drop this when defeated.
    View location | Show on map
  • Image of Tower 5F - Castle Tower 5F

    Tower 5F - Castle Tower 5F

    Normal
    Pesetas (medium) (1×50000) - Dropped by Salazar when defeated.
    View location | Show on map
  • Image of Tower 5F - Castle Tower 5F

    Tower 5F - Castle Tower 5F

    Professional
    Pesetas (medium) (1×50000) - Dropped by Salazar when defeated.
    View location | Show on map
  • Image of Entrance Passage - Island Facility 1F

    Entrance Passage - Island Facility 1F

    Normal
    Pesetas (medium) (1×2000) - Inside the lockers at the north end of the passage.
    View location | Show on map
  • Image of Entrance Passage - Island Facility 1F

    Entrance Passage - Island Facility 1F

    Professional
    Pesetas (medium) (1×2000) - Inside the lockers at the north end of the passage.
    View location | Show on map
  • Image of Storage Room - Island Maintenance Level

    Storage Room - Island Maintenance Level

    Normal
    Pesetas (medium) (1×3000) - In the north west corner of the room.
    View location | Show on map
  • Image of Storage Room - Island Maintenance Level

    Storage Room - Island Maintenance Level

    Professional
    Pesetas (medium) (1×3000) - In the north west corner of the room.
    View location | Show on map
  • Image of South Fenced Area - Island Maintenance Level

    South Fenced Area - Island Maintenance Level

    Normal
    Pesetas (medium) (1×3000) - On the ground at the east end of the area.
    View location | Show on map
  • Image of South Fenced Area - Island Maintenance Level

    South Fenced Area - Island Maintenance Level

    Professional
    Pesetas (medium) (1×3000) - On the ground at the east end of the area.
    View location | Show on map
  • Image of Campsite - Island Sand Ruins

    Campsite - Island Sand Ruins

    Normal
    Pesetas (medium) (1×3000) - Inside the breakable wooden crate on the table inside the tent.
    View location | Show on map
  • Image of Campsite - Island Sand Ruins

    Campsite - Island Sand Ruins

    Professional
    Pesetas (medium) (1×3000) - Inside the breakable wooden crate on the table inside the tent.
    View location | Show on map

There are no locations to show for this game mode. The following game modes are applicable:

Related product

Resident Evil Requiem Deluxe Edition

Buy the Resident Evil Requiem Deluxe Edition on Amazon

Explore further