Town Majini (Resident Evil 5)

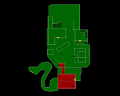
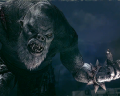
Image of Town Majini
Majini are humans acting under the control of the parasitic bio-weapon "Las Plagas". As such, they will act only under the orders of a specific human. They have lost their personality and ability to reason, but maintain their human intelligence. This means they can communicate their ideas through speech, wield tools and weapons, and employ group tactics.

The Town Majini are the people of the Kijuju Autonomous Zone. They have been injected with the "Type 2 Plagas", an improved version of the originally-discovered European Las Plagas.
Category Enemy

Related product

Resident Evil 2 Keys Collection Set

Buy the Resident Evil 2 Keys Collection Set on Amazon

Location

Chapter 1-1

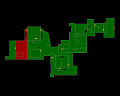
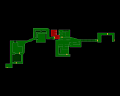
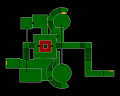
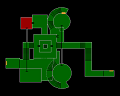
  • Image of Residential House Main Room - Back Alley West

    Residential House Main Room - Back Alley West

    Amateur
    1 Town Majini - Appears during the cutscene when you enter this location.

    View location | Show on map
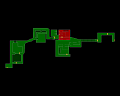
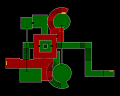
  • Image of Residential House Main Room - Back Alley West

    Residential House Main Room - Back Alley West

    Normal
    1 Town Majini - Appears during the cutscene when you enter this location.
    View location | Show on map
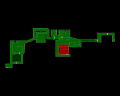
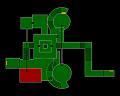
  • Image of Residential House Main Room - Back Alley West

    Residential House Main Room - Back Alley West

    Veteran
    1 Town Majini - Appears during the cutscene when you enter this location.
    View location | Show on map
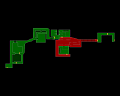
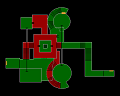
  • Image of Residential House Main Room - Back Alley West

    Residential House Main Room - Back Alley West

    Professional
    1 Town Majini - Appears during the cutscene when you enter this location.
    View location | Show on map
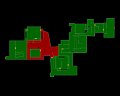
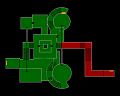
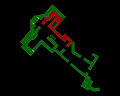
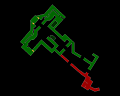
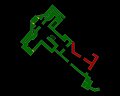
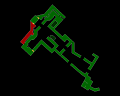
  • Image of Main Alleyway - Back Alley West

    Main Alleyway - Back Alley West

    Amateur
    50 Town Majinis - Appear as you approach the middle area of the alleyway.
    View location | Show on map
  • Image of Main Alleyway - Back Alley West

    Main Alleyway - Back Alley West

    Normal
    50 Town Majinis - Appear as you approach the middle area of the alleyway.
    View location | Show on map
  • Image of Main Alleyway - Back Alley West

    Main Alleyway - Back Alley West

    Veteran
    50 Town Majinis - Appear as you approach the middle area of the alleyway.
    View location | Show on map
  • Image of Main Alleyway - Back Alley West

    Main Alleyway - Back Alley West

    Professional
    50 Town Majinis - Appear as you approach the middle area of the alleyway.
    View location | Show on map
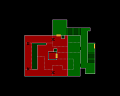
  • Image of House Front Yard - Public Assembly

    House Front Yard - Public Assembly

    Amateur
    Town Majinis - They will indefinitely spawn and enter this area until the chapter ends.
    View location | Show on map
  • Image of House Front Yard - Public Assembly

    House Front Yard - Public Assembly

    Normal
    Town Majinis - They will indefinitely spawn and enter this area until the chapter ends.
    View location | Show on map
  • Image of House Front Yard - Public Assembly

    House Front Yard - Public Assembly

    Veteran
    Town Majinis - They will indefinitely spawn and enter this area until the chapter ends.
    View location | Show on map
  • Image of House Front Yard - Public Assembly

    House Front Yard - Public Assembly

    Professional
    Town Majinis - They will indefinitely spawn and enter this area until the chapter ends.
    View location | Show on map
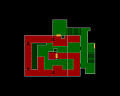
  • Image of Market - Public Assembly

    Market - Public Assembly

    Amateur
    Town Majinis - They will indefinitely spawn and enter this area until the chapter ends.
    View location | Show on map
  • Image of Market - Public Assembly

    Market - Public Assembly

    Normal
    Town Majinis - They will indefinitely spawn and enter this area until the chapter ends.
    View location | Show on map
  • Image of Market - Public Assembly

    Market - Public Assembly

    Veteran
    Town Majinis - They will indefinitely spawn and enter this area until the chapter ends.
    View location | Show on map
  • Image of Market - Public Assembly

    Market - Public Assembly

    Professional
    Town Majinis - They will indefinitely spawn and enter this area until the chapter ends.
    View location | Show on map
  • Image of House - Public Assembly

    House - Public Assembly

    Amateur
    Town Majinis - They will attempt to enter the house from the front yard and the market.
    View location | Show on map
  • Image of House - Public Assembly

    House - Public Assembly

    Normal
    Town Majinis - They will attempt to enter the house from the front yard and the market.
    View location | Show on map
  • Image of House - Public Assembly

    House - Public Assembly

    Veteran
    Town Majinis - They will attempt to enter the house from the front yard and the market.
    View location | Show on map
  • Image of House - Public Assembly

    House - Public Assembly

    Professional
    Town Majinis - They will attempt to enter the house from the front yard and the market.
    View location | Show on map

Chapter 1-2

  • Image of Business Street - Urban District

    Business Street - Urban District

    Amateur
    1 Town Majini - In the northern section of the street.
    1 Town Majini - In the southern section of the street.
    1 Town Majini - Behind the fence on the north side of the street.
    View location | Show on map
  • Image of Business Street - Urban District

    Business Street - Urban District

    Normal
    1 Town Majini - In the northern section of the street.
    1 Town Majini - In the southern section of the street.
    1 Town Majini - Behind the fence on the north side of the street.
    View location | Show on map
  • Image of Business Street - Urban District

    Business Street - Urban District

    Veteran
    1 Town Majini - In the northern section of the street.
    1 Town Majini - In the southern section of the street.
    1 Town Majini - Behind the fence on the north side of the street.
    View location | Show on map
  • Image of Business Street - Urban District

    Business Street - Urban District

    Professional
    1 Town Majini - In the northern section of the street.
    1 Town Majini - In the southern section of the street.
    1 Town Majini - Behind the fence on the north side of the street.
    View location | Show on map
  • Image of Small Store - Urban District

    Small Store - Urban District

    Amateur
    1 Town Majini - Standing around.
    View location | Show on map
  • Image of Small Store - Urban District

    Small Store - Urban District

    Normal
    1 Town Majini - Standing around.
    View location | Show on map
  • Image of Small Store - Urban District

    Small Store - Urban District

    Veteran
    1 Town Majini - Standing around.
    View location | Show on map
  • Image of Small Store - Urban District

    Small Store - Urban District

    Professional
    1 Town Majini - Standing around.
    View location | Show on map
  • Image of East Alleyway - Urban District

    East Alleyway - Urban District

    Amateur
    1 Town Majini - Standing around.
    3 Town Majinis - Enter the alleyway when Sheva uses the ladder to access the upper area.
    View location | Show on map
  • Image of East Alleyway - Urban District

    East Alleyway - Urban District

    Normal
    1 Town Majini - Standing around.
    3 Town Majinis - Enter the alleyway when Sheva uses the ladder to access the upper area.
    View location | Show on map
  • Image of East Alleyway - Urban District

    East Alleyway - Urban District

    Veteran
    1 Town Majini - Standing around.
    3 Town Majinis - Enter the alleyway when Sheva uses the ladder to access the upper area.
    View location | Show on map
  • Image of East Alleyway - Urban District

    East Alleyway - Urban District

    Professional
    1 Town Majini - Standing around.
    3 Town Majinis - Enter the alleyway when Sheva uses the ladder to access the upper area.
    View location | Show on map
  • Image of Connecting Alleyway - Urban District

    Connecting Alleyway - Urban District

    Amateur
    1 Town Majini - Climbs the fence as you approach the north west corner of the alleyway.
    View location | Show on map
  • Image of Connecting Alleyway - Urban District

    Connecting Alleyway - Urban District

    Normal
    1 Town Majini - Climbs the fence as you approach the north west corner of the alleyway.
    View location | Show on map
  • Image of Connecting Alleyway - Urban District

    Connecting Alleyway - Urban District

    Veteran
    1 Town Majini - Climbs the fence as you approach the north west corner of the alleyway.
    View location | Show on map
  • Image of Connecting Alleyway - Urban District

    Connecting Alleyway - Urban District

    Professional
    1 Town Majini - Climbs the fence as you approach the north west corner of the alleyway.
    View location | Show on map
  • Image of South Street - Urban District

    South Street - Urban District

    Amateur
    1 Town Majini - Behind the pile of cardboard boxes inside the small stall on the east side of the street.
    1 Town Majini - Wandering around the south east area of the street.
    View location | Show on map
  • Image of South Street - Urban District

    South Street - Urban District

    Normal
    1 Town Majini - Behind the pile of cardboard boxes inside the small stall on the east side of the street.
    1 Town Majini - Wandering around the south east area of the street.
    View location | Show on map
  • Image of South Street - Urban District

    South Street - Urban District

    Veteran
    1 Town Majini - Behind the pile of cardboard boxes inside the small stall on the east side of the street.
    1 Town Majini - Wandering around the south east area of the street.
    View location | Show on map
  • Image of South Street - Urban District

    South Street - Urban District

    Professional
    1 Town Majini - Behind the pile of cardboard boxes inside the small stall on the east side of the street.
    1 Town Majini - Wandering around the south east area of the street.
    View location | Show on map
  • Image of South House - Urban District

    South House - Urban District

    Amateur
    2 Town Majinis - On the western 2F balcony.
    View location | Show on map
  • Image of South House - Urban District

    South House - Urban District

    Normal
    2 Town Majinis - On the western 2F balcony.
    View location | Show on map
  • Image of South House - Urban District

    South House - Urban District

    Veteran
    2 Town Majinis - On the western 2F balcony.
    View location | Show on map
  • Image of South House - Urban District

    South House - Urban District

    Professional
    2 Town Majinis - On the western 2F balcony.
    View location | Show on map
  • Image of Main House - Urban District

    Main House - Urban District

    Amateur
    1 Town Majini - The girl that you witnessed being abducted will be turned into a Majini and attack you when you enter.
    2 Town Majinis - Will enter through the east and west doors whilst you fight the girl that was abducted.
    View location | Show on map
  • Image of Main House - Urban District

    Main House - Urban District

    Normal
    1 Town Majini - The girl that you witnessed being abducted will be turned into a Majini and attack you when you enter.
    2 Town Majinis - Will enter through the east and west doors whilst you fight the girl that was abducted.
    View location | Show on map
  • Image of Main House - Urban District

    Main House - Urban District

    Veteran
    1 Town Majini - The girl that you witnessed being abducted will be turned into a Majini and attack you when you enter.
    2 Town Majinis - Will enter through the east and west doors whilst you fight the girl that was abducted.
    View location | Show on map
  • Image of Main House - Urban District

    Main House - Urban District

    Professional
    1 Town Majini - The girl that you witnessed being abducted will be turned into a Majini and attack you when you enter.
    2 Town Majinis - Will enter through the east and west doors whilst you fight the girl that was abducted.
    View location | Show on map
  • Image of Main House East Yard - Urban District

    Main House East Yard - Urban District

    Amateur
    3 Town Majinis - Appear here after witnessing the cutscene in the main house.
    View location | Show on map
  • Image of Main House East Yard - Urban District

    Main House East Yard - Urban District

    Normal
    3 Town Majinis - Appear here after witnessing the cutscene in the main house.
    View location | Show on map
  • Image of Main House East Yard - Urban District

    Main House East Yard - Urban District

    Veteran
    3 Town Majinis - Appear here after witnessing the cutscene in the main house.
    View location | Show on map
  • Image of Main House East Yard - Urban District

    Main House East Yard - Urban District

    Professional
    3 Town Majinis - Appear here after witnessing the cutscene in the main house.
    View location | Show on map
  • Image of Main House West Yard - Urban District

    Main House West Yard - Urban District

    Amateur
    2 Town Majinis - Appear here after witnessing the cutscene in the main house.
    4 Town Majinis - Appear as you approach the center of the yard.
    View location | Show on map
  • Image of Main House West Yard - Urban District

    Main House West Yard - Urban District

    Normal
    2 Town Majinis - Appear here after witnessing the cutscene in the main house.
    4 Town Majinis - Appear as you approach the center of the yard.
    View location | Show on map
  • Image of Main House West Yard - Urban District

    Main House West Yard - Urban District

    Veteran
    2 Town Majinis - Appear here after witnessing the cutscene in the main house.
    4 Town Majinis - Appear as you approach the center of the yard.
    View location | Show on map
  • Image of Main House West Yard - Urban District

    Main House West Yard - Urban District

    Professional
    2 Town Majinis - Appear here after witnessing the cutscene in the main house.
    4 Town Majinis - Appear as you approach the center of the yard.
    View location | Show on map

Chapter 2-1

  • Image of Shipping Area - The Bridge

    Shipping Area - The Bridge

    Amateur
    6 Town Majinis - Scattered throughout the area.
    View location | Show on map
  • Image of Shipping Area - The Bridge

    Shipping Area - The Bridge

    Normal
    6 Town Majinis - Scattered throughout the area.
    View location | Show on map
  • Image of Shipping Area - The Bridge

    Shipping Area - The Bridge

    Veteran
    6 Town Majinis - Scattered throughout the area.
    View location | Show on map
  • Image of Shipping Area - The Bridge

    Shipping Area - The Bridge

    Professional
    6 Town Majinis - Scattered throughout the area.
    View location | Show on map
  • Image of Yard - The Bridge

    Yard - The Bridge

    Amateur
    5 Town Majinis - Wandering around.
    View location | Show on map
  • Image of Yard - The Bridge

    Yard - The Bridge

    Normal
    5 Town Majinis - Wandering around.
    View location | Show on map
  • Image of Yard - The Bridge

    Yard - The Bridge

    Veteran
    5 Town Majinis - Wandering around.
    View location | Show on map
  • Image of Yard - The Bridge

    Yard - The Bridge

    Professional
    5 Town Majinis - Wandering around.
    View location | Show on map
  • Image of Bridge - The Bridge

    Bridge - The Bridge

    Amateur
    1 Town Majini - Appears driving a truck as soon as you jump over the gap in the bridge.
    11 Town Majinis - Appear at the north end of the bridge after taking out the truck that appears after jumping over the gap in the bridge.
    View location | Show on map
  • Image of Bridge - The Bridge

    Bridge - The Bridge

    Normal
    1 Town Majini - Appears driving a truck as soon as you jump over the gap in the bridge.
    11 Town Majinis - Appear at the north end of the bridge after taking out the truck that appears after jumping over the gap in the bridge.
    View location | Show on map
  • Image of Bridge - The Bridge

    Bridge - The Bridge

    Veteran
    1 Town Majini - Appears driving a truck as soon as you jump over the gap in the bridge.
    11 Town Majinis - Appear at the north end of the bridge after taking out the truck that appears after jumping over the gap in the bridge.
    View location | Show on map
  • Image of Bridge - The Bridge

    Bridge - The Bridge

    Professional
    1 Town Majini - Appears driving a truck as soon as you jump over the gap in the bridge.
    11 Town Majinis - Appear at the north end of the bridge after taking out the truck that appears after jumping over the gap in the bridge.
    View location | Show on map
  • Image of Drainage Passage - The Port

    Drainage Passage - The Port

    Amateur
    1 Town Majini - The body at the far north end of the main area will get up as you approach.
    View location | Show on map
  • Image of Drainage Passage - The Port

    Drainage Passage - The Port

    Normal
    1 Town Majini - The body at the far north end of the main area will get up as you approach.
    View location | Show on map
  • Image of Drainage Passage - The Port

    Drainage Passage - The Port

    Veteran
    1 Town Majini - The body at the far north end of the main area will get up as you approach.
    View location | Show on map
  • Image of Drainage Passage - The Port

    Drainage Passage - The Port

    Professional
    1 Town Majini - The body at the far north end of the main area will get up as you approach.
    View location | Show on map
  • Image of South Dock - The Port

    South Dock - The Port

    Amateur
    3 Town Majinis - Wandering around the area when you first approach it. They will run away if not killed. If they do get away, they will reappear as part of the horde after acquiring the Port key.
    View location | Show on map
  • Image of South Dock - The Port

    South Dock - The Port

    Normal
    3 Town Majinis - Wandering around the area when you first approach it. They will run away if not killed. If they do get away, they will reappear as part of the horde after acquiring the Port key.
    View location | Show on map
  • Image of South Dock - The Port

    South Dock - The Port

    Veteran
    3 Town Majinis - Wandering around the area when you first approach it. They will run away if not killed. If they do get away, they will reappear as part of the horde after acquiring the Port key.
    View location | Show on map
  • Image of South Dock - The Port

    South Dock - The Port

    Professional
    3 Town Majinis - Wandering around the area when you first approach it. They will run away if not killed. If they do get away, they will reappear as part of the horde after acquiring the Port key.
    View location | Show on map
  • Image of Pier - The Port

    Pier - The Port

    Amateur
    1 Town Majini - You see him running away when you approach the gate to this area from the South Dock.
    View location | Show on map
  • Image of Pier - The Port

    Pier - The Port

    Normal
    1 Town Majini - You see him running away when you approach the gate to this area from the South Dock.
    View location | Show on map
  • Image of Pier - The Port

    Pier - The Port

    Veteran
    1 Town Majini - You see him running away when you approach the gate to this area from the South Dock.
    View location | Show on map
  • Image of Pier - The Port

    Pier - The Port

    Professional
    1 Town Majini - You see him running away when you approach the gate to this area from the South Dock.
    View location | Show on map
  • Image of South Dock - The Port

    South Dock - The Port

    Amateur
    7 Town Majinis - Enter the area after acquiring the Port key.
    View location | Show on map
  • Image of South Dock - The Port

    South Dock - The Port

    Normal
    7 Town Majinis - Enter the area after acquiring the Port key.
    View location | Show on map
  • Image of South Dock - The Port

    South Dock - The Port

    Veteran
    7 Town Majinis - Enter the area after acquiring the Port key.
    View location | Show on map
  • Image of South Dock - The Port

    South Dock - The Port

    Professional
    7 Town Majinis - Enter the area after acquiring the Port key.
    View location | Show on map
  • Image of North Dock - The Port

    North Dock - The Port

    Amateur
    10 Town Majinis - Scattered throughout the area.
    View location | Show on map
  • Image of North Dock - The Port

    North Dock - The Port

    Normal
    10 Town Majinis - Scattered throughout the area.
    View location | Show on map
  • Image of North Dock - The Port

    North Dock - The Port

    Veteran
    10 Town Majinis - Scattered throughout the area.
    View location | Show on map
  • Image of North Dock - The Port

    North Dock - The Port

    Professional
    10 Town Majinis - Scattered throughout the area.
    View location | Show on map
  • Image of Building Roof - The Port

    Building Roof - The Port

    Amateur
    1 Town Majini - Standing around.
    View location | Show on map
  • Image of Building Roof - The Port

    Building Roof - The Port

    Normal
    1 Town Majini - Standing around.
    View location | Show on map
  • Image of Building Roof - The Port

    Building Roof - The Port

    Veteran
    1 Town Majini - Standing around.
    View location | Show on map
  • Image of Building Roof - The Port

    Building Roof - The Port

    Professional
    1 Town Majini - Standing around.
    View location | Show on map
  • Image of North Dock - The Port

    North Dock - The Port

    Amateur
    6 Town Majinis - Emerge from the East Warehouse as you approach it.
    View location | Show on map
  • Image of North Dock - The Port

    North Dock - The Port

    Normal
    6 Town Majinis - Emerge from the East Warehouse as you approach it.
    View location | Show on map
  • Image of North Dock - The Port

    North Dock - The Port

    Veteran
    6 Town Majinis - Emerge from the East Warehouse as you approach it.
    View location | Show on map
  • Image of North Dock - The Port

    North Dock - The Port

    Professional
    6 Town Majinis - Emerge from the East Warehouse as you approach it.
    View location | Show on map
  • Image of Small House - Shanty Town

    Small House - Shanty Town

    Amateur
    3 Town Majinis - Standing around.
    View location | Show on map
  • Image of Small House - Shanty Town

    Small House - Shanty Town

    Normal
    3 Town Majinis - Standing around.
    View location | Show on map
  • Image of Small House - Shanty Town

    Small House - Shanty Town

    Veteran
    3 Town Majinis - Standing around.
    View location | Show on map
  • Image of Small House - Shanty Town

    Small House - Shanty Town

    Professional
    3 Town Majinis - Standing around.
    View location | Show on map
  • Image of Path - Shanty Town

    Path - Shanty Town

    Amateur
    11 Town Majinis - One is standing on the east bank, and the others will appear from the back door as you approach.
    View location | Show on map
  • Image of Path - Shanty Town

    Path - Shanty Town

    Normal
    11 Town Majinis - One is standing on the east bank, and the others will appear from the back door as you approach.
    View location | Show on map
  • Image of Path - Shanty Town

    Path - Shanty Town

    Veteran
    11 Town Majinis - One is standing on the east bank, and the others will appear from the back door as you approach.
    View location | Show on map
  • Image of Path - Shanty Town

    Path - Shanty Town

    Professional
    11 Town Majinis - One is standing on the east bank, and the others will appear from the back door as you approach.
    View location | Show on map
  • Image of North House Back Door - Shanty Town

    North House Back Door - Shanty Town

    Amateur
    1 Town Majini - Standing in the last cubicle in the toilet area.
    View location | Show on map
  • Image of North House Back Door - Shanty Town

    North House Back Door - Shanty Town

    Normal
    1 Town Majini - Standing in the last cubicle in the toilet area.
    View location | Show on map
  • Image of North House Back Door - Shanty Town

    North House Back Door - Shanty Town

    Veteran
    1 Town Majini - Standing in the last cubicle in the toilet area.
    View location | Show on map
  • Image of North House Back Door - Shanty Town

    North House Back Door - Shanty Town

    Professional
    1 Town Majini - Standing in the last cubicle in the toilet area.
    View location | Show on map
  • Image of North House - Shanty Town

    North House - Shanty Town

    Amateur
    1 Town Majini - Wandering around on the 1F.
    1 Town Majini - Standing on the stairs between the 1F and 2F.
    1 Town Majini - On the 2F balcony.
    1 Town Majini - Standing on the stairs between the 2F and 3F.
    View location | Show on map
  • Image of North House - Shanty Town

    North House - Shanty Town

    Normal
    1 Town Majini - Wandering around on the 1F.
    1 Town Majini - Standing on the stairs between the 1F and 2F.
    1 Town Majini - On the 2F balcony.
    1 Town Majini - Standing on the stairs between the 2F and 3F.
    View location | Show on map
  • Image of North House - Shanty Town

    North House - Shanty Town

    Veteran
    1 Town Majini - Wandering around on the 1F.
    1 Town Majini - Standing on the stairs between the 1F and 2F.
    1 Town Majini - On the 2F balcony.
    1 Town Majini - Standing on the stairs between the 2F and 3F.
    View location | Show on map
  • Image of North House - Shanty Town

    North House - Shanty Town

    Professional
    1 Town Majini - Wandering around on the 1F.
    1 Town Majini - Standing on the stairs between the 1F and 2F.
    1 Town Majini - On the 2F balcony.
    1 Town Majini - Standing on the stairs between the 2F and 3F.
    View location | Show on map
  • Image of South House - Shanty Town

    South House - Shanty Town

    Amateur
    11 Town Majinis - Enter the house when you descend from the 3F to the 2F.
    View location | Show on map
  • Image of South House - Shanty Town

    South House - Shanty Town

    Normal
    11 Town Majinis - Enter the house when you descend from the 3F to the 2F.
    View location | Show on map
  • Image of South House - Shanty Town

    South House - Shanty Town

    Veteran
    11 Town Majinis - Enter the house when you descend from the 3F to the 2F.
    View location | Show on map
  • Image of South House - Shanty Town

    South House - Shanty Town

    Professional
    11 Town Majinis - Enter the house when you descend from the 3F to the 2F.
    View location | Show on map
  • Image of Residential Street - Shanty Town

    Residential Street - Shanty Town

    Amateur
    5 Town Majinis - Appear here when you enter the area.
    11 Town Majinis - A maximum of 11 Town Majini can appear during the fight with the Chainsaw Majini.
    View location | Show on map
  • Image of Residential Street - Shanty Town

    Residential Street - Shanty Town

    Normal
    5 Town Majinis - Appear here when you enter the area.
    11 Town Majinis - A maximum of 11 Town Majini can appear during the fight with the Chainsaw Majini.
    View location | Show on map
  • Image of Residential Street - Shanty Town

    Residential Street - Shanty Town

    Veteran
    5 Town Majinis - Appear here when you enter the area.
    11 Town Majinis - A maximum of 11 Town Majini can appear during the fight with the Chainsaw Majini.
    View location | Show on map
  • Image of Residential Street - Shanty Town

    Residential Street - Shanty Town

    Professional
    5 Town Majinis - Appear here when you enter the area.
    11 Town Majinis - A maximum of 11 Town Majini can appear during the fight with the Chainsaw Majini.
    View location | Show on map

Chapter 2-2

  • Image of Train Yard - Train Station

    Train Yard - Train Station

    Amateur
    3 Town Majinis - Appears on the roof of the trains as you progress through the yard.
    View location | Show on map
  • Image of Train Yard - Train Station

    Train Yard - Train Station

    Normal
    3 Town Majinis - Appears on the roof of the trains as you progress through the yard.
    View location | Show on map
  • Image of Train Yard - Train Station

    Train Yard - Train Station

    Veteran
    3 Town Majinis - Appears on the roof of the trains as you progress through the yard.
    View location | Show on map
  • Image of Train Yard - Train Station

    Train Yard - Train Station

    Professional
    3 Town Majinis - Appears on the roof of the trains as you progress through the yard.
    View location | Show on map
  • Image of Entrance Tunnel - The Mines

    Entrance Tunnel - The Mines

    Amateur
    2 Town Majinis - In the first partially flooded section of the tunnel.
    1 Town Majini - At the end of the eastern tunnel where the tunnel splits for the second time.
    1 Town Majini - In the tunnel just beyond where the tunnel splits for the second time in the second partially flooded section.
    View location | Show on map
  • Image of Entrance Tunnel - The Mines

    Entrance Tunnel - The Mines

    Normal
    2 Town Majinis - In the first partially flooded section of the tunnel.
    1 Town Majini - At the end of the eastern tunnel where the tunnel splits for the second time.
    1 Town Majini - In the tunnel just beyond where the tunnel splits for the second time in the second partially flooded section.
    View location | Show on map
  • Image of Entrance Tunnel - The Mines

    Entrance Tunnel - The Mines

    Veteran
    2 Town Majinis - In the first partially flooded section of the tunnel.
    1 Town Majini - At the end of the eastern tunnel where the tunnel splits for the second time.
    1 Town Majini - In the tunnel just beyond where the tunnel splits for the second time in the second partially flooded section.
    View location | Show on map
  • Image of Entrance Tunnel - The Mines

    Entrance Tunnel - The Mines

    Professional
    2 Town Majinis - In the first partially flooded section of the tunnel.
    1 Town Majini - At the end of the eastern tunnel where the tunnel splits for the second time.
    1 Town Majini - In the tunnel just beyond where the tunnel splits for the second time in the second partially flooded section.
    View location | Show on map
  • Image of Middle Tunnel - The Mines

    Middle Tunnel - The Mines

    Amateur
    3 Town Majinis - Standing around near the southern entrance.
    2 Town Majinis - Drop into the area from the west side when you start exploring.
    View location | Show on map
  • Image of Middle Tunnel - The Mines

    Middle Tunnel - The Mines

    Normal
    3 Town Majinis - Standing around near the southern entrance.
    2 Town Majinis - Drop into the area from the west side when you start exploring.
    View location | Show on map
  • Image of Middle Tunnel - The Mines

    Middle Tunnel - The Mines

    Veteran
    3 Town Majinis - Standing around near the southern entrance.
    2 Town Majinis - Drop into the area from the west side when you start exploring.
    View location | Show on map
  • Image of Middle Tunnel - The Mines

    Middle Tunnel - The Mines

    Professional
    3 Town Majinis - Standing around near the southern entrance.
    2 Town Majinis - Drop into the area from the west side when you start exploring.
    View location | Show on map
  • Image of Tunnel to Gate - The Mines

    Tunnel to Gate - The Mines

    Amateur
    1 Town Majini - In the south east section of tunnel.
    3 Town Majinis - Appear when one of your characters goes through the gate leaving the other character here.
    View location | Show on map
  • Image of Tunnel to Gate - The Mines

    Tunnel to Gate - The Mines

    Normal
    1 Town Majini - In the south east section of tunnel.
    3 Town Majinis - Appear when one of your characters goes through the gate leaving the other character here.
    View location | Show on map
  • Image of Tunnel to Gate - The Mines

    Tunnel to Gate - The Mines

    Veteran
    1 Town Majini - In the south east section of tunnel.
    3 Town Majinis - Appear when one of your characters goes through the gate leaving the other character here.
    View location | Show on map
  • Image of Tunnel to Gate - The Mines

    Tunnel to Gate - The Mines

    Professional
    1 Town Majini - In the south east section of tunnel.
    3 Town Majinis - Appear when one of your characters goes through the gate leaving the other character here.
    View location | Show on map
  • Image of Central Mining Hub - The Mines

    Central Mining Hub - The Mines

    Amateur
    20 Town Majinis - Appear throughout this area when both Chris and Sheva enter.
    View location | Show on map
  • Image of Central Mining Hub - The Mines

    Central Mining Hub - The Mines

    Normal
    20 Town Majinis - Appear throughout this area when both Chris and Sheva enter.
    View location | Show on map
  • Image of Central Mining Hub - The Mines

    Central Mining Hub - The Mines

    Veteran
    20 Town Majinis - Appear throughout this area when both Chris and Sheva enter.
    View location | Show on map
  • Image of Central Mining Hub - The Mines

    Central Mining Hub - The Mines

    Professional
    20 Town Majinis - Appear throughout this area when both Chris and Sheva enter.
    View location | Show on map
  • Image of Exit Tunnel - The Mines

    Exit Tunnel - The Mines

    Amateur
    3 Town Majinis - At the north end of the tunnel near the elevator.
    1 Town Majini - In the north west area of the circular section of tunnel.
    View location | Show on map
  • Image of Exit Tunnel - The Mines

    Exit Tunnel - The Mines

    Normal
    3 Town Majinis - At the north end of the tunnel near the elevator.
    1 Town Majini - In the north west area of the circular section of tunnel.
    View location | Show on map
  • Image of Exit Tunnel - The Mines

    Exit Tunnel - The Mines

    Veteran
    3 Town Majinis - At the north end of the tunnel near the elevator.
    1 Town Majini - In the north west area of the circular section of tunnel.
    View location | Show on map
  • Image of Exit Tunnel - The Mines

    Exit Tunnel - The Mines

    Professional
    3 Town Majinis - At the north end of the tunnel near the elevator.
    1 Town Majini - In the north west area of the circular section of tunnel.
    View location | Show on map
  • Image of South Area - Mining Area

    South Area - Mining Area

    Amateur
    7 Town Majinis - Scattered throughout the area.
    View location | Show on map
  • Image of South Area - Mining Area

    South Area - Mining Area

    Normal
    7 Town Majinis - Scattered throughout the area.
    View location | Show on map
  • Image of South Area - Mining Area

    South Area - Mining Area

    Veteran
    7 Town Majinis - Scattered throughout the area.
    View location | Show on map
  • Image of South Area - Mining Area

    South Area - Mining Area

    Professional
    7 Town Majinis - Scattered throughout the area.
    View location | Show on map
  • Image of Small Ledge - Mining Area

    Small Ledge - Mining Area

    Amateur
    1 Town Majini - Standing around.
    View location | Show on map
  • Image of Small Ledge - Mining Area

    Small Ledge - Mining Area

    Normal
    1 Town Majini - Standing around.
    View location | Show on map
  • Image of Small Ledge - Mining Area

    Small Ledge - Mining Area

    Veteran
    1 Town Majini - Standing around.
    View location | Show on map
  • Image of Small Ledge - Mining Area

    Small Ledge - Mining Area

    Professional
    1 Town Majini - Standing around.
    View location | Show on map
  • Image of West Ledge - Mining Area

    West Ledge - Mining Area

    Amateur
    2 Town Majinis - Standing around.
    View location | Show on map
  • Image of West Ledge - Mining Area

    West Ledge - Mining Area

    Normal
    2 Town Majinis - Standing around.
    View location | Show on map
  • Image of West Ledge - Mining Area

    West Ledge - Mining Area

    Veteran
    2 Town Majinis - Standing around.
    View location | Show on map
  • Image of West Ledge - Mining Area

    West Ledge - Mining Area

    Professional
    2 Town Majinis - Standing around.
    View location | Show on map
  • Image of South Area - Mining Area

    South Area - Mining Area

    Amateur
    1 Town Majini - Inside the portable toilet on the west side of the area.
    View location | Show on map
  • Image of South Area - Mining Area

    South Area - Mining Area

    Normal
    1 Town Majini - Inside the portable toilet on the west side of the area.
    View location | Show on map
  • Image of South Area - Mining Area

    South Area - Mining Area

    Veteran
    1 Town Majini - Inside the portable toilet on the west side of the area.
    View location | Show on map
  • Image of South Area - Mining Area

    South Area - Mining Area

    Professional
    1 Town Majini - Inside the portable toilet on the west side of the area.
    View location | Show on map
  • Image of Cliff Pathway - Mining Area

    Cliff Pathway - Mining Area

    Amateur
    22 Town Majinis - Are either scattered throughout the area, or enter the area as you travel through.
    View location | Show on map
  • Image of Cliff Pathway - Mining Area

    Cliff Pathway - Mining Area

    Normal
    22 Town Majinis - Are either scattered throughout the area, or enter the area as you travel through.
    View location | Show on map
  • Image of Cliff Pathway - Mining Area

    Cliff Pathway - Mining Area

    Veteran
    22 Town Majinis - Are either scattered throughout the area, or enter the area as you travel through.
    View location | Show on map
  • Image of Cliff Pathway - Mining Area

    Cliff Pathway - Mining Area

    Professional
    22 Town Majinis - Are either scattered throughout the area, or enter the area as you travel through.
    View location | Show on map

Chapter 2-3

  • Image of Savanna

    Savanna

    Amateur
    Town Majinis - Appear on trucks and blockades throughout this section of the chapter.
  • Image of Savanna

    Savanna

    Normal
    Town Majinis - Appear on trucks and blockades throughout this section of the chapter.
  • Image of Savanna

    Savanna

    Veteran
    Town Majinis - Appear on trucks and blockades throughout this section of the chapter.
  • Image of Savanna

    Savanna

    Professional
    Town Majinis - Appear on trucks and blockades throughout this section of the chapter.
  • Image of The Port (Night)

    The Port (Night)

    Amateur
    Town Majinis - Appear on the structures at the back of the area.
  • Image of The Port (Night)

    The Port (Night)

    Normal
    Town Majinis - Appear on the structures at the back of the area.
  • Image of The Port (Night)

    The Port (Night)

    Veteran
    Town Majinis - Appear on the structures at the back of the area.
  • Image of The Port (Night)

    The Port (Night)

    Professional
    Town Majinis - Appear on the structures at the back of the area.

Chapter 3-2

  • Image of South East Platform - Oil Field - Refinery

    South East Platform - Oil Field - Refinery

    Amateur
    1 Town Majini - Standing around.
    View location | Show on map
  • Image of South East Platform - Oil Field - Refinery

    South East Platform - Oil Field - Refinery

    Normal
    1 Town Majini - Standing around.
    View location | Show on map
  • Image of South East Platform - Oil Field - Refinery

    South East Platform - Oil Field - Refinery

    Veteran
    1 Town Majini - Standing around.
    View location | Show on map
  • Image of South East Platform - Oil Field - Refinery

    South East Platform - Oil Field - Refinery

    Professional
    1 Town Majini - Standing around.
    View location | Show on map
  • Image of Central Valve Platform - Oil Field - Refinery

    Central Valve Platform - Oil Field - Refinery

    Amateur
    1 Town Majini - Standing around.
    View location | Show on map
  • Image of Central Valve Platform - Oil Field - Refinery

    Central Valve Platform - Oil Field - Refinery

    Normal
    1 Town Majini - Standing around.
    View location | Show on map
  • Image of Central Valve Platform - Oil Field - Refinery

    Central Valve Platform - Oil Field - Refinery

    Veteran
    1 Town Majini - Standing around.
    View location | Show on map
  • Image of Central Valve Platform - Oil Field - Refinery

    Central Valve Platform - Oil Field - Refinery

    Professional
    1 Town Majini - Standing around.
    View location | Show on map
  • Image of Refinery - Oil Field - Refinery

    Refinery - Oil Field - Refinery

    Amateur
    5 Town Majinis - Appear when you start to explore this area.
    View location | Show on map
  • Image of Refinery - Oil Field - Refinery

    Refinery - Oil Field - Refinery

    Normal
    5 Town Majinis - Appear when you start to explore this area.
    View location | Show on map
  • Image of Refinery - Oil Field - Refinery

    Refinery - Oil Field - Refinery

    Veteran
    5 Town Majinis - Appear when you start to explore this area.
    View location | Show on map
  • Image of Refinery - Oil Field - Refinery

    Refinery - Oil Field - Refinery

    Professional
    5 Town Majinis - Appear when you start to explore this area.
    View location | Show on map
  • Image of South West Valve Platform - Oil Field - Refinery

    South West Valve Platform - Oil Field - Refinery

    Amateur
    1 Town Majini - Appears here when you start exploring the refinery.
    View location | Show on map
  • Image of South West Valve Platform - Oil Field - Refinery

    South West Valve Platform - Oil Field - Refinery

    Normal
    1 Town Majini - Appears here when you start exploring the refinery.
    View location | Show on map
  • Image of South West Valve Platform - Oil Field - Refinery

    South West Valve Platform - Oil Field - Refinery

    Veteran
    1 Town Majini - Appears here when you start exploring the refinery.
    View location | Show on map
  • Image of South West Valve Platform - Oil Field - Refinery

    South West Valve Platform - Oil Field - Refinery

    Professional
    1 Town Majini - Appears here when you start exploring the refinery.
    View location | Show on map
  • Image of Upper Walkways - Oil Field - Refinery

    Upper Walkways - Oil Field - Refinery

    Amateur
    3 Town Majinis - Appear on the northern platform that leads to north west platform after you've turned the valve handle on the central valve platform.
    View location | Show on map
  • Image of Upper Walkways - Oil Field - Refinery

    Upper Walkways - Oil Field - Refinery

    Normal
    3 Town Majinis - Appear on the northern platform that leads to north west platform after you've turned the valve handle on the central valve platform.
    View location | Show on map
  • Image of Upper Walkways - Oil Field - Refinery

    Upper Walkways - Oil Field - Refinery

    Veteran
    3 Town Majinis - Appear on the northern platform that leads to north west platform after you've turned the valve handle on the central valve platform.
    View location | Show on map
  • Image of Upper Walkways - Oil Field - Refinery

    Upper Walkways - Oil Field - Refinery

    Professional
    3 Town Majinis - Appear on the northern platform that leads to north west platform after you've turned the valve handle on the central valve platform.
    View location | Show on map
  • Image of North West Platform - Oil Field - Refinery

    North West Platform - Oil Field - Refinery

    Amateur
    1 Town Majini - Appears here after you've turned the valve handle on the central valve platform.
    View location | Show on map
  • Image of North West Platform - Oil Field - Refinery

    North West Platform - Oil Field - Refinery

    Normal
    1 Town Majini - Appears here after you've turned the valve handle on the central valve platform.
    View location | Show on map
  • Image of North West Platform - Oil Field - Refinery

    North West Platform - Oil Field - Refinery

    Veteran
    1 Town Majini - Appears here after you've turned the valve handle on the central valve platform.
    View location | Show on map
  • Image of North West Platform - Oil Field - Refinery

    North West Platform - Oil Field - Refinery

    Professional
    1 Town Majini - Appears here after you've turned the valve handle on the central valve platform.
    View location | Show on map
  • Image of Exit Walkway - Oil Field - Refinery

    Exit Walkway - Oil Field - Refinery

    Amateur
    6 Town Majinis - Appear from the east side as you venture along the walkway.
    View location | Show on map
  • Image of Exit Walkway - Oil Field - Refinery

    Exit Walkway - Oil Field - Refinery

    Normal
    6 Town Majinis - Appear from the east side as you venture along the walkway.
    View location | Show on map
  • Image of Exit Walkway - Oil Field - Refinery

    Exit Walkway - Oil Field - Refinery

    Veteran
    6 Town Majinis - Appear from the east side as you venture along the walkway.
    View location | Show on map
  • Image of Exit Walkway - Oil Field - Refinery

    Exit Walkway - Oil Field - Refinery

    Professional
    6 Town Majinis - Appear from the east side as you venture along the walkway.
    View location | Show on map
  • Image of Facility 1F - Oil Field - Control Facility

    Facility 1F - Oil Field - Control Facility

    Amateur
    20 Town Majinis - Enter the area from various places whilst Josh is working the control panel.
    View location | Show on map
  • Image of Facility 1F - Oil Field - Control Facility

    Facility 1F - Oil Field - Control Facility

    Normal
    20 Town Majinis - Enter the area from various places whilst Josh is working the control panel.
    View location | Show on map
  • Image of Facility 1F - Oil Field - Control Facility

    Facility 1F - Oil Field - Control Facility

    Veteran
    20 Town Majinis - Enter the area from various places whilst Josh is working the control panel.
    View location | Show on map
  • Image of Facility 1F - Oil Field - Control Facility

    Facility 1F - Oil Field - Control Facility

    Professional
    20 Town Majinis - Enter the area from various places whilst Josh is working the control panel.
    View location | Show on map
  • Image of Facility 2F - Oil Field - Control Facility

    Facility 2F - Oil Field - Control Facility

    Amateur
    7 Town Majinis - Appear throughout the areas of the 2F.
    7 Town Majinis - Appear when Josh starts working the control panel to unlock the door.
    13 Town Majinis - Appear once Josh has unlocked the door.
    View location | Show on map
  • Image of Facility 2F - Oil Field - Control Facility

    Facility 2F - Oil Field - Control Facility

    Normal
    7 Town Majinis - Appear throughout the areas of the 2F.
    7 Town Majinis - Appear when Josh starts working the control panel to unlock the door.
    13 Town Majinis - Appear once Josh has unlocked the door.
    View location | Show on map
  • Image of Facility 2F - Oil Field - Control Facility

    Facility 2F - Oil Field - Control Facility

    Veteran
    7 Town Majinis - Appear throughout the areas of the 2F.
    7 Town Majinis - Appear when Josh starts working the control panel to unlock the door.
    13 Town Majinis - Appear once Josh has unlocked the door.
    View location | Show on map
  • Image of Facility 2F - Oil Field - Control Facility

    Facility 2F - Oil Field - Control Facility

    Professional
    7 Town Majinis - Appear throughout the areas of the 2F.
    7 Town Majinis - Appear when Josh starts working the control panel to unlock the door.
    13 Town Majinis - Appear once Josh has unlocked the door.
    View location | Show on map
  • Image of South Pier - Oil Field - Dock

    South Pier - Oil Field - Dock

    Amateur
    5 Town Majinis - Appear once the countdown begins.
    View location | Show on map
  • Image of South Pier - Oil Field - Dock

    South Pier - Oil Field - Dock

    Normal
    5 Town Majinis - Appear once the countdown begins.
    View location | Show on map
  • Image of South Pier - Oil Field - Dock

    South Pier - Oil Field - Dock

    Veteran
    5 Town Majinis - Appear once the countdown begins.
    View location | Show on map
  • Image of South Pier - Oil Field - Dock

    South Pier - Oil Field - Dock

    Professional
    5 Town Majinis - Appear once the countdown begins.
    View location | Show on map
  • Image of West Pier - Oil Field - Dock

    West Pier - Oil Field - Dock

    Amateur
    2 Town Majinis - Appear standing on top of the oil tanks in the south west area of the pier once the countdown begins.
    4 Town Majinis - Appear next to the gate leading to the north pier access once the countdown begins.
    View location | Show on map
  • Image of West Pier - Oil Field - Dock

    West Pier - Oil Field - Dock

    Normal
    2 Town Majinis - Appear standing on top of the oil tanks in the south west area of the pier once the countdown begins.
    4 Town Majinis - Appear next to the gate leading to the north pier access once the countdown begins.
    View location | Show on map
  • Image of West Pier - Oil Field - Dock

    West Pier - Oil Field - Dock

    Veteran
    2 Town Majinis - Appear standing on top of the oil tanks in the south west area of the pier once the countdown begins.
    4 Town Majinis - Appear next to the gate leading to the north pier access once the countdown begins.
    View location | Show on map
  • Image of West Pier - Oil Field - Dock

    West Pier - Oil Field - Dock

    Professional
    2 Town Majinis - Appear standing on top of the oil tanks in the south west area of the pier once the countdown begins.
    4 Town Majinis - Appear next to the gate leading to the north pier access once the countdown begins.
    View location | Show on map
  • Image of North Pier - Oil Field - Dock

    North Pier - Oil Field - Dock

    Amateur
    4 Town Majinis - Emerge from Storeroom B as you approach it once the countdown begins.
    View location | Show on map
  • Image of North Pier - Oil Field - Dock

    North Pier - Oil Field - Dock

    Normal
    4 Town Majinis - Emerge from Storeroom B as you approach it once the countdown begins.
    View location | Show on map
  • Image of North Pier - Oil Field - Dock

    North Pier - Oil Field - Dock

    Veteran
    4 Town Majinis - Emerge from Storeroom B as you approach it once the countdown begins.
    View location | Show on map
  • Image of North Pier - Oil Field - Dock

    North Pier - Oil Field - Dock

    Professional
    4 Town Majinis - Emerge from Storeroom B as you approach it once the countdown begins.
    View location | Show on map

Chapter 3-3

  • Image of River - Oil Field - Drilling Facilities

    River - Oil Field - Drilling Facilities

    Amateur
    5 Town Majinis - On two boats that are pursuing you on the stretch of river leading towards gate 1.
    9 Town Majinis - On the various platforms you ride past and navigate under on the stretch of river leading towards gate 1.
    View location | Show on map
  • Image of River - Oil Field - Drilling Facilities

    River - Oil Field - Drilling Facilities

    Normal
    5 Town Majinis - On two boats that are pursuing you on the stretch of river leading towards gate 1.
    9 Town Majinis - On the various platforms you ride past and navigate under on the stretch of river leading towards gate 1.
    View location | Show on map
  • Image of River - Oil Field - Drilling Facilities

    River - Oil Field - Drilling Facilities

    Veteran
    5 Town Majinis - On two boats that are pursuing you on the stretch of river leading towards gate 1.
    9 Town Majinis - On the various platforms you ride past and navigate under on the stretch of river leading towards gate 1.
    View location | Show on map
  • Image of River - Oil Field - Drilling Facilities

    River - Oil Field - Drilling Facilities

    Professional
    5 Town Majinis - On two boats that are pursuing you on the stretch of river leading towards gate 1.
    9 Town Majinis - On the various platforms you ride past and navigate under on the stretch of river leading towards gate 1.
    View location | Show on map
  • Image of North Walkway - Oil Field - Drilling Facilities - Gate 1

    North Walkway - Oil Field - Drilling Facilities - Gate 1

    Amateur
    2 Town Majinis - Standing around.
    View location | Show on map
  • Image of North Walkway - Oil Field - Drilling Facilities - Gate 1

    North Walkway - Oil Field - Drilling Facilities - Gate 1

    Normal
    2 Town Majinis - Standing around.
    View location | Show on map
  • Image of North Walkway - Oil Field - Drilling Facilities - Gate 1

    North Walkway - Oil Field - Drilling Facilities - Gate 1

    Veteran
    2 Town Majinis - Standing around.
    View location | Show on map
  • Image of North Walkway - Oil Field - Drilling Facilities - Gate 1

    North Walkway - Oil Field - Drilling Facilities - Gate 1

    Professional
    2 Town Majinis - Standing around.
    View location | Show on map
  • Image of South Walkway - Oil Field - Drilling Facilities - Gate 1

    South Walkway - Oil Field - Drilling Facilities - Gate 1

    Amateur
    3 Town Majinis - Standing around.
    View location | Show on map
  • Image of South Walkway - Oil Field - Drilling Facilities - Gate 1

    South Walkway - Oil Field - Drilling Facilities - Gate 1

    Normal
    3 Town Majinis - Standing around.
    View location | Show on map
  • Image of South Walkway - Oil Field - Drilling Facilities - Gate 1

    South Walkway - Oil Field - Drilling Facilities - Gate 1

    Veteran
    3 Town Majinis - Standing around.
    View location | Show on map
  • Image of South Walkway - Oil Field - Drilling Facilities - Gate 1

    South Walkway - Oil Field - Drilling Facilities - Gate 1

    Professional
    3 Town Majinis - Standing around.
    View location | Show on map
  • Image of North Walkway - Oil Field - Drilling Facilities - Gate 1

    North Walkway - Oil Field - Drilling Facilities - Gate 1

    Amateur
    2 Town Majinis - Appear when you open the gate using the switch.
    View location | Show on map
  • Image of North Walkway - Oil Field - Drilling Facilities - Gate 1

    North Walkway - Oil Field - Drilling Facilities - Gate 1

    Normal
    2 Town Majinis - Appear when you open the gate using the switch.
    View location | Show on map
  • Image of North Walkway - Oil Field - Drilling Facilities - Gate 1

    North Walkway - Oil Field - Drilling Facilities - Gate 1

    Veteran
    2 Town Majinis - Appear when you open the gate using the switch.
    View location | Show on map
  • Image of North Walkway - Oil Field - Drilling Facilities - Gate 1

    North Walkway - Oil Field - Drilling Facilities - Gate 1

    Professional
    2 Town Majinis - Appear when you open the gate using the switch.
    View location | Show on map
  • Image of South Walkway - Oil Field - Drilling Facilities - Gate 1

    South Walkway - Oil Field - Drilling Facilities - Gate 1

    Amateur
    2 Town Majinis - Appear when you open the gate using the switch.
    View location | Show on map
  • Image of South Walkway - Oil Field - Drilling Facilities - Gate 1

    South Walkway - Oil Field - Drilling Facilities - Gate 1

    Normal
    2 Town Majinis - Appear when you open the gate using the switch.
    View location | Show on map
  • Image of South Walkway - Oil Field - Drilling Facilities - Gate 1

    South Walkway - Oil Field - Drilling Facilities - Gate 1

    Veteran
    2 Town Majinis - Appear when you open the gate using the switch.
    View location | Show on map
  • Image of South Walkway - Oil Field - Drilling Facilities - Gate 1

    South Walkway - Oil Field - Drilling Facilities - Gate 1

    Professional
    2 Town Majinis - Appear when you open the gate using the switch.
    View location | Show on map
  • Image of North Walkway - Oil Field - Drilling Facilities - Gate 2

    North Walkway - Oil Field - Drilling Facilities - Gate 2

    Amateur
    1 Town Majini - Standing around.
    View location | Show on map
  • Image of North Walkway - Oil Field - Drilling Facilities - Gate 2

    North Walkway - Oil Field - Drilling Facilities - Gate 2

    Normal
    1 Town Majini - Standing around.
    View location | Show on map
  • Image of North Walkway - Oil Field - Drilling Facilities - Gate 2

    North Walkway - Oil Field - Drilling Facilities - Gate 2

    Veteran
    1 Town Majini - Standing around.
    View location | Show on map
  • Image of North Walkway - Oil Field - Drilling Facilities - Gate 2

    North Walkway - Oil Field - Drilling Facilities - Gate 2

    Professional
    1 Town Majini - Standing around.
    View location | Show on map
  • Image of South Walkway - Oil Field - Drilling Facilities - Gate 2

    South Walkway - Oil Field - Drilling Facilities - Gate 2

    Amateur
    2 Town Majinis - Standing around.
    View location | Show on map
  • Image of South Walkway - Oil Field - Drilling Facilities - Gate 2

    South Walkway - Oil Field - Drilling Facilities - Gate 2

    Normal
    2 Town Majinis - Standing around.
    View location | Show on map
  • Image of South Walkway - Oil Field - Drilling Facilities - Gate 2

    South Walkway - Oil Field - Drilling Facilities - Gate 2

    Veteran
    2 Town Majinis - Standing around.
    View location | Show on map
  • Image of South Walkway - Oil Field - Drilling Facilities - Gate 2

    South Walkway - Oil Field - Drilling Facilities - Gate 2

    Professional
    2 Town Majinis - Standing around.
    View location | Show on map
  • Image of River - Oil Field - Drilling Facilities

    River - Oil Field - Drilling Facilities

    Amateur
    10 Town Majinis - On the various platforms you ride past and navigate under on the stretch of river leading towards gate 2.
    View location | Show on map
  • Image of River - Oil Field - Drilling Facilities

    River - Oil Field - Drilling Facilities

    Normal
    10 Town Majinis - On the various platforms you ride past and navigate under on the stretch of river leading towards gate 2.
    View location | Show on map
  • Image of River - Oil Field - Drilling Facilities

    River - Oil Field - Drilling Facilities

    Veteran
    10 Town Majinis - On the various platforms you ride past and navigate under on the stretch of river leading towards gate 2.
    View location | Show on map
  • Image of River - Oil Field - Drilling Facilities

    River - Oil Field - Drilling Facilities

    Professional
    10 Town Majinis - On the various platforms you ride past and navigate under on the stretch of river leading towards gate 2.
    View location | Show on map
  • Image of East Walkway - Oil Field - Drilling Facilities - Gate 2

    East Walkway - Oil Field - Drilling Facilities - Gate 2

    Amateur
    1 Town Majini - Standing around.
    View location | Show on map
  • Image of East Walkway - Oil Field - Drilling Facilities - Gate 2

    East Walkway - Oil Field - Drilling Facilities - Gate 2

    Normal
    1 Town Majini - Standing around.
    View location | Show on map
  • Image of East Walkway - Oil Field - Drilling Facilities - Gate 2

    East Walkway - Oil Field - Drilling Facilities - Gate 2

    Veteran
    1 Town Majini - Standing around.
    View location | Show on map
  • Image of East Walkway - Oil Field - Drilling Facilities - Gate 2

    East Walkway - Oil Field - Drilling Facilities - Gate 2

    Professional
    1 Town Majini - Standing around.
    View location | Show on map
  • Image of North West Lookout - Oil Field - Drilling Facilities - Gate 2

    North West Lookout - Oil Field - Drilling Facilities - Gate 2

    Amateur
    3 Town Majinis - Appear here when you move a certain distance from your boat in the docking platform. One of them uses the gun turret.
    View location | Show on map
  • Image of North West Lookout - Oil Field - Drilling Facilities - Gate 2

    North West Lookout - Oil Field - Drilling Facilities - Gate 2

    Normal
    3 Town Majinis - Appear here when you move a certain distance from your boat in the docking platform. One of them uses the gun turret.
    View location | Show on map
  • Image of North West Lookout - Oil Field - Drilling Facilities - Gate 2

    North West Lookout - Oil Field - Drilling Facilities - Gate 2

    Veteran
    3 Town Majinis - Appear here when you move a certain distance from your boat in the docking platform. One of them uses the gun turret.
    View location | Show on map
  • Image of North West Lookout - Oil Field - Drilling Facilities - Gate 2

    North West Lookout - Oil Field - Drilling Facilities - Gate 2

    Professional
    3 Town Majinis - Appear here when you move a certain distance from your boat in the docking platform. One of them uses the gun turret.
    View location | Show on map
  • Image of North Walkway - Oil Field - Drilling Facilities - Gate 2

    North Walkway - Oil Field - Drilling Facilities - Gate 2

    Amateur
    2 Town Majinis - Appear here when you move a certain distance from your boat in the docking platform.
    View location | Show on map
  • Image of North Walkway - Oil Field - Drilling Facilities - Gate 2

    North Walkway - Oil Field - Drilling Facilities - Gate 2

    Normal
    2 Town Majinis - Appear here when you move a certain distance from your boat in the docking platform.
    View location | Show on map
  • Image of North Walkway - Oil Field - Drilling Facilities - Gate 2

    North Walkway - Oil Field - Drilling Facilities - Gate 2

    Veteran
    2 Town Majinis - Appear here when you move a certain distance from your boat in the docking platform.
    View location | Show on map
  • Image of North Walkway - Oil Field - Drilling Facilities - Gate 2

    North Walkway - Oil Field - Drilling Facilities - Gate 2

    Professional
    2 Town Majinis - Appear here when you move a certain distance from your boat in the docking platform.
    View location | Show on map
  • Image of North East Lookout - Oil Field - Drilling Facilities - Gate 2

    North East Lookout - Oil Field - Drilling Facilities - Gate 2

    Amateur
    2 Town Majinis - Appear here when you move a certain distance from your boat in the docking platform. One of them uses the gun turret.
    4 Town Majinis - Appear as you're exploring the surrounding areas.
    View location | Show on map
  • Image of North East Lookout - Oil Field - Drilling Facilities - Gate 2

    North East Lookout - Oil Field - Drilling Facilities - Gate 2

    Normal
    2 Town Majinis - Appear here when you move a certain distance from your boat in the docking platform. One of them uses the gun turret.
    4 Town Majinis - Appear as you're exploring the surrounding areas.
    View location | Show on map
  • Image of North East Lookout - Oil Field - Drilling Facilities - Gate 2

    North East Lookout - Oil Field - Drilling Facilities - Gate 2

    Veteran
    2 Town Majinis - Appear here when you move a certain distance from your boat in the docking platform. One of them uses the gun turret.
    4 Town Majinis - Appear as you're exploring the surrounding areas.
    View location | Show on map
  • Image of North East Lookout - Oil Field - Drilling Facilities - Gate 2

    North East Lookout - Oil Field - Drilling Facilities - Gate 2

    Professional
    2 Town Majinis - Appear here when you move a certain distance from your boat in the docking platform. One of them uses the gun turret.
    4 Town Majinis - Appear as you're exploring the surrounding areas.
    View location | Show on map
  • Image of North West Lookout - Oil Field - Drilling Facilities - Gate 2

    North West Lookout - Oil Field - Drilling Facilities - Gate 2

    Amateur
    2 Town Majinis - Appear as you're exploring the surrounding areas.
    View location | Show on map
  • Image of North West Lookout - Oil Field - Drilling Facilities - Gate 2

    North West Lookout - Oil Field - Drilling Facilities - Gate 2

    Normal
    2 Town Majinis - Appear as you're exploring the surrounding areas.
    View location | Show on map
  • Image of North West Lookout - Oil Field - Drilling Facilities - Gate 2

    North West Lookout - Oil Field - Drilling Facilities - Gate 2

    Veteran
    2 Town Majinis - Appear as you're exploring the surrounding areas.
    View location | Show on map
  • Image of North West Lookout - Oil Field - Drilling Facilities - Gate 2

    North West Lookout - Oil Field - Drilling Facilities - Gate 2

    Professional
    2 Town Majinis - Appear as you're exploring the surrounding areas.
    View location | Show on map
  • Image of North Walkway - Oil Field - Drilling Facilities - Gate 2

    North Walkway - Oil Field - Drilling Facilities - Gate 2

    Amateur
    2 Town Majinis - Appear once you have activated both switches to open the gate.
    View location | Show on map
  • Image of North Walkway - Oil Field - Drilling Facilities - Gate 2

    North Walkway - Oil Field - Drilling Facilities - Gate 2

    Normal
    2 Town Majinis - Appear once you have activated both switches to open the gate.
    View location | Show on map
  • Image of North Walkway - Oil Field - Drilling Facilities - Gate 2

    North Walkway - Oil Field - Drilling Facilities - Gate 2

    Veteran
    2 Town Majinis - Appear once you have activated both switches to open the gate.
    View location | Show on map
  • Image of North Walkway - Oil Field - Drilling Facilities - Gate 2

    North Walkway - Oil Field - Drilling Facilities - Gate 2

    Professional
    2 Town Majinis - Appear once you have activated both switches to open the gate.
    View location | Show on map

There are no locations to show for this game mode. The following game modes are applicable:

Related product

Resident Evil Village Replica House Crest Medallion Set

Buy the Resident Evil Village Replica House Crest Medallion Set on Amazon

Explore further