
Tripwire Bomb (Resident Evil 5)

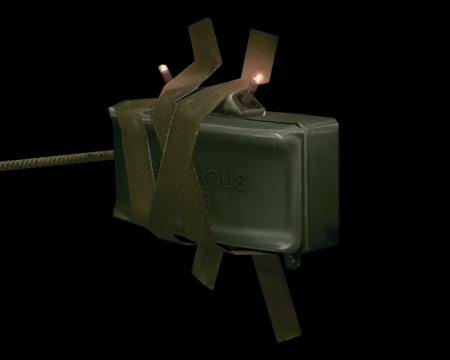
Image of Tripwire Bomb
These bombs will explode if you come into contact with the wire extending from it, and you will find these spanning tight passageways. You can destroy them by either shooting the bomb itself, or of the bomb part is not targetable then you can very carefully shoot the wire itself from a safe distance.
Category Miscellaneous object

Related product

T-Virus/G-Vaccine Prop Replica Set with Case

Buy the T-Virus/G-Vaccine Prop Replica Set with Case on Amazon

Location

Chapter 2-1

  • Image of Shipping Area - The Bridge

    Shipping Area - The Bridge

    Amateur
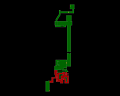
    1 × Tripwire Bomb - At the southern entrance to the shipping container maze.
    1 × Tripwire Bomb - In the north west area of the maze.
    1 × Tripwire Bomb - In the southern area of the maze.
    1 × Tripwire Bomb - In the northern area of the maze.
    View location | Show on map
  • Image of Shipping Area - The Bridge

    Shipping Area - The Bridge

    Normal
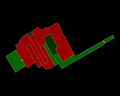
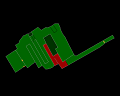
    1 × Tripwire Bomb - At the southern entrance to the shipping container maze.
    1 × Tripwire Bomb - In the north west area of the maze.
    1 × Tripwire Bomb - In the southern area of the maze.
    1 × Tripwire Bomb - In the northern area of the maze.
    View location | Show on map
  • Image of Shipping Area - The Bridge

    Shipping Area - The Bridge

    Veteran
    1 × Tripwire Bomb - At the southern entrance to the shipping container maze.
    1 × Tripwire Bomb - In the north west area of the maze.
    1 × Tripwire Bomb - In the southern area of the maze.
    1 × Tripwire Bomb - In the northern area of the maze.
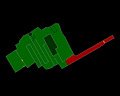
    View location | Show on map
  • Image of Shipping Area - The Bridge

    Shipping Area - The Bridge

    Professional
    1 × Tripwire Bomb - At the southern entrance to the shipping container maze.
    1 × Tripwire Bomb - In the north west area of the maze.
    1 × Tripwire Bomb - In the southern area of the maze.
    1 × Tripwire Bomb - In the northern area of the maze.
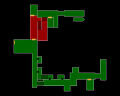
    View location | Show on map

Chapter 2-2

  • Image of Train Yard - Train Station

    Train Yard - Train Station

    Amateur
    1 × Tripwire Bomb - Between the first and second trains on the western half of the yard.
    1 × Tripwire Bomb - Between the second and third trains in the middle of the yard.
    View location | Show on map
  • Image of Train Yard - Train Station

    Train Yard - Train Station

    Normal
    1 × Tripwire Bomb - Between the first and second trains on the western half of the yard.
    1 × Tripwire Bomb - Between the second and third trains in the middle of the yard.
    View location | Show on map
  • Image of Train Yard - Train Station

    Train Yard - Train Station

    Veteran
    1 × Tripwire Bomb - Between the first and second trains on the western half of the yard.
    1 × Tripwire Bomb - Between the second and third trains in the middle of the yard.
    View location | Show on map
  • Image of Train Yard - Train Station

    Train Yard - Train Station

    Professional
    1 × Tripwire Bomb - Between the first and second trains on the western half of the yard.
    1 × Tripwire Bomb - Between the second and third trains in the middle of the yard.
    View location | Show on map
  • Image of Upper Walkway - Train Station

    Upper Walkway - Train Station

    Amateur
    1 × Tripwire Bomb - Spanning the south side of the walkway.
    View location | Show on map
  • Image of Upper Walkway - Train Station

    Upper Walkway - Train Station

    Normal
    1 × Tripwire Bomb - Spanning the south side of the walkway.
    View location | Show on map
  • Image of Upper Walkway - Train Station

    Upper Walkway - Train Station

    Veteran
    1 × Tripwire Bomb - Spanning the south side of the walkway.
    View location | Show on map
  • Image of Upper Walkway - Train Station

    Upper Walkway - Train Station

    Professional
    1 × Tripwire Bomb - Spanning the south side of the walkway.
    View location | Show on map
  • Image of Mine Entrance - Train Station

    Mine Entrance - Train Station

    Amateur
    2 × Tripwire Bomb - Spanning the track.
    View location | Show on map
  • Image of Mine Entrance - Train Station

    Mine Entrance - Train Station

    Normal
    2 × Tripwire Bomb - Spanning the track.
    View location | Show on map
  • Image of Mine Entrance - Train Station

    Mine Entrance - Train Station

    Veteran
    2 × Tripwire Bomb - Spanning the track.
    View location | Show on map
  • Image of Mine Entrance - Train Station

    Mine Entrance - Train Station

    Professional
    2 × Tripwire Bomb - Spanning the track.
    View location | Show on map

Chapter 3-2

  • Image of North Pier Access - Oil Field - Dock

    North Pier Access - Oil Field - Dock

    Amateur
    1 × Tripwire Bomb - Appears here spanning the steps after the countdown begins.
    View location | Show on map
  • Image of North Pier Access - Oil Field - Dock

    North Pier Access - Oil Field - Dock

    Normal
    1 × Tripwire Bomb - Appears here spanning the steps after the countdown begins.
    View location | Show on map
  • Image of North Pier Access - Oil Field - Dock

    North Pier Access - Oil Field - Dock

    Veteran
    1 × Tripwire Bomb - Appears here spanning the steps after the countdown begins.
    View location | Show on map
  • Image of North Pier Access - Oil Field - Dock

    North Pier Access - Oil Field - Dock

    Professional
    1 × Tripwire Bomb - Appears here spanning the steps after the countdown begins.
    View location | Show on map

There are no locations to show for this game mode. The following game modes are applicable:

Related product

Resident Evil Requiem Deluxe Edition

Buy the Resident Evil Requiem Deluxe Edition on Amazon

Explore further