Evil Resource

Handgun (Resident Evil Outbreak)

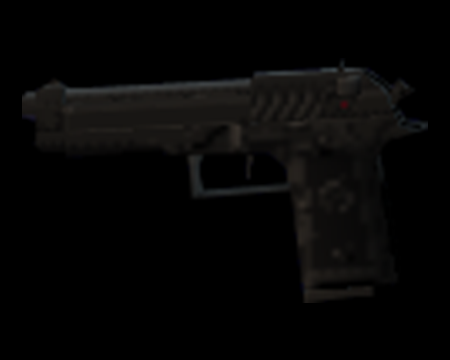
Image of Handgun

The RPD's official handgun. It uses 9mm parabellum rounds.

A lightweight automatic pistol. It fires 9mm parabellum rounds.

Its ammunition is Handgun Rounds and it is also compatible with the Handgun Magazine.
CategoryWeaponry (Firearm)

Related product

Resident Evil Village Replica House Crest Medallion Set

Resident Evil Village Replica House Crest Medallion Set

Buy the Resident Evil Village Replica House Crest Medallion Set on Amazon

Location

  • Image of J's Bar - J's Bar 1F

    J's Bar - J's Bar 1F

    Easy
    1 × Handgun - On the bar.
    View location | Show on map
  • Image of J's Bar - J's Bar 1F

    J's Bar - J's Bar 1F

    Normal
    1 × Handgun - On the bar.
    View location | Show on map
  • Image of Men's Bathroom - J's Bar 1F

    Men's Bathroom - J's Bar 1F

    Easy
    1 × Handgun - In the litter bin next to the door.
    View location | Show on map
  • Image of Men's Bathroom - J's Bar 1F

    Men's Bathroom - J's Bar 1F

    Normal
    1 × Handgun - In the litter bin next to the door.
    View location | Show on map
  • Image of Men's Bathroom - J's Bar 1F

    Men's Bathroom - J's Bar 1F

    Hard
    1 × Handgun - In the litter bin next to the door.
    View location | Show on map
  • Image of Men's Bathroom - J's Bar 1F

    Men's Bathroom - J's Bar 1F

    Very Hard
    1 × Handgun - In the litter bin next to the door.
    View location | Show on map
  • Image of Drawing Room - J's Bar 2F

    Drawing Room - J's Bar 2F

    Normal
    1 × Handgun - Inside the wardrobe at the far end of the room. You need to use Alyssa's S-Shaped Pick to unlock it.
    View location | Show on map
  • Image of Drawing Room - J's Bar 2F

    Drawing Room - J's Bar 2F

    Hard
    1 × Handgun - Inside the wardrobe at the far end of the room. You need to use Alyssa's W-Shaped Pick to unlock it.
    View location | Show on map
  • Image of Locker Room - J's Bar 2F

    Locker Room - J's Bar 2F

    Hard
    1 × Handgun - Inside the third locker from the left on the west side of the room.
    View location | Show on map
  • Image of Rooftop - J's Bar Rooftop

    Rooftop - J's Bar Rooftop

    Easy
    1 × Handgun - If you managed to get Bob to the roof, a cut-scene will occur. Afterwards his gun is available to pick up next to his body.
    View location | Show on map
  • Image of Rooftop - J's Bar Rooftop

    Rooftop - J's Bar Rooftop

    Normal
    1 × Handgun - If you managed to get Bob to the roof, a cut-scene will occur. Afterwards his gun is available to pick up next to his body.
    View location | Show on map
  • Image of Rooftop - J's Bar Rooftop

    Rooftop - J's Bar Rooftop

    Hard
    1 × Handgun - If you managed to get Bob to the roof, a cut-scene will occur. Afterwards his gun is available to pick up next to his body.
    View location | Show on map
  • Image of Rooftop - J's Bar Rooftop

    Rooftop - J's Bar Rooftop

    Very Hard
    1 × Handgun - If you managed to get Bob to the roof, a cut-scene will occur. Afterwards his gun is available to pick up next to his body.
    View location | Show on map
  • Image of In Front of J's Bar - Town 1

    In Front of J's Bar - Town 1

    Very Hard
    1 × Handgun - Inside the back of the furthest police car.
    View location | Show on map
  • Image of Behind the Residential Area - Town 2

    Behind the Residential Area - Town 2

    Hard
    1 × Handgun - In the police van.
    View location | Show on map
  • Image of Behind the Residential Area - Town 2

    Behind the Residential Area - Town 2

    Very Hard
    1 × Handgun - In the police van.
    View location | Show on map
  • Image of Main Street - Town 2

    Main Street - Town 2

    Easy
    1 × Handgun - If you speak to the police at the north end of the street multiple times, he will eventually drop this.
    View location | Show on map
  • Image of Main Street - Town 2

    Main Street - Town 2

    Normal
    1 × Handgun - If you speak to the police at the north end of the street multiple times, he will eventually drop this.
    View location | Show on map
  • Image of Main Street - Town 2

    Main Street - Town 2

    Hard
    1 × Handgun - If you speak to the police at the north end of the street multiple times, he will eventually drop this.
    View location | Show on map
  • Image of Main Street - Town 2

    Main Street - Town 2

    Very Hard
    1 × Handgun - If you speak to the police at the north end of the street multiple times, he will eventually drop this.
    View location | Show on map
  • Image of Room 302 - Hospital 3F

    Room 302 - Hospital 3F

    Easy
    1 × Handgun - Inside the metal lockers in the corner of the room.
    View location | Show on map
  • Image of Room 302 - Hospital 3F

    Room 302 - Hospital 3F

    Normal
    1 × Handgun - Inside the metal lockers in the corner of the room.
    View location | Show on map
  • Image of Room 302 - Hospital 3F

    Room 302 - Hospital 3F

    Hard
    1 × Handgun - Inside the metal lockers in the corner of the room.
    View location | Show on map
  • Image of Room 302 - Hospital 3F

    Room 302 - Hospital 3F

    Very Hard
    1 × Handgun - Inside the metal lockers in the corner of the room.
    View location | Show on map
  • Image of Nurses' Station - Hospital 2F

    Nurses' Station - Hospital 2F

    Easy
    1 × Handgun - In the open cupboard on the north wall.
    View location | Show on map
  • Image of Nurses' Station - Hospital 2F

    Nurses' Station - Hospital 2F

    Normal
    1 × Handgun - In the open cupboard on the north wall.
    View location | Show on map
  • Image of Locker Room - Hospital 1F

    Locker Room - Hospital 1F

    Easy
    1 × Handgun - In the fourth openable locker from the right. You need to use Alyssa's P-Shaped Pick to unlock it.
    View location | Show on map
  • Image of Night Reception - Hospital 1F

    Night Reception - Hospital 1F

    Hard
    1 × Handgun - On the burning boxes.
    View location | Show on map
  • Image of Reposing Room - Hospital B1F

    Reposing Room - Hospital B1F

    Very Hard
    1 × Handgun - On the floor behind the right hand side of the coroner's table.
    View location | Show on map
  • Image of Boiler Room - Apple Inn Hotel 1F

    Boiler Room - Apple Inn Hotel 1F

    Hard
    1 × Handgun - On the 1F ground next to the fire-fighter.
    View location | Show on map
  • Image of Boiler Room - Apple Inn Hotel 1F

    Boiler Room - Apple Inn Hotel 1F

    Very Hard
    1 × Handgun - On the 1F ground next to the fire-fighter.
    View location | Show on map
  • Image of Corridor - Apple Inn Hotel 1F

    Corridor - Apple Inn Hotel 1F

    Easy
    1 × Handgun - On the floor in the south west end of the corridor.
    View location | Show on map
  • Image of Corridor - Apple Inn Hotel 1F

    Corridor - Apple Inn Hotel 1F

    Normal
    1 × Handgun - On the floor in the south west end of the corridor.
    View location | Show on map
  • Image of Security Office - Apple Inn Hotel 2F

    Security Office - Apple Inn Hotel 2F

    Easy
    1 × Handgun - On the gun display rack on the east side of the room.
    View location | Show on map
  • Image of Corridor (3F) - Apple Inn Hotel 3F

    Corridor (3F) - Apple Inn Hotel 3F

    Easy
    1 × Handgun - On the floor in the south west area of the corridor, next to the section of the corridor that is on fire.
    View location | Show on map
  • Image of Corridor (3F) - Apple Inn Hotel 3F

    Corridor (3F) - Apple Inn Hotel 3F

    Normal
    1 × Handgun - On the floor in the south west area of the corridor, next to the section of the corridor that is on fire.
    View location | Show on map
  • Image of Entrance Hall - University 1F

    Entrance Hall - University 1F

    Easy
    1 × Handgun - On the desk in the middle stairway section in the centre of the hall.
    View location | Show on map
  • Image of Entrance Hall - University 1F

    Entrance Hall - University 1F

    Very Hard
    1 × Handgun - On the desk in the middle stairway section in the centre of the hall.
    View location | Show on map
  • Image of 1F Passage Elevator - University 1F

    1F Passage Elevator - University 1F

    Normal
    1 × Handgun - Inside the middle locker on the northern side of the room. You need to use Alyssa's S-Shaped Pick to unlock it.
    View location | Show on map
  • Image of 1F Passage Elevator - University 1F

    1F Passage Elevator - University 1F

    Hard
    1 × Handgun - Inside the middle locker on the northern side of the room. You need to use Alyssa's W-Shaped Pick to unlock it.
    View location | Show on map
  • Image of Student Affairs Office - University 1F

    Student Affairs Office - University 1F

    Easy
    1 × Handgun - Inside the chest of draws at the filling counter desk on the south side of the room.
    View location | Show on map
  • Image of Student Affairs Office - University 1F

    Student Affairs Office - University 1F

    Normal
    1 × Handgun - Inside the chest of draws at the filling counter desk on the south side of the room.
    View location | Show on map
  • Image of Student Affairs Office - University 1F

    Student Affairs Office - University 1F

    Hard
    1 × Handgun - Inside the chest of draws at the filling counter desk on the south side of the room.
    View location | Show on map
  • Image of Drawing Room - University 2F

    Drawing Room - University 2F

    Easy
    1 × Handgun - On the coffee table between the two sofas.
    View location | Show on map
  • Image of Drawing Room - University 2F

    Drawing Room - University 2F

    Normal
    1 × Handgun - On the coffee table between the two sofas.
    View location | Show on map
  • Image of Testing Passage A - University 1F

    Testing Passage A - University 1F

    Hard
    1 × Handgun - On the 2F in the middle of the metal walkway.
    View location | Show on map
  • Image of Water Works Management Office - University B3F

    Water Works Management Office - University B3F

    Easy
    1 × Handgun - On the floor directly in front of the northern door.
    View location | Show on map
  • Image of Water Works Management Office - University B3F

    Water Works Management Office - University B3F

    Normal
    1 × Handgun - On the floor directly in front of the northern door.
    View location | Show on map
  • Image of Water Works Management Office - University B3F

    Water Works Management Office - University B3F

    Hard
    1 × Handgun - On the floor directly in front of the northern door.
    View location | Show on map
  • Image of Emission Tower Access Passage - Emission Tower Lower Level

    Emission Tower Access Passage - Emission Tower Lower Level

    Easy
    1 × Handgun - On the shelves at the east end of the passage.
    View location | Show on map
  • Image of Emission Tower Access Passage - Emission Tower Lower Level

    Emission Tower Access Passage - Emission Tower Lower Level

    Normal
    1 × Handgun - On the shelves at the east end of the passage.
    View location | Show on map
  • Image of Emission Tower Access Passage - Emission Tower Lower Level

    Emission Tower Access Passage - Emission Tower Lower Level

    Hard
    1 × Handgun - On the shelves at the east end of the passage.
    View location | Show on map
  • Image of Second Hall - University 3F

    Second Hall - University 3F

    Easy
    1 × Handgun - After viewing the cut-scene, it is next to the body of the dead doctor.
    View location | Show on map
  • Image of Second Hall - University 3F

    Second Hall - University 3F

    Normal
    1 × Handgun - After viewing the cut-scene, it is next to the body of the dead doctor.
    View location | Show on map
  • Image of Second Hall - University 3F

    Second Hall - University 3F

    Hard
    1 × Handgun - After viewing the cut-scene, it is next to the body of the dead doctor.
    View location | Show on map
  • Image of Second Hall - University 3F

    Second Hall - University 3F

    Very Hard
    1 × Handgun - After viewing the cut-scene, it is next to the body of the dead doctor.
    View location | Show on map
  • Image of Unloading Passage - University Yard 1

    Unloading Passage - University Yard 1

    Easy
    1 × Handgun - On the ground next to the north east door.
    View location | Show on map
  • Image of Unloading Passage - University Yard 1

    Unloading Passage - University Yard 1

    Normal
    1 × Handgun - On the ground next to the north east door.
    View location | Show on map
  • Image of Unloading Passage - University Yard 1

    Unloading Passage - University Yard 1

    Hard
    1 × Handgun - On the ground next to the north east door.
    View location | Show on map
  • Image of Unloading Passage - University Yard 1

    Unloading Passage - University Yard 1

    Very Hard
    1 × Handgun - On the ground next to the north east door.
    View location | Show on map
  • Image of Front Square - University Yard 2

    Front Square - University Yard 2

    Easy
    1 × Handgun - On the ground next to the tank in the north east corner.
    View location | Show on map
  • Image of Front Square - University Yard 2

    Front Square - University Yard 2

    Normal
    1 × Handgun - On the ground next to the tank in the north east corner.
    View location | Show on map
  • Image of Front Square - University Yard 2

    Front Square - University Yard 2

    Hard
    1 × Handgun - On the ground next to the tank in the north east corner.
    View location | Show on map
  • Image of Front Square - University Yard 2

    Front Square - University Yard 2

    Very Hard
    1 × Handgun - On the ground next to the tank in the north east corner.
    View location | Show on map

There are no locations to show for this game mode. The following game modes are applicable:

Related product

Resident Evil Book 4 - Underworld

Resident Evil Book 4 - Underworld

Buy the Resident Evil Book 4 - Underworld by S.D. Perry on Amazon

Explore further