Evil Resource

Typewriter (Resident Evil Outbreak File #2)

Image of Typewriter
An ordinary typewriter.

These allow you to save your progress.
CategoryMiscellaneous object

Related product

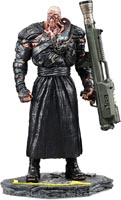
Resident Evil Nemesis Statue

Resident Evil Nemesis Statue

Buy the Resident Evil Nemesis 12-inch Statue on Amazon

Location

  • Image of Supply room - Raccoon City Zoo

    Supply room - Raccoon City Zoo

    Easy
    On the shelves on the east side of the room.
    View location | Show on map
  • Image of Supply room - Raccoon City Zoo

    Supply room - Raccoon City Zoo

    Normal
    On the shelves on the east side of the room.
    View location | Show on map
  • Image of Supply room - Raccoon City Zoo

    Supply room - Raccoon City Zoo

    Hard
    On the shelves on the east side of the room.
    View location | Show on map
  • Image of Supply room - Raccoon City Zoo

    Supply room - Raccoon City Zoo

    Very Hard
    On the shelves on the east side of the room.
    View location | Show on map
  • Image of Inner office - Raccoon City Zoo

    Inner office - Raccoon City Zoo

    Easy
    Inside the eastern room. On the table in the south east corner of the room.
    View location | Show on map
  • Image of Inner office - Raccoon City Zoo

    Inner office - Raccoon City Zoo

    Normal
    Inside the eastern room. On the table in the south east corner of the room.
    View location | Show on map
  • Image of Inner office - Raccoon City Zoo

    Inner office - Raccoon City Zoo

    Hard
    Inside the eastern room. On the table in the south east corner of the room.
    View location | Show on map
  • Image of Inner office - Raccoon City Zoo

    Inner office - Raccoon City Zoo

    Very Hard
    Inside the eastern room. On the table in the south east corner of the room.
    View location | Show on map
  • Image of Women's restroom (west) - Raccoon City subway - Subway B1F

    Women's restroom (west) - Raccoon City subway - Subway B1F

    Easy
    Next to the rightmost toilet stall.
    View location | Show on map
  • Image of Women's restroom (west) - Raccoon City subway - Subway B1F

    Women's restroom (west) - Raccoon City subway - Subway B1F

    Normal
    Next to the rightmost toilet stall.
    View location | Show on map
  • Image of Women's restroom (west) - Raccoon City subway - Subway B1F

    Women's restroom (west) - Raccoon City subway - Subway B1F

    Hard
    Next to the rightmost toilet stall.
    View location | Show on map
  • Image of Women's restroom (west) - Raccoon City subway - Subway B1F

    Women's restroom (west) - Raccoon City subway - Subway B1F

    Very Hard
    Next to the rightmost toilet stall.
    View location | Show on map
  • Image of Subway car - Raccoon City subway - Subway B1F (Platform)

    Subway car - Raccoon City subway - Subway B1F (Platform)

    Easy
    On the seats in the north west corner of the carriage.
    View location | Show on map
  • Image of Subway car - Raccoon City subway - Subway B1F (Platform)

    Subway car - Raccoon City subway - Subway B1F (Platform)

    Normal
    On the seats in the north west corner of the carriage.
    View location | Show on map
  • Image of Subway car - Raccoon City subway - Subway B1F (Platform)

    Subway car - Raccoon City subway - Subway B1F (Platform)

    Hard
    On the seats in the north west corner of the carriage.
    View location | Show on map
  • Image of Subway car - Raccoon City subway - Subway B1F (Platform)

    Subway car - Raccoon City subway - Subway B1F (Platform)

    Very Hard
    On the seats in the north west corner of the carriage.
    View location | Show on map
  • Image of Room 201 - Hospital 2F

    Room 201 - Hospital 2F

    Easy
    On the bed in the north west corner of the room.
    View location | Show on map
  • Image of Room 201 - Hospital 2F

    Room 201 - Hospital 2F

    Normal
    On the bed in the north west corner of the room.
    View location | Show on map
  • Image of Room 201 - Hospital 2F

    Room 201 - Hospital 2F

    Hard
    On the bed in the north west corner of the room.
    View location | Show on map
  • Image of Room 201 - Hospital 2F

    Room 201 - Hospital 2F

    Very Hard
    On the bed in the north west corner of the room.
    View location | Show on map
  • Image of Main Hall - Police station 1F

    Main Hall - Police station 1F

    Easy
    On the bench in the north east corner of the room.
    View location | Show on map
  • Image of Main Hall - Police station 1F

    Main Hall - Police station 1F

    Normal
    On the bench in the north east corner of the room.
    View location | Show on map
  • Image of Main Hall - Police station 1F

    Main Hall - Police station 1F

    Hard
    On the bench in the north east corner of the room.
    View location | Show on map
  • Image of Main Hall - Police station 1F

    Main Hall - Police station 1F

    Very Hard
    On the bench in the north east corner of the room.
    View location | Show on map
  • Image of Stairwell - Umbrella research facility

    Stairwell - Umbrella research facility

    Easy
    On a small pedestal near the top of the stairs.
    View location | Show on map
  • Image of Stairwell - Umbrella research facility

    Stairwell - Umbrella research facility

    Normal
    On a small pedestal near the top of the stairs.
    View location | Show on map
  • Image of Stairwell - Umbrella research facility

    Stairwell - Umbrella research facility

    Hard
    On a small pedestal near the top of the stairs.
    View location | Show on map
  • Image of Stairwell - Umbrella research facility

    Stairwell - Umbrella research facility

    Very Hard
    On a small pedestal near the top of the stairs.
    View location | Show on map
  • Image of Break room - Water treatment plant - Basement 1F

    Break room - Water treatment plant - Basement 1F

    Easy
    On the table on the south side of the room.
    View location | Show on map
  • Image of Break room - Water treatment plant - Basement 1F

    Break room - Water treatment plant - Basement 1F

    Normal
    On the table on the south side of the room.
    View location | Show on map
  • Image of Break room - Water treatment plant - Basement 1F

    Break room - Water treatment plant - Basement 1F

    Hard
    On the table on the south side of the room.
    View location | Show on map
  • Image of Break room - Water treatment plant - Basement 1F

    Break room - Water treatment plant - Basement 1F

    Very Hard
    On the table on the south side of the room.
    View location | Show on map
  • Image of Apple Inn front lobby - Urban area downtown

    Apple Inn front lobby - Urban area downtown

    Easy
    On the reception desk on the north side of the room.
    View location | Show on map
  • Image of Apple Inn front lobby - Urban area downtown

    Apple Inn front lobby - Urban area downtown

    Normal
    On the reception desk on the north side of the room.
    View location | Show on map
  • Image of Apple Inn front lobby - Urban area downtown

    Apple Inn front lobby - Urban area downtown

    Hard
    On the reception desk on the north side of the room.
    View location | Show on map
  • Image of Apple Inn front lobby - Urban area downtown

    Apple Inn front lobby - Urban area downtown

    Very Hard
    On the reception desk on the north side of the room.
    View location | Show on map

There are no locations to show for this game mode. The following game modes are applicable:

Related product

Resident Evil 2 Limited Edition R.P.D Welcome Pack

Resident Evil 2 Limited Edition R.P.D Welcome Pack

Buy the Resident Evil 2 Limited Edition R.P.D Welcome Pack on Amazon

Explore further