Evil Resource

Shotgun Shells (Resident Evil 3 Remake)

Image of Shotgun Shells

12-gauge shotgun shells packed with 18.5mm pellets.

A box of shotgun shells.

These are used with the M3 Shotgun.
CategoryWeaponry (Ammo)

Related product

Welcome to Raccoon City Sign

Welcome to Raccoon City Sign

Buy the Welcome to Raccoon City Sign on Amazon

Statistics

Game modeOccurrencesSum total
Assisted13-14 [1]97-103 [1]
Standard15-16 [1]106-112 [1]
Hardcore15-16 [1]105-111 [1]
Nightmare15-16 [1]103-109 [1]
Inferno13-14 [1]97-103 [1]
[1] Exact number can depend on certain game conditions.

Location

  • Image of Garage - Downtown

    Garage - Downtown

    Assisted
    Shotgun Shells (1×4) - On the small workbench next to the steps.
    View location | Show on map
  • Image of Garage - Downtown

    Garage - Downtown

    Standard
    Shotgun Shells (1×4) - On the small workbench next to the steps.
    View location | Show on map
  • Image of Garage - Downtown

    Garage - Downtown

    Hardcore
    Shotgun Shells (1×4) - On the small workbench next to the steps.
    View location | Show on map
  • Image of Garage - Downtown

    Garage - Downtown

    Nightmare
    Shotgun Shells (1×4) - On the small workbench next to the steps.
    View location | Show on map
  • Image of Garage - Downtown

    Garage - Downtown

    Inferno
    Shotgun Shells (1×4) - On the small workbench next to the steps.
    View location | Show on map
  • Image of Side Alley - Downtown

    Side Alley - Downtown

    Assisted
    Shotgun Shells (1×5) - Inside the weapons case on the table in the south west corner of the alley.
    View location | Show on map
  • Image of Side Alley - Downtown

    Side Alley - Downtown

    Standard
    Shotgun Shells (1×5) - Inside the weapons case on the table in the south west corner of the alley.
    View location | Show on map
  • Image of Side Alley - Downtown

    Side Alley - Downtown

    Hardcore
    Shotgun Shells (1×5) - Inside the weapons case on the table in the south west corner of the alley.
    View location | Show on map
  • Image of Side Alley - Downtown

    Side Alley - Downtown

    Nightmare
    Shotgun Shells (1×5) - Inside the weapons case on the table in the south west corner of the alley.
    View location | Show on map
  • Image of Side Alley - Downtown

    Side Alley - Downtown

    Inferno
    Shotgun Shells (1×5) - Inside the weapons case on the table in the south west corner of the alley.
    View location | Show on map
  • Image of Control Room - Subway Office

    Control Room - Subway Office

    Assisted
    Shotgun Shells (1×5) - Inside the weapons case in the north west corner of the room.
    View location | Show on map
  • Image of Control Room - Subway Office

    Control Room - Subway Office

    Standard
    Shotgun Shells (1×5) - Inside the weapons case in the north west corner of the room.
    View location | Show on map
  • Image of Control Room - Subway Office

    Control Room - Subway Office

    Hardcore
    Shotgun Shells (1×5) - Inside the weapons case in the north west corner of the room.
    View location | Show on map
  • Image of Control Room - Subway Office

    Control Room - Subway Office

    Nightmare
    Shotgun Shells (1×5) - Inside the weapons case in the north west corner of the room.
    View location | Show on map
  • Image of Control Room - Subway Office

    Control Room - Subway Office

    Inferno
    Shotgun Shells (1×5) - Inside the weapons case in the north west corner of the room.
    View location | Show on map
  • Image of Subway Ticket Gate - Downtown

    Subway Ticket Gate - Downtown

    Assisted
    Shotgun Shells (1×5) - Inside the weapons case in south west corner. You need to use the Lock Pick to open it.
    View location | Show on map
  • Image of Subway Ticket Gate - Downtown

    Subway Ticket Gate - Downtown

    Standard
    Shotgun Shells (1×5) - Inside the weapons case in south west corner. You need to use the Lock Pick to open it.
    View location | Show on map
  • Image of Subway Ticket Gate - Downtown

    Subway Ticket Gate - Downtown

    Hardcore
    Shotgun Shells (1×5) - Inside the weapons case in south west corner. You need to use the Lock Pick to open it.
    View location | Show on map
  • Image of Subway Ticket Gate - Downtown

    Subway Ticket Gate - Downtown

    Nightmare
    Shotgun Shells (1×5) - Inside the weapons case in south west corner. You need to use the Lock Pick to open it.
    View location | Show on map
  • Image of Subway Ticket Gate - Downtown

    Subway Ticket Gate - Downtown

    Inferno
    Shotgun Shells (1×5) - Inside the weapons case in south west corner. You need to use the Lock Pick to open it.
    View location | Show on map
  • Image of Manager's Office - Sewers Lower Waterway

    Manager's Office - Sewers Lower Waterway

    Assisted
    Shotgun Shells (1×4) - Inside the middle-left locker on the west side of the room.
    View location | Show on map
  • Image of Manager's Office - Sewers Lower Waterway

    Manager's Office - Sewers Lower Waterway

    Standard
    Shotgun Shells (1×4) - Inside the middle-left locker on the west side of the room.
    View location | Show on map
  • Image of Manager's Office - Sewers Lower Waterway

    Manager's Office - Sewers Lower Waterway

    Hardcore
    Shotgun Shells (1×4) - Inside the middle-left locker on the west side of the room.
    View location | Show on map
  • Image of Manager's Office - Sewers Lower Waterway

    Manager's Office - Sewers Lower Waterway

    Nightmare
    Shotgun Shells (1×4) - Inside the middle-left locker on the west side of the room.
    View location | Show on map
  • Image of Manager's Office - Sewers Lower Waterway

    Manager's Office - Sewers Lower Waterway

    Inferno
    Shotgun Shells (1×4) - Inside the middle-left locker on the west side of the room.
    View location | Show on map
  • Image of North West Tunnel - Sewers Lower Waterway

    North West Tunnel - Sewers Lower Waterway

    Assisted
    Shotgun Shells (1×4) - On the ground next to the dead body in the open area at the end of the tunnel.
    View location | Show on map
  • Image of North West Tunnel - Sewers Lower Waterway

    North West Tunnel - Sewers Lower Waterway

    Standard
    Shotgun Shells (1×4) - On the ground next to the dead body in the open area at the end of the tunnel.
    View location | Show on map
  • Image of North West Tunnel - Sewers Lower Waterway

    North West Tunnel - Sewers Lower Waterway

    Hardcore
    Shotgun Shells (1×4) - On the ground next to the dead body in the open area at the end of the tunnel.
    View location | Show on map
  • Image of North West Tunnel - Sewers Lower Waterway

    North West Tunnel - Sewers Lower Waterway

    Nightmare
    Shotgun Shells (1×4) - On the ground next to the dead body in the open area at the end of the tunnel.
    View location | Show on map
  • Image of North West Tunnel - Sewers Lower Waterway

    North West Tunnel - Sewers Lower Waterway

    Inferno
    Shotgun Shells (1×4) - On the ground next to the dead body in the open area at the end of the tunnel.
    View location | Show on map
  • Image of Roof - Demolition Site Roof

    Roof - Demolition Site Roof

    Assisted
    Shotgun Shells (1×7) - On the large portable generator in the north east area of the roof.
    View location | Show on map
  • Image of Roof - Demolition Site Roof

    Roof - Demolition Site Roof

    Standard
    Shotgun Shells (1×7) - On the large portable generator in the north east area of the roof.
    View location | Show on map
  • Image of Roof - Demolition Site Roof

    Roof - Demolition Site Roof

    Hardcore
    Shotgun Shells (1×7) - On the large portable generator in the north east area of the roof.
    View location | Show on map
  • Image of Roof - Demolition Site Roof

    Roof - Demolition Site Roof

    Nightmare
    Shotgun Shells (1×7) - On the large portable generator in the north east area of the roof.
    View location | Show on map
  • Image of Roof - Demolition Site Roof

    Roof - Demolition Site Roof

    Inferno
    Shotgun Shells (1×7) - On the large portable generator in the north east area of the roof.
    View location | Show on map
  • Image of Nemesis

    Nemesis

    Assisted
    Shotgun Shells (1×6) - Inside the Supply Case held by Nemesis during the time you encounter him in the Shopping Plaza after exploring the Demolition Site.
  • Image of Nemesis

    Nemesis

    Standard
    Shotgun Shells (1×6) - Inside the Supply Case held by Nemesis during the time you encounter him in the Shopping Plaza after exploring the Demolition Site.
  • Image of Nemesis

    Nemesis

    Hardcore
    Shotgun Shells (1×6) - Inside the Supply Case held by Nemesis during the time you encounter him in the Shopping Plaza after exploring the Demolition Site.
  • Image of Nemesis

    Nemesis

    Nightmare
    Shotgun Shells (1×6) - Inside the Supply Case held by Nemesis during the time you encounter him in the Shopping Plaza after exploring the Demolition Site.
  • Image of Nemesis

    Nemesis

    Inferno
    Shotgun Shells (1×6) - Inside the Supply Case held by Nemesis during the time you encounter him in the Shopping Plaza after exploring the Demolition Site.
  • Image of Plaza - Clock Tower Plaza

    Plaza - Clock Tower Plaza

    Assisted
    Shotgun Shells (1×14) - Inside the stack of weapon cases in the north west corner of the plaza.
    Shotgun Shells (1×16) - On the passenger seat of the van in the north west corner of the plaza.
    View location | Show on map
  • Image of Plaza - Clock Tower Plaza

    Plaza - Clock Tower Plaza

    Standard
    Shotgun Shells (1×14) - Inside the stack of weapon cases in the north west corner of the plaza.
    Shotgun Shells (1×16) - On the passenger seat of the van in the north west corner of the plaza.
    View location | Show on map
  • Image of Plaza - Clock Tower Plaza

    Plaza - Clock Tower Plaza

    Hardcore
    Shotgun Shells (1×14) - Inside the stack of weapon cases in the north west corner of the plaza.
    Shotgun Shells (1×16) - On the passenger seat of the van in the north west corner of the plaza.
    View location | Show on map
  • Image of Plaza - Clock Tower Plaza

    Plaza - Clock Tower Plaza

    Nightmare
    Shotgun Shells (1×14) - Inside the stack of weapon cases in the north west corner of the plaza.
    Shotgun Shells (1×16) - On the passenger seat of the van in the north west corner of the plaza.
    View location | Show on map
  • Image of Plaza - Clock Tower Plaza

    Plaza - Clock Tower Plaza

    Inferno
    Shotgun Shells (1×14) - Inside the stack of weapon cases in the north west corner of the plaza.
    Shotgun Shells (1×16) - On the passenger seat of the van in the north west corner of the plaza.
    View location | Show on map
  • Image of Staff Room - Hospital 2F

    Staff Room - Hospital 2F

    Assisted
    Shotgun Shells (1×12) - Inside the locker locker on the west side of the main room. You need to use the Lock Pick to open it.
    View location | Show on map
  • Image of Staff Room - Hospital 2F

    Staff Room - Hospital 2F

    Standard
    Shotgun Shells (1×12) - Inside the locker locker on the west side of the main room. You need to use the Lock Pick to open it.
    View location | Show on map
  • Image of Staff Room - Hospital 2F

    Staff Room - Hospital 2F

    Hardcore
    Shotgun Shells (1×12) - Inside the locker locker on the west side of the main room. You need to use the Lock Pick to open it.
    View location | Show on map
  • Image of Staff Room - Hospital 2F

    Staff Room - Hospital 2F

    Nightmare
    Shotgun Shells (1×12) - Inside the locker locker on the west side of the main room. You need to use the Lock Pick to open it.
    View location | Show on map
  • Image of Staff Room - Hospital 2F

    Staff Room - Hospital 2F

    Inferno
    Shotgun Shells (1×12) - Inside the locker locker on the west side of the main room. You need to use the Lock Pick to open it.
    View location | Show on map
  • Image of Warehouse - Underground Storage

    Warehouse - Underground Storage

    Standard
    Shotgun Shells (1×3) - Inside the breakable wooden crate on the north side of the north west platform.
    View location | Show on map
  • Image of Warehouse - Underground Storage

    Warehouse - Underground Storage

    Hardcore
    Shotgun Shells (1×2) - Inside the breakable wooden crate on the north side of the north west platform.
    View location | Show on map
  • Image of Warehouse - Underground Storage

    Warehouse - Underground Storage

    Nightmare
    Shotgun Shells (1×2) - Inside the breakable wooden crate on the north side of the north west platform.
    View location | Show on map
  • Image of Warehouse - Underground Storage

    Warehouse - Underground Storage

    Inferno
    Shotgun Shells (1×2) - Inside the breakable wooden crate on the north side of the north west platform.
    View location | Show on map
  • Image of Small Storage Room - Underground Storage

    Small Storage Room - Underground Storage

    Assisted
    Shotgun Shells (1×3) - On the stack of cardboard boxes on the east side of the room.
    View location | Show on map
  • Image of Small Storage Room - Underground Storage

    Small Storage Room - Underground Storage

    Standard
    Shotgun Shells (1×3) - On the stack of cardboard boxes on the east side of the room.
    View location | Show on map
  • Image of Small Storage Room - Underground Storage

    Small Storage Room - Underground Storage

    Hardcore
    Shotgun Shells (1×3) - On the stack of cardboard boxes on the east side of the room.
    View location | Show on map
  • Image of Small Storage Room - Underground Storage

    Small Storage Room - Underground Storage

    Nightmare
    Shotgun Shells (1×3) - On the stack of cardboard boxes on the east side of the room.
    View location | Show on map
  • Image of Small Storage Room - Underground Storage

    Small Storage Room - Underground Storage

    Inferno
    Shotgun Shells (1×3) - On the stack of cardboard boxes on the east side of the room.
    View location | Show on map
  • Image of Laboratory Hallway 2F - NEST 2 2F

    Laboratory Hallway 2F - NEST 2 2F

    Standard
    Shotgun Shells (1×6) - Inside the breakable wooden crate in the corner of the south west area of the corridor.
    View location | Show on map
  • Image of Laboratory Hallway 2F - NEST 2 2F

    Laboratory Hallway 2F - NEST 2 2F

    Hardcore
    Shotgun Shells (1×6) - Inside the breakable wooden crate in the corner of the south west area of the corridor.
    View location | Show on map
  • Image of Laboratory Hallway 2F - NEST 2 2F

    Laboratory Hallway 2F - NEST 2 2F

    Nightmare
    Shotgun Shells (1×4) - Inside the breakable wooden crate in the corner of the south west area of the corridor.
    View location | Show on map
  • Image of Experiment Storage - NEST 2 1F

    Experiment Storage - NEST 2 1F

    Assisted
    Shotgun Shells (1×2) - On the storage cases in the north east corner of the room.
    View location | Show on map
  • Image of Experiment Storage - NEST 2 1F

    Experiment Storage - NEST 2 1F

    Standard
    Shotgun Shells (1×2) - On the storage cases in the north east corner of the room.
    View location | Show on map
  • Image of Experiment Storage - NEST 2 1F

    Experiment Storage - NEST 2 1F

    Hardcore
    Shotgun Shells (1×2) - On the storage cases in the north east corner of the room.
    View location | Show on map
  • Image of Experiment Storage - NEST 2 1F

    Experiment Storage - NEST 2 1F

    Nightmare
    Shotgun Shells (1×2) - On the storage cases in the north east corner of the room.
    View location | Show on map
  • Image of Disposal Chamber - NEST 2 B2

    Disposal Chamber - NEST 2 B2

    Assisted
    Shotgun Shells (1×16) - On the ground on the south west edge of the area.
    View location | Show on map
  • Image of Disposal Chamber - NEST 2 B2

    Disposal Chamber - NEST 2 B2

    Standard
    Shotgun Shells (1×16) - On the ground on the south west edge of the area.
    View location | Show on map
  • Image of Disposal Chamber - NEST 2 B2

    Disposal Chamber - NEST 2 B2

    Hardcore
    Shotgun Shells (1×16) - On the ground on the south west edge of the area.
    View location | Show on map
  • Image of Disposal Chamber - NEST 2 B2

    Disposal Chamber - NEST 2 B2

    Nightmare
    Shotgun Shells (1×16) - On the ground on the south west edge of the area.
    View location | Show on map
  • Image of Disposal Chamber - NEST 2 B2

    Disposal Chamber - NEST 2 B2

    Inferno
    Shotgun Shells (1×16) - On the ground on the south west edge of the area.
    View location | Show on map

There are no locations to show for this game mode. The following game modes are applicable:

Related product

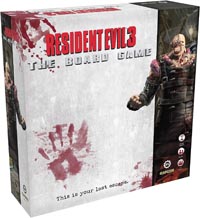
Resident Evil 3 Board Game

Resident Evil 3 Board Game

Buy the Resident Evil 3 Board Game on Amazon

Explore further