Evil Resource

Explosive B (Resident Evil 3 Remake)

Image of Explosive B

Combine with explosive A to create flame rounds, or combine with another explosive B to make acid rounds.

A small container of explosive used to create ammunition.

You can use this in the following combinations:
CategoryWeaponry (Resource)

Related product

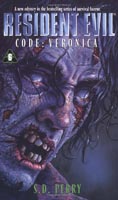
Resident Evil Book 6 - Code: Veronica

Resident Evil Book 6 - Code: Veronica

Buy the Resident Evil Book 6 - Code: Veronica by S.D. Perry on Amazon

Statistics

Game modeSum total
Assisted6
Standard6
Hardcore7
Nightmare7
Inferno5

Location

  • Image of Office - Sewers Lower Waterway

    Office - Sewers Lower Waterway

    Assisted
    1 × Explosive B - On the oil drum in the north east corner of the room.
    View location | Show on map
  • Image of Office - Sewers Lower Waterway

    Office - Sewers Lower Waterway

    Standard
    1 × Explosive B - On the oil drum in the north east corner of the room.
    View location | Show on map
  • Image of Office - Sewers Lower Waterway

    Office - Sewers Lower Waterway

    Hardcore
    1 × Explosive B - On the oil drum in the north east corner of the room.
    View location | Show on map
  • Image of Office - Sewers Lower Waterway

    Office - Sewers Lower Waterway

    Nightmare
    1 × Explosive B - On the oil drum in the north east corner of the room.
    View location | Show on map
  • Image of Office - Sewers Lower Waterway

    Office - Sewers Lower Waterway

    Inferno
    1 × Explosive B - On the oil drum in the north east corner of the room.
    View location | Show on map
  • Image of Gun Shop - Downtown

    Gun Shop - Downtown

    Assisted
    1 × Explosive B - In the wooden display cabinet opposite the entrance.
    View location | Show on map
  • Image of Gun Shop - Downtown

    Gun Shop - Downtown

    Standard
    1 × Explosive B - In the wooden display cabinet opposite the entrance.
    View location | Show on map
  • Image of Gun Shop - Downtown

    Gun Shop - Downtown

    Hardcore
    1 × Explosive B - In the wooden display cabinet opposite the entrance.
    View location | Show on map
  • Image of Gun Shop - Downtown

    Gun Shop - Downtown

    Nightmare
    1 × Explosive B - In the wooden display cabinet opposite the entrance.
    View location | Show on map
  • Image of Research Laboratory - Hospital 1F

    Research Laboratory - Hospital 1F

    Assisted
    1 × Explosive B - Appears here after regaining control of Jill. On the desk on the east side of the room, next to the dead body of Doctor Bard.
    View location | Show on map
  • Image of Research Laboratory - Hospital 1F

    Research Laboratory - Hospital 1F

    Standard
    1 × Explosive B - Appears here after regaining control of Jill. On the desk on the east side of the room, next to the dead body of Doctor Bard.
    View location | Show on map
  • Image of Research Laboratory - Hospital 1F

    Research Laboratory - Hospital 1F

    Hardcore
    1 × Explosive B - Appears here after regaining control of Jill. On the desk on the east side of the room, next to the dead body of Doctor Bard.
    View location | Show on map
  • Image of Research Laboratory - Hospital 1F

    Research Laboratory - Hospital 1F

    Nightmare
    1 × Explosive B - Appears here after regaining control of Jill. On the desk on the east side of the room, next to the dead body of Doctor Bard.
    View location | Show on map
  • Image of Research Laboratory - Hospital 1F

    Research Laboratory - Hospital 1F

    Inferno
    1 × Explosive B - Appears here after regaining control of Jill. On the desk on the east side of the room, next to the dead body of Doctor Bard.
    View location | Show on map
  • Image of Loading Bay - Hospital 1F

    Loading Bay - Hospital 1F

    Assisted
    1 × Explosive B - On the containers on the south side of the room.
    View location | Show on map
  • Image of Loading Bay - Hospital 1F

    Loading Bay - Hospital 1F

    Standard
    1 × Explosive B - On the containers on the south side of the room.
    View location | Show on map
  • Image of Loading Bay - Hospital 1F

    Loading Bay - Hospital 1F

    Hardcore
    1 × Explosive B - On the containers on the south side of the room.
    View location | Show on map
  • Image of Loading Bay - Hospital 1F

    Loading Bay - Hospital 1F

    Nightmare
    1 × Explosive B - On the containers on the south side of the room.
    View location | Show on map
  • Image of Server Room 2F - NEST 2 1F

    Server Room 2F - NEST 2 1F

    Inferno
    1 × Explosive B - On the stack of cases next to the server cabinet on the south side of the room.
    View location | Show on map
  • Image of Bioweapon Incubation Room - NEST 2 B1

    Bioweapon Incubation Room - NEST 2 B1

    Assisted
    1 × Explosive B - Inside the weapons case on the adjustable trolley on the south half of the room.
    View location | Show on map
  • Image of Bioweapon Incubation Room - NEST 2 B1

    Bioweapon Incubation Room - NEST 2 B1

    Standard
    1 × Explosive B - Inside the weapons case on the adjustable trolley on the south half of the room.
    View location | Show on map
  • Image of Bioweapon Incubation Room - NEST 2 B1

    Bioweapon Incubation Room - NEST 2 B1

    Hardcore
    1 × Explosive B - Inside the weapons case on the adjustable trolley on the south half of the room.
    View location | Show on map
  • Image of Bioweapon Incubation Room - NEST 2 B1

    Bioweapon Incubation Room - NEST 2 B1

    Nightmare
    1 × Explosive B - Inside the weapons case on the adjustable trolley on the south half of the room.
    View location | Show on map
  • Image of Walkway - NEST 2 2F

    Walkway - NEST 2 2F

    Assisted
    1 × Explosive B - Inside the weapons case on the adjustable trolley on the south side of the room.
    View location | Show on map
  • Image of Walkway - NEST 2 2F

    Walkway - NEST 2 2F

    Standard
    1 × Explosive B - Inside the weapons case on the adjustable trolley on the south side of the room.
    View location | Show on map
  • Image of Walkway - NEST 2 2F

    Walkway - NEST 2 2F

    Hardcore
    1 × Explosive B - Inside the weapons case on the adjustable trolley on the south side of the room.
    View location | Show on map
  • Image of Walkway - NEST 2 2F

    Walkway - NEST 2 2F

    Nightmare
    1 × Explosive B - Inside the weapons case on the adjustable trolley on the south side of the room.
    View location | Show on map
  • Image of Walkway - NEST 2 2F

    Walkway - NEST 2 2F

    Inferno
    1 × Explosive B - Inside the weapons case on the adjustable trolley on the south side of the room.
    View location | Show on map
  • Image of Worker's Break Room - NEST 2 2F

    Worker's Break Room - NEST 2 2F

    Hardcore
    1 × Explosive B - Inside the breakable wooden crate in the south west corner of the room.
    View location | Show on map
  • Image of Worker's Break Room - NEST 2 2F

    Worker's Break Room - NEST 2 2F

    Nightmare
    1 × Explosive B - Inside the breakable wooden crate in the south west corner of the room.
    View location | Show on map
  • Image of Worker's Break Room - NEST 2 2F

    Worker's Break Room - NEST 2 2F

    Inferno
    1 × Explosive B - Inside the breakable wooden crate in the south west corner of the room.
    View location | Show on map

There are no locations to show for this game mode. The following game modes are applicable:

Related product

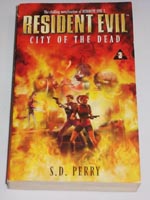
Resident Evil Book 3 - City of the Dead

Resident Evil Book 3 - City of the Dead

Buy the Resident Evil Book 3 - City of the Dead by S.D. Perry on Amazon

Explore further