
Break Room Hallway - Police Station 1F
Leon (Standard)Shotgun Shells (1×2) - On the metal shelves above the stairs in the north west corner of the hallway.


12-gauge shotgun shells, 18.1mm in diameter.
| Category | Weaponry (Ammo) |
|---|
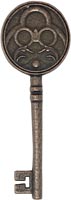 | Resident Evil Village Replica Iron Insignia KeyBuy the Resident Evil Village Replica Iron Insignia Key on Amazon |
|---|
| Game mode | Occurrences | Sum total |
|---|---|---|
| Leon (Standard) | 16 | 48 |
| Leon [2nd] (Standard) | 16 | 48 |
| Leon (Hardcore) | 16 | 48 |
| Leon [2nd] (Hardcore) | 16 | 48 |


")
There are no locations to show for this game mode. The following game modes are applicable:
 | Resident Evil Book 4 - UnderworldBuy the Resident Evil Book 4 - Underworld by S.D. Perry on Amazon |
|---|