Evil Resource

Shells (Resident Evil)

Image of Shells

Shells for the Shotgun.

A container of seven shotgun shells. Provides extra ammunition for the Remington M870.
CategoryWeaponry (Ammunition)
Alternative nameShotgun Shells

Related product

Resident Evil Book 4 - Underworld

Resident Evil Book 4 - Underworld

Buy the Resident Evil Book 4 - Underworld by S.D. Perry on Amazon

Statistics

Game modeOccurrencesSum total
Jill12 84
Jill (Arranged / Advanced)12 84
Jill (Deadly Silence Rebirth)15 112
Chris18 126
Chris (Arranged / Advanced)16 112
Chris (Deadly Silence Rebirth)22 161

Location

  • Image of Item Box

    Item Box

    Jill (Deadly Silence Rebirth)
    Shells (1×14) - These come already supplied within the box.
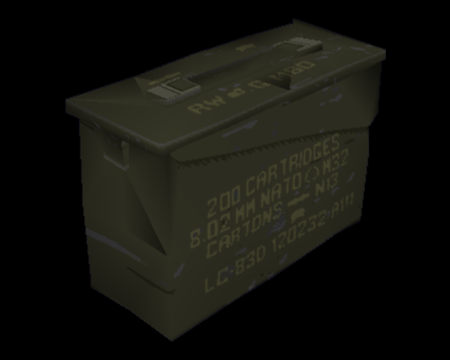
  • Image of Item Box

    Item Box

    Chris (Deadly Silence Rebirth)
    Shells (1×14) - These come already supplied within the box.
  • Image of Keeper's Bedroom - Mansion 1F

    Keeper's Bedroom - Mansion 1F

    Jill
    Shells (1×7) - On the floor of the closet.
    View location | Show on map
  • Image of Keeper's Bedroom - Mansion 1F

    Keeper's Bedroom - Mansion 1F

    Jill (Arranged / Advanced)
    Shells (1×7) - On the floor of the closet.
    View location | Show on map
  • Image of Keeper's Bedroom - Mansion 1F

    Keeper's Bedroom - Mansion 1F

    Jill (Deadly Silence Rebirth)
    Shells (1×7) - On the floor of the closet.
    View location | Show on map
  • Image of Keeper's Bedroom - Mansion 1F

    Keeper's Bedroom - Mansion 1F

    Chris
    Shells (1×7) - On the floor of the closet.
    View location | Show on map
  • Image of Keeper's Bedroom - Mansion 1F

    Keeper's Bedroom - Mansion 1F

    Chris (Arranged / Advanced)
    Shells (1×7) - On the floor of the closet.
    View location | Show on map
  • Image of Keeper's Bedroom - Mansion 1F

    Keeper's Bedroom - Mansion 1F

    Chris (Deadly Silence Rebirth)
    Shells (1×7) - On the floor of the closet.
    View location | Show on map
  • Image of Vacant Room - Mansion 1F

    Vacant Room - Mansion 1F

    Jill
    Shells (1×7) - Inside the locked desk draw in the south west corner of the room. Chris requires a Desk Key to unlock it.
    View location | Show on map
  • Image of Vacant Room - Mansion 1F

    Vacant Room - Mansion 1F

    Jill (Arranged / Advanced)
    Shells (1×7) - Inside the locked desk draw in the south west corner of the room. Chris requires a Desk Key to unlock it.
    View location | Show on map
  • Image of Vacant Room - Mansion 1F

    Vacant Room - Mansion 1F

    Jill (Deadly Silence Rebirth)
    Shells (1×7) - Inside the locked desk draw in the south west corner of the room. Chris requires a Desk Key to unlock it.
    View location | Show on map
  • Image of Vacant Room - Mansion 1F

    Vacant Room - Mansion 1F

    Chris
    Shells (1×7) - Inside the locked desk draw in the south west corner of the room. Chris requires a Desk Key to unlock it.
    View location | Show on map
  • Image of Vacant Room - Mansion 1F

    Vacant Room - Mansion 1F

    Chris (Arranged / Advanced)
    Shells (1×7) - Inside the locked desk draw in the south west corner of the room. Chris requires a Desk Key to unlock it.
    View location | Show on map
  • Image of Vacant Room - Mansion 1F

    Vacant Room - Mansion 1F

    Chris (Deadly Silence Rebirth)
    Shells (1×7) - Inside the locked desk draw in the south west corner of the room. Chris requires a Desk Key to unlock it.
    View location | Show on map
  • Image of Dressing Room - Mansion 1F

    Dressing Room - Mansion 1F

    Jill
    Shells (1×7) - Inside the locked desk draw. Chris requires a Desk Key to unlock it.
    View location | Show on map
  • Image of Dressing Room - Mansion 1F

    Dressing Room - Mansion 1F

    Jill (Arranged / Advanced)
    Shells (1×7) - Inside the locked desk draw. Chris requires a Desk Key to unlock it.
    View location | Show on map
  • Image of Dressing Room - Mansion 1F

    Dressing Room - Mansion 1F

    Jill (Deadly Silence Rebirth)
    Shells (1×7) - Inside the locked desk draw. Chris requires a Desk Key to unlock it.
    View location | Show on map
  • Image of Dressing Room - Mansion 1F

    Dressing Room - Mansion 1F

    Chris
    Shells (1×7) - Inside the locked desk draw. Chris requires a Desk Key to unlock it.
    View location | Show on map
  • Image of Dressing Room - Mansion 1F

    Dressing Room - Mansion 1F

    Chris (Arranged / Advanced)
    Shells (1×7) - Inside the locked desk draw. Chris requires a Desk Key to unlock it.
    View location | Show on map
  • Image of Dressing Room - Mansion 1F

    Dressing Room - Mansion 1F

    Chris (Deadly Silence Rebirth)
    Shells (1×7) - Inside the locked desk draw. Chris requires a Desk Key to unlock it.
    View location | Show on map
  • Image of Bedroom - Mansion 2F

    Bedroom - Mansion 2F

    Chris
    Shells (1×7) - On the floor on the right-hand side of the right bed.
    View location | Show on map
  • Image of Bedroom - Mansion 2F

    Bedroom - Mansion 2F

    Chris (Arranged / Advanced)
    Shells (1×7) - On the floor on the right-hand side of the right bed.
    View location | Show on map
  • Image of Bedroom - Mansion 2F

    Bedroom - Mansion 2F

    Chris (Deadly Silence Rebirth)
    Shells (1×7) - On the floor on the right-hand side of the right bed.
    View location | Show on map
  • Image of Study - Mansion 2F

    Study - Mansion 2F

    Chris
    Shells (1×7) - In the secret compartment behind the wardrobe.
    View location | Show on map
  • Image of Study - Mansion 2F

    Study - Mansion 2F

    Chris (Deadly Silence Rebirth)
    Shells (1×7) - In the secret compartment behind the wardrobe.
    View location | Show on map
  • Image of Dining Room - Mansion 1F

    Dining Room - Mansion 1F

    Jill (Deadly Silence Rebirth)
    Shells (1×7) - Drop from the ceiling near the grandfather clock when you set it to a specific time. The time you set it to comes from Richard after you have tried to save his life in the Pillar Passage, and it can only be set once you have revealed the secret alcove behind the clock.
    View location | Show on map
  • Image of Dining Room - Mansion 1F

    Dining Room - Mansion 1F

    Chris (Deadly Silence Rebirth)
    Shells (1×7) - Drop from the ceiling near the grandfather clock when you set it to a specific time. The time you set it to comes from Richard after you have tried to save his life in the Pillar Passage, and it can only be set once you have revealed the secret alcove behind the clock.
    View location | Show on map
  • Image of Small Dining Room - Mansion 2F

    Small Dining Room - Mansion 2F

    Chris
    Shells (1×7) - In the cabinet inside the hidden alcove behind the bookcase. Use the Lighter on the candles on the main dining table in order to see better.
    View location | Show on map
  • Image of Small Dining Room - Mansion 2F

    Small Dining Room - Mansion 2F

    Chris (Deadly Silence Rebirth)
    Shells (1×7) - In the cabinet inside the hidden alcove behind the bookcase. Use the Lighter on the candles on the main dining table in order to see better.
    View location | Show on map
  • Image of Attic - Mansion 2F

    Attic - Mansion 2F

    Jill
    Shells (1×7) - On the stack of barrels next to the wall.
    View location | Show on map
  • Image of Attic - Mansion 2F

    Attic - Mansion 2F

    Jill (Arranged / Advanced)
    Shells (1×7) - On the stack of barrels next to the wall.
    View location | Show on map
  • Image of Attic - Mansion 2F

    Attic - Mansion 2F

    Jill (Deadly Silence Rebirth)
    Shells (1×7) - On the stack of barrels next to the wall.
    View location | Show on map
  • Image of Attic - Mansion 2F

    Attic - Mansion 2F

    Chris
    Shells (1×7) - On the stack of barrels next to the wall.
    View location | Show on map
  • Image of Attic - Mansion 2F

    Attic - Mansion 2F

    Chris (Arranged / Advanced)
    Shells (1×7) - On the stack of barrels next to the wall.
    View location | Show on map
  • Image of Attic - Mansion 2F

    Attic - Mansion 2F

    Chris (Deadly Silence Rebirth)
    Shells (1×7) - On the stack of barrels next to the wall.
    View location | Show on map
  • Image of Guardhouse Save Room - Guardhouse 1F

    Guardhouse Save Room - Guardhouse 1F

    Jill (Deadly Silence Rebirth)
    Shells (1×7) - Inside the Puzzle Chest.
    View location | Show on map
  • Image of Guardhouse Save Room - Guardhouse 1F

    Guardhouse Save Room - Guardhouse 1F

    Chris (Deadly Silence Rebirth)
    Shells (1×7) - Inside the Puzzle Chest.
    View location | Show on map
  • Image of Room 001 - Guardhouse 1F

    Room 001 - Guardhouse 1F

    Jill
    Shells (1×7) - Inside the locked desk draw. Chris requires a Desk Key to unlock it.
    View location | Show on map
  • Image of Room 001 - Guardhouse 1F

    Room 001 - Guardhouse 1F

    Jill (Arranged / Advanced)
    Shells (1×7) - Inside the locked desk draw. Chris requires a Desk Key to unlock it.
    View location | Show on map
  • Image of Room 001 - Guardhouse 1F

    Room 001 - Guardhouse 1F

    Jill (Deadly Silence Rebirth)
    Shells (1×7) - Inside the locked desk draw. Chris requires a Desk Key to unlock it.
    View location | Show on map
  • Image of Room 001 - Guardhouse 1F

    Room 001 - Guardhouse 1F

    Chris
    Shells (1×7) - Inside the locked desk draw. Chris requires a Desk Key to unlock it.
    View location | Show on map
  • Image of Room 001 - Guardhouse 1F

    Room 001 - Guardhouse 1F

    Chris (Arranged / Advanced)
    Shells (1×7) - Inside the locked desk draw. Chris requires a Desk Key to unlock it.
    View location | Show on map
  • Image of Room 001 - Guardhouse 1F

    Room 001 - Guardhouse 1F

    Chris (Deadly Silence Rebirth)
    Shells (1×7) - Inside the locked desk draw. Chris requires a Desk Key to unlock it.
    View location | Show on map
  • Image of Room 002 - Guardhouse 1F

    Room 002 - Guardhouse 1F

    Jill
    Shells (1×7) - Inside the locked desk draw. Chris requires a Desk Key to unlock it.
    View location | Show on map
  • Image of Room 002 - Guardhouse 1F

    Room 002 - Guardhouse 1F

    Jill (Arranged / Advanced)
    Shells (1×7) - Inside the locked desk draw. Chris requires a Desk Key to unlock it.
    View location | Show on map
  • Image of Room 002 - Guardhouse 1F

    Room 002 - Guardhouse 1F

    Jill (Deadly Silence Rebirth)
    Shells (1×7) - Inside the locked desk draw. Chris requires a Desk Key to unlock it.
    View location | Show on map
  • Image of Room 002 - Guardhouse 1F

    Room 002 - Guardhouse 1F

    Chris
    Shells (1×7) - Inside the locked desk draw. Chris requires a Desk Key to unlock it.
    View location | Show on map
  • Image of Room 002 - Guardhouse 1F

    Room 002 - Guardhouse 1F

    Chris (Arranged / Advanced)
    Shells (1×7) - Inside the locked desk draw. Chris requires a Desk Key to unlock it.
    View location | Show on map
  • Image of Room 002 - Guardhouse 1F

    Room 002 - Guardhouse 1F

    Chris (Deadly Silence Rebirth)
    Shells (1×7) - Inside the locked desk draw. Chris requires a Desk Key to unlock it.
    View location | Show on map
  • Image of Arms Storage - Guardhouse B1

    Arms Storage - Guardhouse B1

    Jill
    Shells (2×7) - On the shelf.
    View location | Show on map
  • Image of Arms Storage - Guardhouse B1

    Arms Storage - Guardhouse B1

    Jill (Arranged / Advanced)
    Shells (2×7) - On the shelf.
    View location | Show on map
  • Image of Arms Storage - Guardhouse B1

    Arms Storage - Guardhouse B1

    Jill (Deadly Silence Rebirth)
    Shells (2×7) - On the shelf.
    View location | Show on map
  • Image of Arms Storage - Guardhouse B1

    Arms Storage - Guardhouse B1

    Chris
    Shells (2×7) - On the shelf.
    View location | Show on map
  • Image of Arms Storage - Guardhouse B1

    Arms Storage - Guardhouse B1

    Chris (Arranged / Advanced)
    Shells (2×7) - On the shelf.
    View location | Show on map
  • Image of Arms Storage - Guardhouse B1

    Arms Storage - Guardhouse B1

    Chris (Deadly Silence Rebirth)
    Shells (2×7) - On the shelf.
    View location | Show on map
  • Image of Mansion Storeroom - Mansion 1F

    Mansion Storeroom - Mansion 1F

    Jill
    Shells (1×7) - On the floor left to you by Barry. Appears here after defeating Plant 42.
    View location | Show on map
  • Image of Mansion Storeroom - Mansion 1F

    Mansion Storeroom - Mansion 1F

    Jill (Arranged / Advanced)
    Shells (1×7) - On the floor left to you by Barry. Appears here after defeating Plant 42.
    View location | Show on map
  • Image of Mansion Storeroom - Mansion 1F

    Mansion Storeroom - Mansion 1F

    Jill (Deadly Silence Rebirth)
    Shells (1×7) - On the floor left to you by Barry. Appears here after defeating Plant 42.
    View location | Show on map
  • Image of Mansion Storeroom - Mansion 1F

    Mansion Storeroom - Mansion 1F

    Chris
    Shells (1×7) - On the floor left to you by Wesker. Appears here after defeating Plant 42.
    View location | Show on map
  • Image of Mansion Storeroom - Mansion 1F

    Mansion Storeroom - Mansion 1F

    Chris (Arranged / Advanced)
    Shells (1×7) - On the floor left to you by Wesker. Appears here after defeating Plant 42.
    View location | Show on map
  • Image of Mansion Storeroom - Mansion 1F

    Mansion Storeroom - Mansion 1F

    Chris (Deadly Silence Rebirth)
    Shells (1×7) - On the floor left to you by Wesker. Appears here after defeating Plant 42.
    View location | Show on map
  • Image of Underground Passage 1 - Mansion B1

    Underground Passage 1 - Mansion B1

    Jill
    Shells (1×7) - On the floor in the corner of the small offshoot.
    View location | Show on map
  • Image of Underground Passage 1 - Mansion B1

    Underground Passage 1 - Mansion B1

    Jill (Arranged / Advanced)
    Shells (1×7) - On the floor in the corner of the small offshoot.
    View location | Show on map
  • Image of Underground Passage 1 - Mansion B1

    Underground Passage 1 - Mansion B1

    Jill (Deadly Silence Rebirth)
    Shells (1×7) - On the floor in the corner of the small offshoot.
    View location | Show on map
  • Image of Underground Passage 1 - Mansion B1

    Underground Passage 1 - Mansion B1

    Chris
    Shells (1×7) - On the floor in the corner of the small offshoot.
    View location | Show on map
  • Image of Underground Passage 1 - Mansion B1

    Underground Passage 1 - Mansion B1

    Chris (Arranged / Advanced)
    Shells (1×7) - On the floor in the corner of the small offshoot.
    View location | Show on map
  • Image of Underground Passage 1 - Mansion B1

    Underground Passage 1 - Mansion B1

    Chris (Deadly Silence Rebirth)
    Shells (1×7) - On the floor in the corner of the small offshoot.
    View location | Show on map
  • Image of Closet - Mansion 2F

    Closet - Mansion 2F

    Chris
    Shells (2×7) - On the shelf.
    View location | Show on map
  • Image of Closet - Mansion 2F

    Closet - Mansion 2F

    Chris (Arranged / Advanced)
    Shells (2×7) - On the shelf.
    View location | Show on map
  • Image of Closet - Mansion 2F

    Closet - Mansion 2F

    Chris (Deadly Silence Rebirth)
    Shells (2×7) - On the shelf.
    View location | Show on map
  • Image of Trophy Room - Mansion 2F

    Trophy Room - Mansion 2F

    Jill
    Shells (1×7) - On the cabinet in the north west corner of the room.
    View location | Show on map
  • Image of Trophy Room - Mansion 2F

    Trophy Room - Mansion 2F

    Jill (Arranged / Advanced)
    Shells (1×7) - On the cabinet in the north west corner of the room.
    View location | Show on map
  • Image of Trophy Room - Mansion 2F

    Trophy Room - Mansion 2F

    Jill (Deadly Silence Rebirth)
    Shells (1×7) - On the cabinet in the north west corner of the room.
    View location | Show on map
  • Image of Trophy Room - Mansion 2F

    Trophy Room - Mansion 2F

    Chris
    Shells (1×7) - On the cabinet in the north west corner of the room.
    View location | Show on map
  • Image of Trophy Room - Mansion 2F

    Trophy Room - Mansion 2F

    Chris (Arranged / Advanced)
    Shells (1×7) - On the cabinet in the north west corner of the room.
    View location | Show on map
  • Image of Trophy Room - Mansion 2F

    Trophy Room - Mansion 2F

    Chris (Deadly Silence Rebirth)
    Shells (1×7) - On the cabinet in the north west corner of the room.
    View location | Show on map
  • Image of Generator Room - Underground

    Generator Room - Underground

    Chris
    Shells (1×7) - On top of the machinery in the offshoot area.
    View location | Show on map
  • Image of Generator Room - Underground

    Generator Room - Underground

    Chris (Arranged / Advanced)
    Shells (1×7) - On top of the machinery in the offshoot area.
    View location | Show on map
  • Image of Generator Room - Underground

    Generator Room - Underground

    Chris (Deadly Silence Rebirth)
    Shells (1×7) - On top of the machinery in the offshoot area.
    View location | Show on map
  • Image of Operating Room - Laboratory B3

    Operating Room - Laboratory B3

    Jill
    Shells (1×7) - On the operating table in the middle of the room.
    View location | Show on map
  • Image of Operating Room - Laboratory B3

    Operating Room - Laboratory B3

    Jill (Arranged / Advanced)
    Shells (1×7) - On the operating table in the middle of the room.
    View location | Show on map
  • Image of Operating Room - Laboratory B3

    Operating Room - Laboratory B3

    Jill (Deadly Silence Rebirth)
    Shells (1×7) - On the operating table in the middle of the room.
    View location | Show on map
  • Image of Operating Room - Laboratory B3

    Operating Room - Laboratory B3

    Chris
    Shells (1×7) - On the operating table in the middle of the room.
    View location | Show on map
  • Image of Operating Room - Laboratory B3

    Operating Room - Laboratory B3

    Chris (Arranged / Advanced)
    Shells (1×7) - On the operating table in the middle of the room.
    View location | Show on map
  • Image of Operating Room - Laboratory B3

    Operating Room - Laboratory B3

    Chris (Deadly Silence Rebirth)
    Shells (1×7) - On the operating table in the middle of the room.
    View location | Show on map
  • Image of Mansion Save Room - Mansion 1F

    Mansion Save Room - Mansion 1F

    Chris (Deadly Silence Rebirth)
    Shells (1×7) - Inside the Puzzle Chest.
    View location | Show on map

There are no locations to show for this game mode. The following game modes are applicable:

Related product

TUBBZ Resident Evil Ada Wong Duck Vinyl Figure

TUBBZ Resident Evil Ada Wong Duck Vinyl Figure

Buy the TUBBZ Resident Evil Ada Wong Duck Vinyl Figure on Amazon

Explore further