Evil Resource

Shotgun Ammo (Resident Evil Zero)

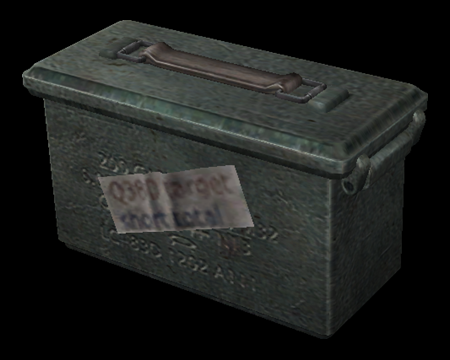
Image of Shotgun Ammo

12 gauge shotgun shells.

A container of shotgun shells.

An extra box of shells for use with the following weapons:
CategoryWeaponry (Ammunition)

Related product

Resident Evil Book 4 - Underworld

Resident Evil Book 4 - Underworld

Buy the Resident Evil Book 4 - Underworld by S.D. Perry on Amazon

Statistics

Game modeOccurrencesSum total
Easy19 133
Normal16 112
Hard13 91

Location

  • Image of Cabin 101 - Train 2F

    Cabin 101 - Train 2F

    Easy
    Shotgun Ammo (1×7) - On the floor in the south east corner of the room.
    View location | Show on map
  • Image of Cabin 101 - Train 2F

    Cabin 101 - Train 2F

    Normal
    Shotgun Ammo (1×7) - On the floor in the south east corner of the room.
    View location | Show on map
  • Image of Cabin 101 - Train 2F

    Cabin 101 - Train 2F

    Hard
    Shotgun Ammo (1×7) - On the floor in the south east corner of the room.
    View location | Show on map
  • Image of Freight Car - Train 1F

    Freight Car - Train 1F

    Easy
    Shotgun Ammo (1×7) - On the shelf in the north west corner of the car.
    View location | Show on map
  • Image of Freight Car - Train 1F

    Freight Car - Train 1F

    Normal
    Shotgun Ammo (1×7) - On the shelf in the north west corner of the car.
    View location | Show on map
  • Image of Freight Car - Train 1F

    Freight Car - Train 1F

    Hard
    Shotgun Ammo (1×7) - On the shelf in the north west corner of the car.
    View location | Show on map
  • Image of Art Room - Training Facility 2F

    Art Room - Training Facility 2F

    Easy
    Shotgun Ammo (1×7) - In the fireplace in the north east corner of the room.
    View location | Show on map
  • Image of Art Room - Training Facility 2F

    Art Room - Training Facility 2F

    Normal
    Shotgun Ammo (1×7) - In the fireplace in the north east corner of the room.
    View location | Show on map
  • Image of Art Room - Training Facility 2F

    Art Room - Training Facility 2F

    Hard
    Shotgun Ammo (1×7) - In the fireplace in the north east corner of the room.
    View location | Show on map
  • Image of Assistant Director's Office - Training Facility 2F

    Assistant Director's Office - Training Facility 2F

    Easy
    Shotgun Ammo (1×7) - On the desk in the south west corner of the room.
    View location | Show on map
  • Image of Assistant Director's Office - Training Facility 2F

    Assistant Director's Office - Training Facility 2F

    Normal
    Shotgun Ammo (1×7) - On the desk in the south west corner of the room.
    View location | Show on map
  • Image of Lecture Room - Training Facility 2F

    Lecture Room - Training Facility 2F

    Easy
    Shotgun Ammo (1×7) - On the floor, next to the table with the typewriter in the north east corner of the room.
    View location | Show on map
  • Image of Lecture Room - Training Facility 2F

    Lecture Room - Training Facility 2F

    Normal
    Shotgun Ammo (1×7) - On the floor, next to the table with the typewriter in the north east corner of the room.
    View location | Show on map
  • Image of Lecture Room - Training Facility 2F

    Lecture Room - Training Facility 2F

    Hard
    Shotgun Ammo (1×7) - On the floor, next to the table with the typewriter in the north east corner of the room.
    View location | Show on map
  • Image of Clock Room - Training Facility 3F

    Clock Room - Training Facility 3F

    Easy
    Shotgun Ammo (1×7) - On the floor next to the lift.
    View location | Show on map
  • Image of Maintenance Room - Training Facility 2F

    Maintenance Room - Training Facility 2F

    Easy
    Shotgun Ammo (1×7) - On the shelves in the north east corner of the room.
    View location | Show on map
  • Image of Maintenance Room - Training Facility 2F

    Maintenance Room - Training Facility 2F

    Normal
    Shotgun Ammo (1×7) - On the shelves in the north east corner of the room.
    View location | Show on map
  • Image of Maintenance Room - Training Facility 2F

    Maintenance Room - Training Facility 2F

    Hard
    Shotgun Ammo (1×7) - On the shelves in the north east corner of the room.
    View location | Show on map
  • Image of Private Study Room - Training Facility 2F

    Private Study Room - Training Facility 2F

    Easy
    Shotgun Ammo (1×7) - On the floor in the north east corner of the room.
    View location | Show on map
  • Image of Private Study Room - Training Facility 2F

    Private Study Room - Training Facility 2F

    Normal
    Shotgun Ammo (1×7) - On the floor in the north east corner of the room.
    View location | Show on map
  • Image of Monitor Room - Facility Basement B1

    Monitor Room - Facility Basement B1

    Easy
    Shotgun Ammo (1×7) - On the floor in the south east corner of the room.
    View location | Show on map
  • Image of Monitor Room - Facility Basement B1

    Monitor Room - Facility Basement B1

    Normal
    Shotgun Ammo (1×7) - On the floor in the south east corner of the room.
    View location | Show on map
  • Image of Monitor Room - Facility Basement B1

    Monitor Room - Facility Basement B1

    Hard
    Shotgun Ammo (1×7) - On the floor in the south east corner of the room.
    View location | Show on map
  • Image of Training Room - Facility Basement B3

    Training Room - Facility Basement B3

    Easy
    Shotgun Ammo (1×7) - On the bench on the north side of the upstairs control room.
    View location | Show on map
  • Image of Training Room - Facility Basement B3

    Training Room - Facility Basement B3

    Normal
    Shotgun Ammo (1×7) - On the bench on the north side of the upstairs control room.
    View location | Show on map
  • Image of Training Room - Facility Basement B3

    Training Room - Facility Basement B3

    Hard
    Shotgun Ammo (1×7) - On the bench on the north side of the upstairs control room.
    View location | Show on map
  • Image of Outside Area - Laboratory 1F

    Outside Area - Laboratory 1F

    Easy
    Shotgun Ammo (1×7) - Inside the small building that has the pressure pad for unlocking the church door.
    View location | Show on map
  • Image of Church Back Room - Laboratory 1F

    Church Back Room - Laboratory 1F

    Easy
    Shotgun Ammo (1×7) - On the floor on the east side of the room.
    View location | Show on map
  • Image of Church Back Room - Laboratory 1F

    Church Back Room - Laboratory 1F

    Normal
    Shotgun Ammo (1×7) - On the floor on the east side of the room.
    View location | Show on map
  • Image of Church Back Room - Laboratory 1F

    Church Back Room - Laboratory 1F

    Hard
    Shotgun Ammo (1×7) - On the floor on the east side of the room.
    View location | Show on map
  • Image of Leech Laboratory - Laboratory B1

    Leech Laboratory - Laboratory B1

    Easy
    Shotgun Ammo (1×7) - On the shelves in the north east area of the room.
    View location | Show on map
  • Image of Leech Laboratory - Laboratory B1

    Leech Laboratory - Laboratory B1

    Normal
    Shotgun Ammo (1×7) - On the shelves in the north east area of the room.
    View location | Show on map
  • Image of Machine Room 2F - Laboratory B1

    Machine Room 2F - Laboratory B1

    Easy
    Shotgun Ammo (1×7) - Inside the control room, in the north west corner next to the lockers.
    View location | Show on map
  • Image of Machine Room 2F - Laboratory B1

    Machine Room 2F - Laboratory B1

    Normal
    Shotgun Ammo (1×7) - Inside the control room, in the north west corner next to the lockers.
    View location | Show on map
  • Image of Machine Room 2F - Laboratory B1

    Machine Room 2F - Laboratory B1

    Hard
    Shotgun Ammo (1×7) - Inside the control room, in the north west corner next to the lockers.
    View location | Show on map
  • Image of Cargo Control Room - Treatment Plant B7

    Cargo Control Room - Treatment Plant B7

    Easy
    Shotgun Ammo (1×7) - On a box in the south west corner.
    View location | Show on map
  • Image of Cargo Control Room - Treatment Plant B7

    Cargo Control Room - Treatment Plant B7

    Normal
    Shotgun Ammo (1×7) - On a box in the south west corner.
    View location | Show on map
  • Image of Cargo Control Room - Treatment Plant B7

    Cargo Control Room - Treatment Plant B7

    Hard
    Shotgun Ammo (1×7) - On a box in the south west corner.
    View location | Show on map
  • Image of Water Pool - Treatment Plant B7

    Water Pool - Treatment Plant B7

    Easy
    Shotgun Ammo (1×7) - Inside the equipment locker on the western wall.
    View location | Show on map
  • Image of Water Pool - Treatment Plant B7

    Water Pool - Treatment Plant B7

    Normal
    Shotgun Ammo (1×7) - Inside the equipment locker on the western wall.
    View location | Show on map
  • Image of Water Pool - Treatment Plant B7

    Water Pool - Treatment Plant B7

    Hard
    Shotgun Ammo (1×7) - Inside the equipment locker on the western wall.
    View location | Show on map
  • Image of Engine Room - Treatment Plant B9

    Engine Room - Treatment Plant B9

    Easy
    Shotgun Ammo (2×7) - On the floor in the south east corner of the room.
    View location | Show on map
  • Image of Engine Room - Treatment Plant B9

    Engine Room - Treatment Plant B9

    Normal
    Shotgun Ammo (1×7) - On the floor in the south east corner of the room.
    View location | Show on map
  • Image of Engine Room - Treatment Plant B9

    Engine Room - Treatment Plant B9

    Hard
    Shotgun Ammo (1×7) - On the floor in the south east corner of the room.
    View location | Show on map
  • Image of Storage - Treatment Plant B9

    Storage - Treatment Plant B9

    Easy
    Shotgun Ammo (1×7) - On the shelves in the south east area of the room.
    View location | Show on map
  • Image of Storage - Treatment Plant B9

    Storage - Treatment Plant B9

    Normal
    Shotgun Ammo (1×7) - On the shelves in the south east area of the room.
    View location | Show on map
  • Image of Storage - Treatment Plant B9

    Storage - Treatment Plant B9

    Hard
    Shotgun Ammo (1×7) - On the shelves in the south east area of the room.
    View location | Show on map

There are no locations to show for this game mode. The following game modes are applicable:

Related product

Resident Evil Book 6 - Code: Veronica

Resident Evil Book 6 - Code: Veronica

Buy the Resident Evil Book 6 - Code: Veronica by S.D. Perry on Amazon

Explore further