Evil Resource

Shotgun Shells (Resident Evil Revelations)

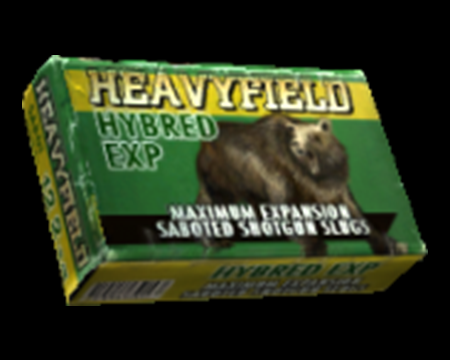
Image of Shotgun Shells

Ammo for Shotgun.

A box of shotgun ammunition of varying quantity.

This ammunition is used with the following weapons:
CategoryWeaponry (Ammunition)

Related product

Resident Evil Book 3 - City of the Dead

Resident Evil Book 3 - City of the Dead

Buy the Resident Evil Book 3 - City of the Dead by S.D. Perry on Amazon

Location

  • Image of Veltro Mine - Winter Canyon 1

    Veltro Mine - Winter Canyon 1

    Normal
    Shotgun Shells (1×3) - Episode 2-1. On the wooden tables next to the chasm on the west side of the cavernous chamber with the small bridge.
    Shotgun Shells (1×3) - Episode 2-1. On the crate in the south west corner of the second large cave.
    View location | Show on map
  • Image of Veltro Mine - Winter Canyon 1

    Veltro Mine - Winter Canyon 1

    Hell
    Shotgun Shells (1×3) - Episode 2-1. On the wooden tables next to the chasm on the west side of the cavernous chamber with the small bridge.
    Shotgun Shells (1×3) - Episode 2-1. On the crate in the south west corner of the second large cave.
    View location | Show on map
  • Image of Veltro Mine - Winter Canyon 1

    Veltro Mine - Winter Canyon 1

    Infernal
    Shotgun Shells (1×4) - Episode 2-1. On the stacks of wood in the centre of the second large cave.
    View location | Show on map
  • Image of Locker Room - Bridge Upper Level - Queen Zenobia

    Locker Room - Bridge Upper Level - Queen Zenobia

    Normal
    Shotgun Shells (1×8) - Episode 2-2 onwards. In the south west locker.
    View location | Show on map
  • Image of Locker Room - Bridge Upper Level - Queen Zenobia

    Locker Room - Bridge Upper Level - Queen Zenobia

    Hell
    Shotgun Shells (1×8) - Episode 2-2 onwards. In the south west locker.
    View location | Show on map
  • Image of Locker Room - Bridge Upper Level - Queen Zenobia

    Locker Room - Bridge Upper Level - Queen Zenobia

    Infernal
    Shotgun Shells (1×8) - Episode 2-2 onwards. In the south west locker.
    View location | Show on map
  • Image of Office Room 2 - Terragrigia 3F

    Office Room 2 - Terragrigia 3F

    Normal
    Shotgun Shells (1×8) - Episode 3-1. On the shelves in the middle of the room.
    Shotgun Shells (1×8) - Episode 3-1. On the cardboard boxes in the north west corner of the room.
    View location | Show on map
  • Image of Office Room 2 - Terragrigia 3F

    Office Room 2 - Terragrigia 3F

    Hell
    Shotgun Shells (1×8) - Episode 3-1. On the shelves in the middle of the room.
    Shotgun Shells (1×8) - Episode 3-1. On the cardboard boxes in the north west corner of the room.
    View location | Show on map
  • Image of South Corridor - Terragrigia 3F

    South Corridor - Terragrigia 3F

    Normal
    Shotgun Shells (1×8) - Episode 3-1. On the cardboard boxes in the south east dead-end of the corridor.
    View location | Show on map
  • Image of South Corridor - Terragrigia 3F

    South Corridor - Terragrigia 3F

    Hell
    Shotgun Shells (1×8) - Episode 3-1. On the cardboard boxes in the south east dead-end of the corridor.
    View location | Show on map
  • Image of Large Office - Terragrigia 6F

    Large Office - Terragrigia 6F

    Normal
    Shotgun Shells (1×8) - Episode 3-1. Inside the right-hand locker on the north side of the office.
    View location | Show on map
  • Image of Large Office - Terragrigia 6F

    Large Office - Terragrigia 6F

    Hell
    Shotgun Shells (1×8) - Episode 3-1. Inside the right-hand locker on the north side of the office.
    View location | Show on map
  • Image of Large Office - Terragrigia 6F

    Large Office - Terragrigia 6F

    Infernal
    Shotgun Shells (1×8) - Episode 3-1. Inside the right-hand locker on the north side of the office.
    View location | Show on map
  • Image of Elevator Hall - Terragrigia 6F

    Elevator Hall - Terragrigia 6F

    Normal
    Shotgun Shells (2×8) - Episode 3-1. On the floor in the north west corner of the main room.
    View location | Show on map
  • Image of Elevator Hall - Terragrigia 6F

    Elevator Hall - Terragrigia 6F

    Hell
    Shotgun Shells (2×8) - Episode 3-1. On the floor in the north west corner of the main room.
    View location | Show on map
  • Image of Elevator Hall - Terragrigia 6F

    Elevator Hall - Terragrigia 6F

    Infernal
    Shotgun Shells (1×8) - Episode 3-1. On the floor in the north west corner of the main room.
    Shotgun Shells (1×8) - Episode 3-1. On the cardboard box in the south west corner of the main room.
    View location | Show on map
  • Image of Conference Room - Bridge Lower Level - Queen Zenobia

    Conference Room - Bridge Lower Level - Queen Zenobia

    Normal
    Shotgun Shells (1×5) - Episode 3-2 onwards. On the table in the middle of the room.
    View location | Show on map
  • Image of Conference Room - Bridge Lower Level - Queen Zenobia

    Conference Room - Bridge Lower Level - Queen Zenobia

    Hell
    Shotgun Shells (1×5) - Episode 3-2 onwards. On the table in the middle of the room.
    View location | Show on map
  • Image of Captain's Private Cabin - Bridge Lower Level - Queen Zenobia

    Captain's Private Cabin - Bridge Lower Level - Queen Zenobia

    Normal
    Shotgun Shells (1×3) - Episode 3-2 onwards. On the body of the dead captain sitting in his chair on the east side of the room. Requires the Genesis Scanner to find.
    View location | Show on map
  • Image of Captain's Private Cabin - Bridge Lower Level - Queen Zenobia

    Captain's Private Cabin - Bridge Lower Level - Queen Zenobia

    Hell
    Shotgun Shells (1×3) - Episode 3-2 onwards. On the body of the dead captain sitting in his chair on the east side of the room. Requires the Genesis Scanner to find.
    View location | Show on map
  • Image of Captain's Private Cabin - Bridge Lower Level - Queen Zenobia

    Captain's Private Cabin - Bridge Lower Level - Queen Zenobia

    Infernal
    Shotgun Shells (1×3) - Episode 3-2 onwards. On the body of the dead captain sitting in his chair on the east side of the room. Requires the Genesis Scanner to find.
    View location | Show on map
  • Image of Upper Walkway - Promenade 2F - Queen Zenobia

    Upper Walkway - Promenade 2F - Queen Zenobia

    Normal
    Shotgun Shells (1×7) - Episode 3-2 onwards. On the table on the balcony on the south side.
    View location | Show on map
  • Image of Upper Walkway - Promenade 2F - Queen Zenobia

    Upper Walkway - Promenade 2F - Queen Zenobia

    Hell
    Shotgun Shells (1×7) - Episode 3-2 onwards. On the table on the balcony on the south side.
    View location | Show on map
  • Image of Main Section - Promenade 1F - Queen Zenobia

    Main Section - Promenade 1F - Queen Zenobia

    Normal
    Shotgun Shells (1×6) - Episode 3-2 onwards. On a table in the room on the south side of the area west of the barricade.
    Shotgun Shells (1×7) - Episode 3-2 onwards. On a table on the north side of the area west of the barricade.
    View location | Show on map
  • Image of Main Section - Promenade 1F - Queen Zenobia

    Main Section - Promenade 1F - Queen Zenobia

    Hell
    Shotgun Shells (1×6) - Episode 3-2 onwards. On a table in the room on the south side of the area west of the barricade.
    Shotgun Shells (1×7) - Episode 3-2 onwards. On a table on the north side of the area west of the barricade.
    View location | Show on map
  • Image of Emergency Communications Room - Hall 2F - Queen Zenobia

    Emergency Communications Room - Hall 2F - Queen Zenobia

    Normal
    Shotgun Shells (1×4) - Episode 4-1 onwards. On the main communications console.
    View location | Show on map
  • Image of Emergency Communications Room - Hall 2F - Queen Zenobia

    Emergency Communications Room - Hall 2F - Queen Zenobia

    Hell
    Shotgun Shells (1×4) - Episode 4-1 onwards. On the main communications console.
    View location | Show on map
  • Image of Solarium - Solarium - Queen Zenobia

    Solarium - Solarium - Queen Zenobia

    Normal
    Shotgun Shells (1×4) - Episode 4-1 onwards. On the southern deck chairs on the east side of the room.
    Shotgun Shells (1×7) - Episode 4-1 onwards. On the southern deck chairs on the east side of the room.
    View location | Show on map
  • Image of Solarium - Solarium - Queen Zenobia

    Solarium - Solarium - Queen Zenobia

    Hell
    Shotgun Shells (1×4) - Episode 4-1 onwards. On the southern deck chairs on the east side of the room.
    Shotgun Shells (1×7) - Episode 4-1 onwards. On the southern deck chairs on the east side of the room.
    View location | Show on map
  • Image of Solarium - Solarium - Queen Zenobia

    Solarium - Solarium - Queen Zenobia

    Infernal
    Shotgun Shells (1×4) - Episode 4-1 onwards. On the southern deck chairs on the east side of the room.
    Shotgun Shells (1×7) - Episode 4-1 onwards. On the southern deck chairs on the east side of the room.
    View location | Show on map
  • Image of VIP Room - Casino - Queen Zenobia

    VIP Room - Casino - Queen Zenobia

    Normal
    Shotgun Shells (1×8) - Episode 4-1 onwards. On the couch.
    View location | Show on map
  • Image of VIP Room - Casino - Queen Zenobia

    VIP Room - Casino - Queen Zenobia

    Hell
    Shotgun Shells (1×8) - Episode 4-1 onwards. On the couch.
    View location | Show on map
  • Image of VIP Room - Casino - Queen Zenobia

    VIP Room - Casino - Queen Zenobia

    Infernal
    Shotgun Shells (1×8) - Episode 4-1 onwards. On the couch.
    View location | Show on map
  • Image of Projector Room - Airport Building

    Projector Room - Airport Building

    Normal
    Shotgun Shells (1×8) - Episode 5-1. Inside a locker in the south west corner of the room.
    View location | Show on map
  • Image of Projector Room - Airport Building

    Projector Room - Airport Building

    Hell
    Shotgun Shells (1×8) - Episode 5-1. Inside a locker in the south west corner of the room.
    View location | Show on map
  • Image of Projector Room - Airport Building

    Projector Room - Airport Building

    Infernal
    Shotgun Shells (1×8) - Episode 5-1. Inside a locker in the south west corner of the room.
    View location | Show on map
  • Image of Bilge Passage 2 - Bilge Block Level 3 - Queen Semiramis

    Bilge Passage 2 - Bilge Block Level 3 - Queen Semiramis

    Infernal
    Shotgun Shells (1×12) - Episode 6-1. On the window ledge at the north end of the passage.
    View location | Show on map
  • Image of Maintenance Room - Bilge Block Level 2 - Queen Semiramis

    Maintenance Room - Bilge Block Level 2 - Queen Semiramis

    Normal
    Shotgun Shells (1×16) - Episode 6-1. On the shelves inside the western room.
    View location | Show on map
  • Image of Maintenance Room - Bilge Block Level 2 - Queen Semiramis

    Maintenance Room - Bilge Block Level 2 - Queen Semiramis

    Hell
    Shotgun Shells (1×16) - Episode 6-1. On the shelves inside the western room.
    View location | Show on map
  • Image of Deck - Observation Deck Level 1 - Queen Zenobia

    Deck - Observation Deck Level 1 - Queen Zenobia

    Normal
    Shotgun Shells (1×6) - Episode 6-2 onwards. On the floor on the south side of the main deck area.
    View location | Show on map
  • Image of Deck - Observation Deck Level 1 - Queen Zenobia

    Deck - Observation Deck Level 1 - Queen Zenobia

    Hell
    Shotgun Shells (1×6) - Episode 6-2 onwards. On the floor on the south side of the main deck area.
    View location | Show on map
  • Image of Deck - Observation Deck Level 1 - Queen Zenobia

    Deck - Observation Deck Level 1 - Queen Zenobia

    Infernal
    Shotgun Shells (1×12) - Episode 6-2 onwards. On the floor on the south side of the main deck area.
    View location | Show on map
  • Image of Gear Room 1F - Bilge Block Level 2 - Queen Zenobia

    Gear Room 1F - Bilge Block Level 2 - Queen Zenobia

    Normal
    Shotgun Shells (1×8) - Episode 8-1 onwards. In the southern passage, amongst the collapsed pipes in the middle of the corridor.
    View location | Show on map
  • Image of Gear Room 1F - Bilge Block Level 2 - Queen Zenobia

    Gear Room 1F - Bilge Block Level 2 - Queen Zenobia

    Hell
    Shotgun Shells (1×8) - Episode 8-1 onwards. In the southern passage, amongst the collapsed pipes in the middle of the corridor.
    View location | Show on map
  • Image of Gear Room 1F - Bilge Block Level 2 - Queen Zenobia

    Gear Room 1F - Bilge Block Level 2 - Queen Zenobia

    Infernal
    Shotgun Shells (1×8) - Episode 8-1 onwards. In the southern passage, amongst the collapsed pipes in the middle of the corridor.
    View location | Show on map
  • Image of Boiler Room - Bilge Block Level 2 - Queen Zenobia

    Boiler Room - Bilge Block Level 2 - Queen Zenobia

    Normal
    Shotgun Shells (1×8) - Episode 8-1 onwards. On top of the large boiler in the middle of the room.
    Shotgun Shells (1×8) - Episode 8-1 onwards. On top of one of the smaller boilers on the north side of the room.
    View location | Show on map
  • Image of Boiler Room - Bilge Block Level 2 - Queen Zenobia

    Boiler Room - Bilge Block Level 2 - Queen Zenobia

    Hell
    Shotgun Shells (1×8) - Episode 8-1 onwards. On top of the large boiler in the middle of the room.
    Shotgun Shells (1×8) - Episode 8-1 onwards. On top of one of the smaller boilers on the north side of the room.
    View location | Show on map
  • Image of Boiler Room - Bilge Block Level 2 - Queen Zenobia

    Boiler Room - Bilge Block Level 2 - Queen Zenobia

    Infernal
    Shotgun Shells (1×8) - Episode 8-1 onwards. On top of the large boiler in the middle of the room.
    Shotgun Shells (1×8) - Episode 8-1 onwards. On top of one of the smaller boilers on the north side of the room.
    View location | Show on map
  • Image of L-Shaped Corridor - Freight Lift Lower Level & Hold - Queen Zenobia

    L-Shaped Corridor - Freight Lift Lower Level & Hold - Queen Zenobia

    Normal
    Shotgun Shells (1×8) - Episode 8-1 onwards. On the floor at the corner of the corridor.
    View location | Show on map
  • Image of L-Shaped Corridor - Freight Lift Lower Level & Hold - Queen Zenobia

    L-Shaped Corridor - Freight Lift Lower Level & Hold - Queen Zenobia

    Hell
    Shotgun Shells (1×8) - Episode 8-1 onwards. On the floor at the corner of the corridor.
    View location | Show on map
  • Image of L-Shaped Corridor - Freight Lift Lower Level & Hold - Queen Zenobia

    L-Shaped Corridor - Freight Lift Lower Level & Hold - Queen Zenobia

    Infernal
    Shotgun Shells (1×8) - Episode 8-1 onwards. On the floor at the corner of the corridor.
    View location | Show on map
  • Image of Laser Maze Room - Laboratory Lower Level - Queen Zenobia

    Laser Maze Room - Laboratory Lower Level - Queen Zenobia

    Normal
    Shotgun Shells (1×10) - Episode 9-2 onwards. On the crates next to the small elevator.
    View location | Show on map
  • Image of Laser Maze Room - Laboratory Lower Level - Queen Zenobia

    Laser Maze Room - Laboratory Lower Level - Queen Zenobia

    Hell
    Shotgun Shells (1×10) - Episode 9-2 onwards. On the crates next to the small elevator.
    View location | Show on map
  • Image of Side Hatch - Lower Levels - Queen Dido

    Side Hatch - Lower Levels - Queen Dido

    Normal
    Shotgun Shells (1×8) - Episode 12-1. On the shelves on the north side of the room.
    View location | Show on map
  • Image of Side Hatch - Lower Levels - Queen Dido

    Side Hatch - Lower Levels - Queen Dido

    Hell
    Shotgun Shells (1×8) - Episode 12-1. On the shelves on the north side of the room.
    View location | Show on map
  • Image of Power Room Maze - Lower Levels - Queen Dido

    Power Room Maze - Lower Levels - Queen Dido

    Infernal
    Shotgun Shells (1×8) - Episode 12-1. On the ground near the control switch for the power in the small south eastern room of the area.
    View location | Show on map
  • Image of Living Quarters Passage - Upper Levels - Queen Dido

    Living Quarters Passage - Upper Levels - Queen Dido

    Normal
    Shotgun Shells (1×10) - Episode 12-1. On the coffee table in the north east corner of the living quarters room.
    View location | Show on map
  • Image of Living Quarters Passage - Upper Levels - Queen Dido

    Living Quarters Passage - Upper Levels - Queen Dido

    Hell
    Shotgun Shells (1×10) - Episode 12-1. On the coffee table in the north east corner of the living quarters room.
    View location | Show on map
  • Image of Living Quarters Passage - Upper Levels - Queen Dido

    Living Quarters Passage - Upper Levels - Queen Dido

    Infernal
    Shotgun Shells (1×10) - Episode 12-1. On the couch next to the toppled grandfather clock in the living quarters.
    View location | Show on map
  • Image of Projector Room - Upper Levels - Queen Dido

    Projector Room - Upper Levels - Queen Dido

    Normal
    Shotgun Shells (1×10) - Episode 12-1. On the floor in the north east corner of the room.
    View location | Show on map
  • Image of Projector Room - Upper Levels - Queen Dido

    Projector Room - Upper Levels - Queen Dido

    Hell
    Shotgun Shells (1×10) - Episode 12-1. On the floor in the north east corner of the room.
    View location | Show on map
  • Image of Grand Stairway - Upper Levels - Queen Dido

    Grand Stairway - Upper Levels - Queen Dido

    Normal
    Shotgun Shells (1×10) - Episode 12-1. On the floor next to the dead body halfway down the stairs.
    View location | Show on map
  • Image of Grand Stairway - Upper Levels - Queen Dido

    Grand Stairway - Upper Levels - Queen Dido

    Hell
    Shotgun Shells (1×10) - Episode 12-1. On the floor next to the dead body halfway down the stairs.
    View location | Show on map

There are no locations to show for this game mode. The following game modes are applicable:

Related product

S.T.A.R.S. Numskull Men's Snapback

S.T.A.R.S. Numskull Men's Snapback

Buy the S.T.A.R.S. Numskull Men's Snapback on Amazon

Explore further