Evil Resource

Tricorne Ooze (Resident Evil Revelations)

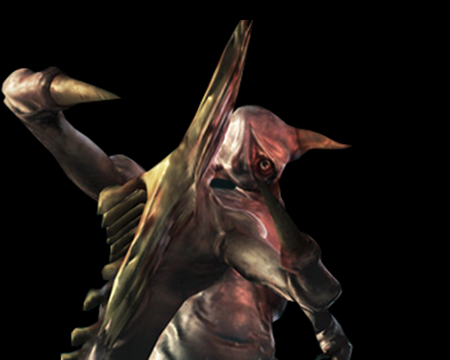
Image of Tricorne Ooze
The Tricorne Ooze (or Shooter Ooze as it is commonly aliased) is a variant of the regular Ooze. They prefer to fight from long range and have a sharp gun-like appendage that shoots spinning bone projectiles at the player. It is possible to shatter these projectiles out of the air with a well-timed knife attack. As with the regular Oozes, their weak spot is also their head.
CategoryEnemy

Related product

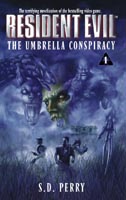
Resident Evil Book 1 - The Umbrella Conspiracy

Resident Evil Book 1 - The Umbrella Conspiracy

Buy the Resident Evil Book 1 - The Umbrella Conspiracy by S.D. Perry on Amazon

Location

  • Image of Elevator Passage - Crew Quarters Lower Level - Queen Zenobia

    Elevator Passage - Crew Quarters Lower Level - Queen Zenobia

    Infernal
    1 Tricorne Ooze - Episode 1-1. Standing in the northern section of the elevator area.
    View location | Show on map
  • Image of Dining Hall 1F - Lower Cabins & Cafeteria - Queen Zenobia

    Dining Hall 1F - Lower Cabins & Cafeteria - Queen Zenobia

    Normal
    1 Tricorne Ooze - Episode 3-2. Standing in the middle of the room.
    View location | Show on map
  • Image of Dining Hall 1F - Lower Cabins & Cafeteria - Queen Zenobia

    Dining Hall 1F - Lower Cabins & Cafeteria - Queen Zenobia

    Hell
    1 Tricorne Ooze - Episode 3-2. Standing in the middle of the room.
    View location | Show on map
  • Image of Dining Hall 1F - Lower Cabins & Cafeteria - Queen Zenobia

    Dining Hall 1F - Lower Cabins & Cafeteria - Queen Zenobia

    Infernal
    1 Tricorne Ooze - Episode 3-2. Standing in the middle of the room.
    View location | Show on map
  • Image of Dining Hall 2F - Upper Cabins & Cafeteria - Queen Zenobia

    Dining Hall 2F - Upper Cabins & Cafeteria - Queen Zenobia

    Normal
    1 Tricorne Ooze - Episode 3-2. Standing on the eastern balcony.
    View location | Show on map
  • Image of Dining Hall 2F - Upper Cabins & Cafeteria - Queen Zenobia

    Dining Hall 2F - Upper Cabins & Cafeteria - Queen Zenobia

    Hell
    1 Tricorne Ooze - Episode 3-2. Standing on the eastern balcony.
    View location | Show on map
  • Image of Dining Hall 2F - Upper Cabins & Cafeteria - Queen Zenobia

    Dining Hall 2F - Upper Cabins & Cafeteria - Queen Zenobia

    Infernal
    1 Tricorne Ooze - Episode 3-2. Standing on the eastern balcony.
    View location | Show on map
  • Image of Northern Corridor - Promenade 2F - Queen Zenobia

    Northern Corridor - Promenade 2F - Queen Zenobia

    Infernal
    1 Tricorne Ooze - Episode 3-2. Standing in the middle of the corridor.
    View location | Show on map
  • Image of Upper Walkway - Promenade 2F - Queen Zenobia

    Upper Walkway - Promenade 2F - Queen Zenobia

    Normal
    1 Tricorne Ooze - Episode 3-2. On the east side of the area.
    Tricorne Oozes - Episode 3-2. Multiple Shooter Oozes will appear when the Scagdead attacks.
    View location | Show on map
  • Image of Upper Walkway - Promenade 2F - Queen Zenobia

    Upper Walkway - Promenade 2F - Queen Zenobia

    Hell
    1 Tricorne Ooze - Episode 3-2. On the east side of the area.
    Tricorne Oozes - Episode 3-2. Multiple Shooter Oozes will appear when the Scagdead attacks.
    View location | Show on map
  • Image of Upper Walkway - Promenade 2F - Queen Zenobia

    Upper Walkway - Promenade 2F - Queen Zenobia

    Infernal
    1 Tricorne Ooze - Episode 3-2. On the east side of the area.
    Tricorne Oozes - Episode 3-2. Multiple Shooter Oozes will appear when the Scagdead attacks.
    View location | Show on map
  • Image of Main Section - Promenade 1F - Queen Zenobia

    Main Section - Promenade 1F - Queen Zenobia

    Normal
    Tricorne Oozes - Episode 4-1. Multiple ones spawn here.
    View location | Show on map
  • Image of Main Section - Promenade 1F - Queen Zenobia

    Main Section - Promenade 1F - Queen Zenobia

    Hell
    Tricorne Oozes - Episode 4-1. Multiple ones spawn here.
    View location | Show on map
  • Image of Main Section - Promenade 1F - Queen Zenobia

    Main Section - Promenade 1F - Queen Zenobia

    Infernal
    Tricorne Oozes - Episode 4-1. Multiple ones spawn here.
    View location | Show on map
  • Image of Upper Walkway - Promenade 2F - Queen Zenobia

    Upper Walkway - Promenade 2F - Queen Zenobia

    Normal
    1 Tricorne Ooze - Episode 4-1. Multiple ones spawn here.
    View location | Show on map
  • Image of Upper Walkway - Promenade 2F - Queen Zenobia

    Upper Walkway - Promenade 2F - Queen Zenobia

    Hell
    1 Tricorne Ooze - Episode 4-1. Multiple ones spawn here.
    View location | Show on map
  • Image of Bunkhouse Corridor - Crew Quarters Upper Level - Queen Zenobia

    Bunkhouse Corridor - Crew Quarters Upper Level - Queen Zenobia

    Normal
    1 Tricorne Ooze - Episode 4-1. Random chance of appearing on the western side of the corridor after triggering the event with Rachael Ooze. Only appears if you have not defeated Rachael prior to getting to this location.
    1 Tricorne Ooze - Episode 4-1. Random chance of appearing on the eastern side of the corridor after triggering the event with Rachael Ooze. Only appears if you have not defeated Rachael prior to getting to this location.
    View location | Show on map
  • Image of Bunkhouse Corridor - Crew Quarters Upper Level - Queen Zenobia

    Bunkhouse Corridor - Crew Quarters Upper Level - Queen Zenobia

    Hell
    1 Tricorne Ooze - Episode 4-1. Random chance of appearing on the western side of the corridor after triggering the event with Rachael Ooze. Only appears if you have not defeated Rachael prior to getting to this location.
    1 Tricorne Ooze - Episode 4-1. Random chance of appearing on the eastern side of the corridor after triggering the event with Rachael Ooze. Only appears if you have not defeated Rachael prior to getting to this location.
    View location | Show on map
  • Image of Bunkhouse Corridor - Crew Quarters Upper Level - Queen Zenobia

    Bunkhouse Corridor - Crew Quarters Upper Level - Queen Zenobia

    Infernal
    1 Tricorne Ooze - Episode 4-1. Random chance of appearing on the western side of the corridor after triggering the event with Rachael Ooze. Only appears if you have not defeated Rachael prior to getting to this location.
    1 Tricorne Ooze - Episode 4-1. Random chance of appearing on the eastern side of the corridor after triggering the event with Rachael Ooze. Only appears if you have not defeated Rachael prior to getting to this location.
    View location | Show on map
  • Image of Stairwell Entry - Crew Quarters Lower Level - Queen Zenobia

    Stairwell Entry - Crew Quarters Lower Level - Queen Zenobia

    Normal
    1 Tricorne Ooze - Episode 4-1. Appears after triggering the event with Rachael Ooze. Note: it does not appear in the 3DS version.
    View location | Show on map
  • Image of Dining Hall - Crew Quarters Lower Level - Queen Zenobia

    Dining Hall - Crew Quarters Lower Level - Queen Zenobia

    Normal
    Tricorne Oozes - Episode 4-1. Multiple ones appear here after triggering the event with Rachael Ooze. Only if you have not defeated her prior to getting to this location. Note: they do not appear in the 3DS version.
    View location | Show on map
  • Image of Forked Passage - Bilge Block Level 2 - Queen Zenobia

    Forked Passage - Bilge Block Level 2 - Queen Zenobia

    Infernal
    2 Tricorne Oozes - Episode 5-2. Appear at either end of the passage once you have acquired the Cog.
    View location | Show on map
  • Image of Gear Room 1F - Bilge Block Level 2 - Queen Zenobia

    Gear Room 1F - Bilge Block Level 2 - Queen Zenobia

    Infernal
    2 Tricorne Oozes - Episode 5-2. Appear here once you have acquired the Cog.
    View location | Show on map
  • Image of Casino Floor - Casino - Queen Semiramis

    Casino Floor - Casino - Queen Semiramis

    Infernal
    1 Tricorne Ooze - Episode 6-1. Emerges from the Money Office when you approach the door.
    View location | Show on map
  • Image of Large Storeroom - Freight Lift Upper Level - Queen Semiramis

    Large Storeroom - Freight Lift Upper Level - Queen Semiramis

    Normal
    1 Tricorne Ooze - Episode 6-1. Standing in the south east corner.
    View location | Show on map
  • Image of Large Storeroom - Freight Lift Upper Level - Queen Semiramis

    Large Storeroom - Freight Lift Upper Level - Queen Semiramis

    Hell
    1 Tricorne Ooze - Episode 6-1. Standing in the south east corner.
    View location | Show on map
  • Image of Bilge Passage 3 - Bilge Block Level 3 - Queen Semiramis

    Bilge Passage 3 - Bilge Block Level 3 - Queen Semiramis

    Normal
    1 Tricorne Ooze - Episode 6-1. In the lower section.
    View location | Show on map
  • Image of Bilge Passage 3 - Bilge Block Level 3 - Queen Semiramis

    Bilge Passage 3 - Bilge Block Level 3 - Queen Semiramis

    Hell
    1 Tricorne Ooze - Episode 6-1. In the lower section.
    View location | Show on map
  • Image of Bilge Passage 3 - Bilge Block Level 3 - Queen Semiramis

    Bilge Passage 3 - Bilge Block Level 3 - Queen Semiramis

    Infernal
    3 Tricorne Oozes - Episode 6-1. In the lower section.
    View location | Show on map
  • Image of Bilge Passage 4 - Bilge Block Level 2 - Queen Semiramis

    Bilge Passage 4 - Bilge Block Level 2 - Queen Semiramis

    Normal
    1 Tricorne Ooze - Episode 6-1. On the platform.
    View location | Show on map
  • Image of Bilge Passage 4 - Bilge Block Level 2 - Queen Semiramis

    Bilge Passage 4 - Bilge Block Level 2 - Queen Semiramis

    Hell
    1 Tricorne Ooze - Episode 6-1. On the platform.
    View location | Show on map
  • Image of Forked Passage - Bilge Block Level 2 - Queen Semiramis

    Forked Passage - Bilge Block Level 2 - Queen Semiramis

    Normal
    1 Tricorne Ooze - Episode 6-1. Standing in the southern section of the passage.
    View location | Show on map
  • Image of Forked Passage - Bilge Block Level 2 - Queen Semiramis

    Forked Passage - Bilge Block Level 2 - Queen Semiramis

    Hell
    1 Tricorne Ooze - Episode 6-1. Standing in the southern section of the passage.
    View location | Show on map
  • Image of Main Section - Promenade 1F - Queen Zenobia

    Main Section - Promenade 1F - Queen Zenobia

    Normal
    10 Tricorne Oozes - Episode 6-2. Multiple ones spawn here.
    View location | Show on map
  • Image of Main Section - Promenade 1F - Queen Zenobia

    Main Section - Promenade 1F - Queen Zenobia

    Hell
    10 Tricorne Oozes - Episode 6-2. Multiple ones spawn here.
    View location | Show on map
  • Image of Ventilation Tunnel 2 - Freight Lift Upper Level & Hold - Queen Zenobia

    Ventilation Tunnel 2 - Freight Lift Upper Level & Hold - Queen Zenobia

    Infernal
    1 Tricorne Ooze - Episode 6-2. Appears at the western end of the tunnel.
    View location | Show on map
  • Image of Dining Hall 1F - Lower Cabins & Cafeteria - Queen Zenobia

    Dining Hall 1F - Lower Cabins & Cafeteria - Queen Zenobia

    Normal
    2 Tricorne Oozes - Episode 7-1. Standing around.
    View location | Show on map
  • Image of Dining Hall 1F - Lower Cabins & Cafeteria - Queen Zenobia

    Dining Hall 1F - Lower Cabins & Cafeteria - Queen Zenobia

    Hell
    2 Tricorne Oozes - Episode 7-1. Standing around.
    View location | Show on map
  • Image of Dining Hall 1F - Lower Cabins & Cafeteria - Queen Zenobia

    Dining Hall 1F - Lower Cabins & Cafeteria - Queen Zenobia

    Infernal
    2 Tricorne Oozes - Episode 7-1. Standing around.
    View location | Show on map
  • Image of Dining Hall 2F - Upper Cabins & Cafeteria - Queen Zenobia

    Dining Hall 2F - Upper Cabins & Cafeteria - Queen Zenobia

    Normal
    1 Tricorne Ooze - Episode 7-1. Standing around.
    View location | Show on map
  • Image of Dining Hall 2F - Upper Cabins & Cafeteria - Queen Zenobia

    Dining Hall 2F - Upper Cabins & Cafeteria - Queen Zenobia

    Hell
    1 Tricorne Ooze - Episode 7-1. Standing around.
    View location | Show on map
  • Image of Dining Hall 2F - Upper Cabins & Cafeteria - Queen Zenobia

    Dining Hall 2F - Upper Cabins & Cafeteria - Queen Zenobia

    Infernal
    1 Tricorne Ooze - Episode 7-1. Standing around.
    View location | Show on map
  • Image of Library 1 - Lower Cabins & Cafeteria - Queen Zenobia

    Library 1 - Lower Cabins & Cafeteria - Queen Zenobia

    Normal
    2 Tricorne Oozes - Episode 7-1. Standing around.
    View location | Show on map
  • Image of Library 1 - Lower Cabins & Cafeteria - Queen Zenobia

    Library 1 - Lower Cabins & Cafeteria - Queen Zenobia

    Hell
    2 Tricorne Oozes - Episode 7-1. Standing around.
    View location | Show on map
  • Image of Library 1 - Lower Cabins & Cafeteria - Queen Zenobia

    Library 1 - Lower Cabins & Cafeteria - Queen Zenobia

    Infernal
    2 Tricorne Oozes - Episode 7-1. Standing around.
    View location | Show on map
  • Image of L-Shaped Corridor - Upper Cabins & Cafeteria - Queen Zenobia

    L-Shaped Corridor - Upper Cabins & Cafeteria - Queen Zenobia

    Normal
    1 Tricorne Ooze - Episode 7-1. Standing in the corner section of the corridor.
    View location | Show on map
  • Image of L-Shaped Corridor - Upper Cabins & Cafeteria - Queen Zenobia

    L-Shaped Corridor - Upper Cabins & Cafeteria - Queen Zenobia

    Hell
    1 Tricorne Ooze - Episode 7-1. Standing in the corner section of the corridor.
    View location | Show on map
  • Image of L-Shaped Corridor - Upper Cabins & Cafeteria - Queen Zenobia

    L-Shaped Corridor - Upper Cabins & Cafeteria - Queen Zenobia

    Infernal
    1 Tricorne Ooze - Episode 7-1. Standing in the corner section of the corridor.
    View location | Show on map
  • Image of Cabin Corridor 2 - Upper Cabins & Cafeteria - Queen Zenobia

    Cabin Corridor 2 - Upper Cabins & Cafeteria - Queen Zenobia

    Normal
    2 Tricorne Oozes - Episode 7-1. Standing at either end of the corridor.
    View location | Show on map
  • Image of Cabin Corridor 2 - Upper Cabins & Cafeteria - Queen Zenobia

    Cabin Corridor 2 - Upper Cabins & Cafeteria - Queen Zenobia

    Hell
    2 Tricorne Oozes - Episode 7-1. Standing at either end of the corridor.
    View location | Show on map
  • Image of Cabin Corridor 2 - Upper Cabins & Cafeteria - Queen Zenobia

    Cabin Corridor 2 - Upper Cabins & Cafeteria - Queen Zenobia

    Infernal
    2 Tricorne Oozes - Episode 7-1. Standing at either end of the corridor.
    View location | Show on map
  • Image of Upper Balcony - Upper Cabins & Cafeteria - Queen Zenobia

    Upper Balcony - Upper Cabins & Cafeteria - Queen Zenobia

    Normal
    2 Tricorne Oozes - Episode 7-1. Standing around.
    View location | Show on map
  • Image of Upper Balcony - Upper Cabins & Cafeteria - Queen Zenobia

    Upper Balcony - Upper Cabins & Cafeteria - Queen Zenobia

    Hell
    2 Tricorne Oozes - Episode 7-1. Standing around.
    View location | Show on map
  • Image of Upper Balcony - Upper Cabins & Cafeteria - Queen Zenobia

    Upper Balcony - Upper Cabins & Cafeteria - Queen Zenobia

    Infernal
    2 Tricorne Oozes - Episode 7-1. Standing around.
    View location | Show on map
  • Image of Elevator Entry - Upper Cabins & Cafeteria - Queen Zenobia

    Elevator Entry - Upper Cabins & Cafeteria - Queen Zenobia

    Normal
    1 Tricorne Ooze - Episode 7-1. Initially on the floor.
    View location | Show on map
  • Image of Elevator Entry - Upper Cabins & Cafeteria - Queen Zenobia

    Elevator Entry - Upper Cabins & Cafeteria - Queen Zenobia

    Hell
    1 Tricorne Ooze - Episode 7-1. Initially on the floor.
    View location | Show on map
  • Image of Elevator Entry - Upper Cabins & Cafeteria - Queen Zenobia

    Elevator Entry - Upper Cabins & Cafeteria - Queen Zenobia

    Infernal
    1 Tricorne Ooze - Episode 7-1. Initially on the floor.
    View location | Show on map
  • Image of Side Deck - Side Deck - Queen Zenobia

    Side Deck - Side Deck - Queen Zenobia

    Normal
    1 Tricorne Ooze - Episode 7-2. At the eastern end of the deck.
    View location | Show on map
  • Image of Side Deck - Side Deck - Queen Zenobia

    Side Deck - Side Deck - Queen Zenobia

    Hell
    1 Tricorne Ooze - Episode 7-2. At the eastern end of the deck.
    View location | Show on map
  • Image of Side Deck - Side Deck - Queen Zenobia

    Side Deck - Side Deck - Queen Zenobia

    Infernal
    2 Tricorne Oozes - Episode 7-2. At the eastern end of the deck.
    View location | Show on map
  • Image of Elevator Entry - Side Deck - Queen Zenobia

    Elevator Entry - Side Deck - Queen Zenobia

    Normal
    1 Tricorne Ooze - Episode 7-2. Standing in the corner of the corridor.
    View location | Show on map
  • Image of Elevator Entry - Side Deck - Queen Zenobia

    Elevator Entry - Side Deck - Queen Zenobia

    Hell
    1 Tricorne Ooze - Episode 7-2. Standing in the corner of the corridor.
    View location | Show on map
  • Image of Elevator Entry - Side Deck - Queen Zenobia

    Elevator Entry - Side Deck - Queen Zenobia

    Infernal
    1 Tricorne Ooze - Episode 7-2. Standing in the corner of the corridor.
    View location | Show on map
  • Image of Main Hold 2F - Freight Lift Upper Level & Hold - Queen Zenobia

    Main Hold 2F - Freight Lift Upper Level & Hold - Queen Zenobia

    Normal
    2 Tricorne Oozes - Episode 7-2. On the walkway.
    View location | Show on map
  • Image of Main Hold 2F - Freight Lift Upper Level & Hold - Queen Zenobia

    Main Hold 2F - Freight Lift Upper Level & Hold - Queen Zenobia

    Hell
    2 Tricorne Oozes - Episode 7-2. On the walkway.
    View location | Show on map
  • Image of Main Hold 2F - Freight Lift Upper Level & Hold - Queen Zenobia

    Main Hold 2F - Freight Lift Upper Level & Hold - Queen Zenobia

    Infernal
    2 Tricorne Oozes - Episode 7-2. On the walkway.
    View location | Show on map
  • Image of Main Hold 1F - Freight Lift Lower Level & Hold - Queen Zenobia

    Main Hold 1F - Freight Lift Lower Level & Hold - Queen Zenobia

    Normal
    3 Tricorne Oozes - Episode 7-2. Scattered around the containers.
    View location | Show on map
  • Image of Main Hold 1F - Freight Lift Lower Level & Hold - Queen Zenobia

    Main Hold 1F - Freight Lift Lower Level & Hold - Queen Zenobia

    Hell
    3 Tricorne Oozes - Episode 7-2. Scattered around the containers.
    View location | Show on map
  • Image of Main Hold 1F - Freight Lift Lower Level & Hold - Queen Zenobia

    Main Hold 1F - Freight Lift Lower Level & Hold - Queen Zenobia

    Infernal
    4 Tricorne Oozes - Episode 7-2. Scattered around the containers.
    View location | Show on map
  • Image of Southern Corridor - Freight Lift Lower Level & Hold - Queen Zenobia

    Southern Corridor - Freight Lift Lower Level & Hold - Queen Zenobia

    Normal
    2 Tricorne Oozes - Episode 7-2. Standing next to the door to the UAV Control Room.
    View location | Show on map
  • Image of Southern Corridor - Freight Lift Lower Level & Hold - Queen Zenobia

    Southern Corridor - Freight Lift Lower Level & Hold - Queen Zenobia

    Hell
    2 Tricorne Oozes - Episode 7-2. Standing next to the door to the UAV Control Room.
    View location | Show on map
  • Image of Southern Corridor - Freight Lift Lower Level & Hold - Queen Zenobia

    Southern Corridor - Freight Lift Lower Level & Hold - Queen Zenobia

    Infernal
    4 Tricorne Oozes - Episode 7-2. Standing next to the door to the UAV Control Room.
    View location | Show on map
  • Image of Main Hold 2F - Freight Lift Upper Level & Hold - Queen Zenobia

    Main Hold 2F - Freight Lift Upper Level & Hold - Queen Zenobia

    Infernal
    3 Tricorne Oozes - Episode 8-1. Standing around the walkway.
    View location | Show on map
  • Image of Entrance Tunnel - Laboratory Upper Level - Queen Zenobia

    Entrance Tunnel - Laboratory Upper Level - Queen Zenobia

    Infernal
    2 Tricorne Oozes - Episode 8-3. Standing halfway along the tunnel.
    View location | Show on map
  • Image of Main Platform - Laboratory Upper Level - Queen Zenobia

    Main Platform - Laboratory Upper Level - Queen Zenobia

    Normal
    Tricorne Oozes - Episode 9-2. Multiple ones storm the platform once you use the passcode on the main terminal.
    View location | Show on map
  • Image of Main Platform - Laboratory Upper Level - Queen Zenobia

    Main Platform - Laboratory Upper Level - Queen Zenobia

    Hell
    Tricorne Oozes - Episode 9-2. Multiple ones storm the platform once you use the passcode on the main terminal.
    View location | Show on map
  • Image of Dome Room - Laboratory Lower Level - Queen Zenobia

    Dome Room - Laboratory Lower Level - Queen Zenobia

    Normal
    1 Tricorne Ooze - Episode 9-2. Standing in the northern area of the room.
    View location | Show on map
  • Image of Dome Room - Laboratory Lower Level - Queen Zenobia

    Dome Room - Laboratory Lower Level - Queen Zenobia

    Hell
    1 Tricorne Ooze - Episode 9-2. Standing in the northern area of the room.
    View location | Show on map
  • Image of Dome Room - Laboratory Lower Level - Queen Zenobia

    Dome Room - Laboratory Lower Level - Queen Zenobia

    Infernal
    1 Tricorne Ooze - Episode 9-2. Standing in the northern area of the room.
    View location | Show on map
  • Image of Library 2 - Lower Cabins & Cafeteria - Queen Zenobia

    Library 2 - Lower Cabins & Cafeteria - Queen Zenobia

    Normal
    1 Tricorne Ooze - Episode 10-1. Standing in the south east corner of the room.
    View location | Show on map
  • Image of Library 2 - Lower Cabins & Cafeteria - Queen Zenobia

    Library 2 - Lower Cabins & Cafeteria - Queen Zenobia

    Hell
    1 Tricorne Ooze - Episode 10-1. Standing in the south east corner of the room.
    View location | Show on map
  • Image of Library 2 - Lower Cabins & Cafeteria - Queen Zenobia

    Library 2 - Lower Cabins & Cafeteria - Queen Zenobia

    Infernal
    1 Tricorne Ooze - Episode 10-1. Standing in the south east corner of the room.
    View location | Show on map
  • Image of Art Corridor - Lower Cabins & Cafeteria - Queen Zenobia

    Art Corridor - Lower Cabins & Cafeteria - Queen Zenobia

    Normal
    1 Tricorne Ooze - Episode 10-1. Standing around.
    View location | Show on map
  • Image of Art Corridor - Lower Cabins & Cafeteria - Queen Zenobia

    Art Corridor - Lower Cabins & Cafeteria - Queen Zenobia

    Hell
    1 Tricorne Ooze - Episode 10-1. Standing around.
    View location | Show on map
  • Image of Art Corridor - Lower Cabins & Cafeteria - Queen Zenobia

    Art Corridor - Lower Cabins & Cafeteria - Queen Zenobia

    Infernal
    1 Tricorne Ooze - Episode 10-1. Standing around.
    View location | Show on map
  • Image of Display Room - Upper Cabins & Cafeteria - Queen Zenobia

    Display Room - Upper Cabins & Cafeteria - Queen Zenobia

    Normal
    1 Tricorne Ooze - Episode 10-1. Standing in the north west corner of the room.
    View location | Show on map
  • Image of Display Room - Upper Cabins & Cafeteria - Queen Zenobia

    Display Room - Upper Cabins & Cafeteria - Queen Zenobia

    Hell
    1 Tricorne Ooze - Episode 10-1. Standing in the north west corner of the room.
    View location | Show on map
  • Image of Display Room - Upper Cabins & Cafeteria - Queen Zenobia

    Display Room - Upper Cabins & Cafeteria - Queen Zenobia

    Infernal
    1 Tricorne Ooze - Episode 10-1. Standing in the north west corner of the room.
    View location | Show on map
  • Image of Elevator Entry - Upper Cabins & Cafeteria - Queen Zenobia

    Elevator Entry - Upper Cabins & Cafeteria - Queen Zenobia

    Normal
    2 Tricorne Oozes - Episode 10-1. Standing in front of the elevator.
    View location | Show on map
  • Image of Elevator Entry - Upper Cabins & Cafeteria - Queen Zenobia

    Elevator Entry - Upper Cabins & Cafeteria - Queen Zenobia

    Hell
    2 Tricorne Oozes - Episode 10-1. Standing in front of the elevator.
    View location | Show on map
  • Image of Elevator Entry - Upper Cabins & Cafeteria - Queen Zenobia

    Elevator Entry - Upper Cabins & Cafeteria - Queen Zenobia

    Infernal
    2 Tricorne Oozes - Episode 10-1. Standing in front of the elevator.
    View location | Show on map
  • Image of Boiler Room - Emergency Passageway Lower Level - Queen Zenobia

    Boiler Room - Emergency Passageway Lower Level - Queen Zenobia

    Normal
    2 Tricorne Oozes - Episode 10-2. In the south east corner of the main room.
    View location | Show on map
  • Image of Boiler Room - Emergency Passageway Lower Level - Queen Zenobia

    Boiler Room - Emergency Passageway Lower Level - Queen Zenobia

    Hell
    2 Tricorne Oozes - Episode 10-2. In the south east corner of the main room.
    View location | Show on map
  • Image of Boiler Room - Emergency Passageway Lower Level - Queen Zenobia

    Boiler Room - Emergency Passageway Lower Level - Queen Zenobia

    Infernal
    2 Tricorne Oozes - Episode 10-2. In the south east corner of the main room.
    View location | Show on map
  • Image of Steam Corridor 2F - Emergency Passageway Upper Level - Queen Zenobia

    Steam Corridor 2F - Emergency Passageway Upper Level - Queen Zenobia

    Normal
    1 Tricorne Ooze - Episode 10-2. Standing on the west end of the platform.
    View location | Show on map
  • Image of Steam Corridor 2F - Emergency Passageway Upper Level - Queen Zenobia

    Steam Corridor 2F - Emergency Passageway Upper Level - Queen Zenobia

    Hell
    1 Tricorne Ooze - Episode 10-2. Standing on the west end of the platform.
    View location | Show on map
  • Image of Steam Corridor 2F - Emergency Passageway Upper Level - Queen Zenobia

    Steam Corridor 2F - Emergency Passageway Upper Level - Queen Zenobia

    Infernal
    1 Tricorne Ooze - Episode 10-2. Standing on the west end of the platform.
    View location | Show on map
  • Image of Elevator Shaft - Emergency Passageway Upper Level - Queen Zenobia

    Elevator Shaft - Emergency Passageway Upper Level - Queen Zenobia

    Normal
    1 Tricorne Ooze - Episode 10-2. Drops down from above. Note: it only appears in the 3DS version.
    View location | Show on map
  • Image of Elevator Shaft - Emergency Passageway Upper Level - Queen Zenobia

    Elevator Shaft - Emergency Passageway Upper Level - Queen Zenobia

    Hell
    1 Tricorne Ooze - Episode 10-2. Drop down from above.
    View location | Show on map

There are no locations to show for this game mode. The following game modes are applicable:

Related product

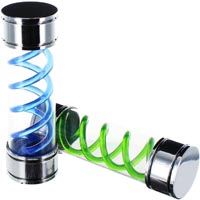
T-Virus/G-Vaccine Prop Replica Set with Case

T-Virus/G-Vaccine Prop Replica Set with Case

Buy the T-Virus/G-Vaccine Prop Replica Set with Case on Amazon

Explore further