Evil Resource

Pass Code Output Terminal (Resident Evil Remake)

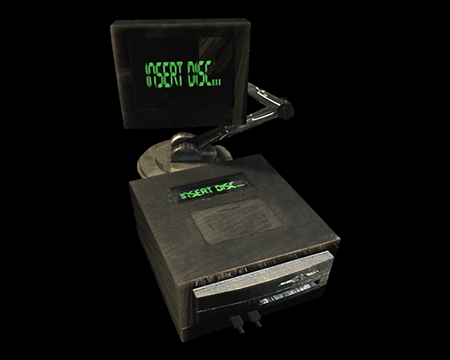
Image of Pass Code Output Terminal
A device for authenticating and transmitting a pass code when used with an MO Disk.
CategoryMiscellaneous object

Related product

Resident Evil Book 2 - Caliban Cove

Resident Evil Book 2 - Caliban Cove

Buy the Resident Evil Book 2 - Caliban Cove by S.D. Perry on Amazon

Location

  • Image of Morgue - Laboratory B3

    Morgue - Laboratory B3

    Jill (Very Easy)
    On the desk in the south west corner, you have to travel through the air ducts to reach it.
    View location | Show on map
  • Image of Morgue - Laboratory B3

    Morgue - Laboratory B3

    Chris (Very Easy)
    On the desk in the south west corner, you have to travel through the air ducts to reach it.
    View location | Show on map
  • Image of Morgue - Laboratory B3

    Morgue - Laboratory B3

    Jill (Easy)
    On the desk in the south west corner, you have to travel through the air ducts to reach it.
    View location | Show on map
  • Image of Morgue - Laboratory B3

    Morgue - Laboratory B3

    Chris (Easy)
    On the desk in the south west corner, you have to travel through the air ducts to reach it.
    View location | Show on map
  • Image of Morgue - Laboratory B3

    Morgue - Laboratory B3

    Jill (Normal)
    On the desk in the south west corner, you have to travel through the air ducts to reach it.
    View location | Show on map
  • Image of Morgue - Laboratory B3

    Morgue - Laboratory B3

    Chris (Normal)
    On the desk in the south west corner, you have to travel through the air ducts to reach it.
    View location | Show on map
  • Image of Morgue - Laboratory B3

    Morgue - Laboratory B3

    Jill (Hard)
    On the desk in the south west corner, you have to travel through the air ducts to reach it.
    View location | Show on map
  • Image of Morgue - Laboratory B3

    Morgue - Laboratory B3

    Chris (Hard)
    On the desk in the south west corner, you have to travel through the air ducts to reach it.
    View location | Show on map
  • Image of Power Maze B - Laboratory B3

    Power Maze B - Laboratory B3

    Jill (Very Easy)
    On a desk in the south east corner of the maze.
    View location | Show on map
  • Image of Power Maze B - Laboratory B3

    Power Maze B - Laboratory B3

    Chris (Very Easy)
    On a desk in the south east corner of the maze.
    View location | Show on map
  • Image of Power Maze B - Laboratory B3

    Power Maze B - Laboratory B3

    Jill (Easy)
    On a desk in the south east corner of the maze.
    View location | Show on map
  • Image of Power Maze B - Laboratory B3

    Power Maze B - Laboratory B3

    Chris (Easy)
    On a desk in the south east corner of the maze.
    View location | Show on map
  • Image of Power Maze B - Laboratory B3

    Power Maze B - Laboratory B3

    Jill (Normal)
    On a desk in the south east corner of the maze.
    View location | Show on map
  • Image of Power Maze B - Laboratory B3

    Power Maze B - Laboratory B3

    Chris (Normal)
    On a desk in the south east corner of the maze.
    View location | Show on map
  • Image of Power Maze B - Laboratory B3

    Power Maze B - Laboratory B3

    Jill (Hard)
    On a desk in the south east corner of the maze.
    View location | Show on map
  • Image of Power Maze B - Laboratory B3

    Power Maze B - Laboratory B3

    Chris (Hard)
    On a desk in the south east corner of the maze.
    View location | Show on map
  • Image of X-Ray Room B - Laboratory B3

    X-Ray Room B - Laboratory B3

    Jill (Very Easy)
    On the desk in the north east corner of the room.
    View location | Show on map
  • Image of X-Ray Room B - Laboratory B3

    X-Ray Room B - Laboratory B3

    Chris (Very Easy)
    On the desk in the north east corner of the room.
    View location | Show on map
  • Image of X-Ray Room B - Laboratory B3

    X-Ray Room B - Laboratory B3

    Jill (Easy)
    On the desk in the north east corner of the room.
    View location | Show on map
  • Image of X-Ray Room B - Laboratory B3

    X-Ray Room B - Laboratory B3

    Chris (Easy)
    On the desk in the north east corner of the room.
    View location | Show on map
  • Image of X-Ray Room B - Laboratory B3

    X-Ray Room B - Laboratory B3

    Jill (Normal)
    On the desk in the north east corner of the room.
    View location | Show on map
  • Image of X-Ray Room B - Laboratory B3

    X-Ray Room B - Laboratory B3

    Chris (Normal)
    On the desk in the north east corner of the room.
    View location | Show on map
  • Image of X-Ray Room B - Laboratory B3

    X-Ray Room B - Laboratory B3

    Jill (Hard)
    On the desk in the north east corner of the room.
    View location | Show on map
  • Image of X-Ray Room B - Laboratory B3

    X-Ray Room B - Laboratory B3

    Chris (Hard)
    On the desk in the north east corner of the room.
    View location | Show on map

There are no locations to show for this game mode. The following game modes are applicable:
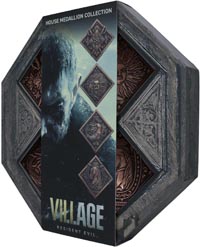
Related product

Resident Evil Village Replica House Crest Medallion Set

Resident Evil Village Replica House Crest Medallion Set

Buy the Resident Evil Village Replica House Crest Medallion Set on Amazon

Explore further