Evil Resource

Zombie (Resident Evil Outbreak)

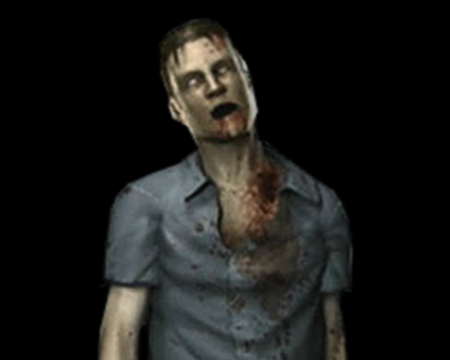
Image of Zombie
Zombies are the residents of Raccoon City who have become undead flesh-seekers given un-life through mutations and reanimation caused by the T-Virus. Zombies appear in many forms and dress styles in the game, and they are the most frequently encountered enemy. Even if you clear a room of zombies, you will find that areas respawn after a certain length of time, and zombies will follow you from room to room.

Related product

Resident Evil 2 Limited Edition R.P.D Welcome Pack

Resident Evil 2 Limited Edition R.P.D Welcome Pack

Buy the Resident Evil 2 Limited Edition R.P.D Welcome Pack on Amazon

Location

  • Image of J's Bar - J's Bar 1F

    J's Bar - J's Bar 1F

    Easy
    Zombies - Break down the door and swarm into the room after a certain amount of time has elapsed.
    View location | Show on map
  • Image of J's Bar - J's Bar 1F

    J's Bar - J's Bar 1F

    Normal
    Zombies - Break down the door and swarm into the room after a certain amount of time has elapsed.
    View location | Show on map
  • Image of J's Bar - J's Bar 1F

    J's Bar - J's Bar 1F

    Hard
    Zombies - Break down the door and swarm into the room after a certain amount of time has elapsed.
    View location | Show on map
  • Image of J's Bar - J's Bar 1F

    J's Bar - J's Bar 1F

    Very Hard
    Zombies - Break down the door and swarm into the room after a certain amount of time has elapsed.
    View location | Show on map
  • Image of Women's Bathroom - J's Bar 1F

    Women's Bathroom - J's Bar 1F

    Easy
    1 Zombie - Its arms are reaching out from the vent on the far side of the room.
    View location | Show on map
  • Image of Women's Bathroom - J's Bar 1F

    Women's Bathroom - J's Bar 1F

    Normal
    1 Zombie - Its arms are reaching out from the vent on the far side of the room.
    View location | Show on map
  • Image of Women's Bathroom - J's Bar 1F

    Women's Bathroom - J's Bar 1F

    Hard
    1 Zombie - Its arms are reaching out from the vent on the far side of the room.
    View location | Show on map
  • Image of Women's Bathroom - J's Bar 1F

    Women's Bathroom - J's Bar 1F

    Very Hard
    1 Zombie - Its arms are reaching out from the vent on the far side of the room.
    View location | Show on map
  • Image of Stairs Between 1F and 2F - J's Bar 1F

    Stairs Between 1F and 2F - J's Bar 1F

    Easy
    1 Zombie - Smashes through the window as you pass.
    View location | Show on map
  • Image of Stairs Between 1F and 2F - J's Bar 1F

    Stairs Between 1F and 2F - J's Bar 1F

    Normal
    1 Zombie - Smashes through the window as you pass.
    View location | Show on map
  • Image of Stairs Between 1F and 2F - J's Bar 1F

    Stairs Between 1F and 2F - J's Bar 1F

    Hard
    1 Zombie - Smashes through the window as you pass.
    View location | Show on map
  • Image of Stairs Between 1F and 2F - J's Bar 1F

    Stairs Between 1F and 2F - J's Bar 1F

    Very Hard
    1 Zombie - Smashes through the window as you pass.
    View location | Show on map
  • Image of Staff Room - J's Bar 2F

    Staff Room - J's Bar 2F

    Easy
    1 Zombie - Standing in the landing area at the top of the stairs.
    View location | Show on map
  • Image of Staff Room - J's Bar 2F

    Staff Room - J's Bar 2F

    Normal
    1 Zombie - Standing in the landing area at the top of the stairs.
    View location | Show on map
  • Image of Staff Room - J's Bar 2F

    Staff Room - J's Bar 2F

    Hard
    2 Zombies - One is standing in the landing area at the top of the stairs, the other is at the far end of the main room.
    View location | Show on map
  • Image of Staff Room - J's Bar 2F

    Staff Room - J's Bar 2F

    Very Hard
    2 Zombies - One is standing in the landing area at the top of the stairs, the other is at the far end of the main room.
    View location | Show on map
  • Image of Drawing Room - J's Bar 2F

    Drawing Room - J's Bar 2F

    Hard
    1 Zombie - Standing next to the wardrobe.
    View location | Show on map
  • Image of Owner's Room - J's Bar 2F

    Owner's Room - J's Bar 2F

    Easy
    1 Zombie - In the balcony area outside.
    View location | Show on map
  • Image of Owner's Room - J's Bar 2F

    Owner's Room - J's Bar 2F

    Normal
    1 Zombie - In the balcony area outside.
    View location | Show on map
  • Image of Owner's Room - J's Bar 2F

    Owner's Room - J's Bar 2F

    Very Hard
    1 Zombie - In the balcony area outside.
    View location | Show on map
  • Image of Liquor Room - J's Bar 3F

    Liquor Room - J's Bar 3F

    Hard
    1 Zombie - Standing near the area with the forklift.
    View location | Show on map
  • Image of Liquor Room - J's Bar 3F

    Liquor Room - J's Bar 3F

    Very Hard
    1 Zombie - Standing near the area with the forklift.
    View location | Show on map
  • Image of Rooftop - J's Bar Rooftop

    Rooftop - J's Bar Rooftop

    Normal
    1 Zombie - Standing on the south side of the roof.
    View location | Show on map
  • Image of Rooftop - J's Bar Rooftop

    Rooftop - J's Bar Rooftop

    Hard
    1 Zombie - Standing on the south side of the roof.
    View location | Show on map
  • Image of Rooftop - J's Bar Rooftop

    Rooftop - J's Bar Rooftop

    Very Hard
    1 Zombie - Standing on the south side of the roof.
    1 Zombie - If you managed to get Bob to the roof, a cutscene will occur. Afterwards he will become a zombie and attack.
    View location | Show on map
  • Image of Top Floor of the Apartment - J's Bar Rooftop

    Top Floor of the Apartment - J's Bar Rooftop

    Hard
    1 Zombie - Emerges from the elevator as you pass.
    View location | Show on map
  • Image of Top Floor of the Apartment - J's Bar Rooftop

    Top Floor of the Apartment - J's Bar Rooftop

    Very Hard
    1 Zombie - Emerges from the elevator as you pass.
    View location | Show on map
  • Image of 1F of the Apartment - J's Bar 1F

    1F of the Apartment - J's Bar 1F

    Easy
    2 Zombies - One is standing around the corner, and another bursts through the window.
    View location | Show on map
  • Image of 1F of the Apartment - J's Bar 1F

    1F of the Apartment - J's Bar 1F

    Normal
    2 Zombies - One is standing around the corner, and another bursts through the window.
    View location | Show on map
  • Image of 1F of the Apartment - J's Bar 1F

    1F of the Apartment - J's Bar 1F

    Hard
    2 Zombies - One is standing around the corner, and another bursts through the window.
    View location | Show on map
  • Image of 1F of the Apartment - J's Bar 1F

    1F of the Apartment - J's Bar 1F

    Very Hard
    3 Zombies - Two standing either end of the main corridor, and another bursts through the window.
    View location | Show on map
  • Image of In Front of J's Bar - Town 1

    In Front of J's Bar - Town 1

    Easy
    Zombies - Lots of them, they come from the west side of the street.
    View location | Show on map
  • Image of In Front of J's Bar - Town 1

    In Front of J's Bar - Town 1

    Normal
    Zombies - Lots of them, they come from the west side of the street.
    View location | Show on map
  • Image of Behind the Apartment - Town 1

    Behind the Apartment - Town 1

    Easy
    Zombies - Many zombies appear in this area.
    View location | Show on map
  • Image of Behind the Apartment - Town 1

    Behind the Apartment - Town 1

    Normal
    Zombies - Many zombies appear in this area.
    View location | Show on map
  • Image of Slope Along the Canal - Town 1

    Slope Along the Canal - Town 1

    Easy
    Zombies - Many zombies appear in this area.
    View location | Show on map
  • Image of Slope Along the Canal - Town 1

    Slope Along the Canal - Town 1

    Normal
    Zombies - Many zombies appear in this area.
    View location | Show on map
  • Image of Main Street - Town 2

    Main Street - Town 2

    Easy
    Zombies - Many zombies appear in this area.
    View location | Show on map
  • Image of Main Street - Town 2

    Main Street - Town 2

    Normal
    Zombies - Many zombies appear in this area.
    View location | Show on map
  • Image of Main Street - Town 2

    Main Street - Town 2

    Hard
    Zombies - Many zombies appear in this area.
    View location | Show on map
  • Image of Main Street - Town 2

    Main Street - Town 2

    Very Hard
    Zombies - Many zombies appear in this area.
    View location | Show on map
  • Image of B7F Chemical Storage - Underground 7F

    B7F Chemical Storage - Underground 7F

    Normal
    1 Zombie - Wandering around.
    1 Zombie (Yoko) - If you are not playing as Yoko there is a chance you will encounter her here as a zombie.
    View location | Show on map
  • Image of B7F Chemical Storage - Underground 7F

    B7F Chemical Storage - Underground 7F

    Very Hard
    1 Zombie - Wandering around.
    View location | Show on map
  • Image of B7F South Passage - Underground 7F

    B7F South Passage - Underground 7F

    Easy
    1 Zombie - Under random circumstances one appears here.
    1 Zombie - Appears after acquiring the Wrench.
    View location | Show on map
  • Image of B7F South Passage - Underground 7F

    B7F South Passage - Underground 7F

    Normal
    1 Zombie - Under random circumstances one appears here.
    1 Zombie - Appears after acquiring the Wrench.
    View location | Show on map
  • Image of B7F South Passage - Underground 7F

    B7F South Passage - Underground 7F

    Hard
    1 Zombie - Under random circumstances one appears here.
    1 Zombie - Appears after acquiring the Wrench.
    View location | Show on map
  • Image of B7F South Passage - Underground 7F

    B7F South Passage - Underground 7F

    Very Hard
    1 Zombie - Under random circumstances one appears here.
    1 Zombie - Appears after acquiring the Wrench.
    View location | Show on map
  • Image of B7F Chemical Disposal Room - Underground 7F

    B7F Chemical Disposal Room - Underground 7F

    Very Hard
    1 Zombie (Yoko) - If you are not playing as Yoko there is a chance you will encounter her here as a zombie.
    1 Zombie - Inside the testing area.
    View location | Show on map
  • Image of B7F Chemical Disposal Room - Underground 7F

    B7F Chemical Disposal Room - Underground 7F

    Easy
    1 Zombie - Inside the testing area.
    View location | Show on map
  • Image of B7F Chemical Disposal Room - Underground 7F

    B7F Chemical Disposal Room - Underground 7F

    Normal
    1 Zombie - Inside the testing area.
    View location | Show on map
  • Image of B7F Chemical Disposal Room - Underground 7F

    B7F Chemical Disposal Room - Underground 7F

    Hard
    1 Zombie - Inside the testing area.
    View location | Show on map
  • Image of B7F East Passage - Underground 7F

    B7F East Passage - Underground 7F

    Hard
    1 Zombie - Wakes up after you have been in the corridor for a few moments.
    View location | Show on map
  • Image of B7F East Passage - Underground 7F

    B7F East Passage - Underground 7F

    Very Hard
    1 Zombie - Wakes up after you have been in the corridor for a few moments.
    View location | Show on map
  • Image of B7F Laboratory - Underground 7F

    B7F Laboratory - Underground 7F

    Easy
    1 Zombie - One wakes up after being in the room for a few moments.
    1 Zombie (Yoko) - If you are not playing as Yoko there is a chance you will encounter her here as a zombie.
    View location | Show on map
  • Image of B7F Laboratory - Underground 7F

    B7F Laboratory - Underground 7F

    Normal
    2 Zombies - Two of them are lying on the floor, one wakes up after being in the room for a few moments.
    1 Zombie (Yoko) - If you are not playing as Yoko there is a chance you will encounter her here as a zombie.
    View location | Show on map
  • Image of B7F Laboratory - Underground 7F

    B7F Laboratory - Underground 7F

    Hard
    2 Zombies - Two of them are lying on the floor, one wakes up after being in the room for a few moments.
    View location | Show on map
  • Image of B7F Laboratory - Underground 7F

    B7F Laboratory - Underground 7F

    Very Hard
    2 Zombies - Two of them are lying on the floor, one wakes up after being in the room for a few moments.
    View location | Show on map
  • Image of B6F South Passage - Underground 6F

    B6F South Passage - Underground 6F

    Easy
    1 Zombie - The body on the ground will rise up after a few moments of being in the passage.
    View location | Show on map
  • Image of B6F South Passage - Underground 6F

    B6F South Passage - Underground 6F

    Normal
    1 Zombie - The body on the ground will rise up after a few moments of being in the passage.
    View location | Show on map
  • Image of B6F South Passage - Underground 6F

    B6F South Passage - Underground 6F

    Hard
    1 Zombie - The body on the ground will rise up after a few moments of being in the passage.
    View location | Show on map
  • Image of B6F East Passage - Underground 6F

    B6F East Passage - Underground 6F

    Easy
    2 Zombies - Wandering around.
    View location | Show on map
  • Image of B6F East Passage - Underground 6F

    B6F East Passage - Underground 6F

    Normal
    2 Zombies - Wandering around.
    View location | Show on map
  • Image of B6F East Passage - Underground 6F

    B6F East Passage - Underground 6F

    Hard
    2 Zombies - Wandering around.
    View location | Show on map
  • Image of B6F East Passage - Underground 6F

    B6F East Passage - Underground 6F

    Very Hard
    2 Zombies - Wandering around.
    View location | Show on map
  • Image of B6F Break Room - Underground 6F

    B6F Break Room - Underground 6F

    Hard
    1 Zombie - Wandering around.
    1 Zombie (Yoko) - If you are not playing as Yoko there is a chance you will encounter her here as a zombie.
    View location | Show on map
  • Image of B6F Break Room - Underground 6F

    B6F Break Room - Underground 6F

    Very Hard
    1 Zombie - Wandering around.
    View location | Show on map
  • Image of B6F Security Center - Underground 6F

    B6F Security Center - Underground 6F

    Hard
    1 Zombie - Wandering around.
    1 Zombie - Appears here once you have acquired the Wrench.
    View location | Show on map
  • Image of B6F Security Center - Underground 6F

    B6F Security Center - Underground 6F

    Very Hard
    1 Zombie - Wandering around.
    2 Zombies - Appear here once you have acquired the Wrench.
    View location | Show on map
  • Image of B6F Security Center - Underground 6F

    B6F Security Center - Underground 6F

    Easy
    1 Zombie - Appears here once you have acquired the Wrench.
    View location | Show on map
  • Image of B6F Security Center - Underground 6F

    B6F Security Center - Underground 6F

    Normal
    1 Zombie - Appears here once you have acquired the Wrench.
    View location | Show on map
  • Image of B6F East Passage - Underground 6F

    B6F East Passage - Underground 6F

    Hard
    1 Zombie - Appears here once you have acquired the Wrench.
    View location | Show on map
  • Image of B6F South Passage - Underground 6F

    B6F South Passage - Underground 6F

    Very Hard
    2 Zombies - The two bodies on the ground will rise up after a few moments of being in the passage.
    View location | Show on map
  • Image of B5F Emergency Passage - Underground 5F

    B5F Emergency Passage - Underground 5F

    Easy
    1 Zombie - Wandering around.
    View location | Show on map
  • Image of B5F Emergency Passage - Underground 5F

    B5F Emergency Passage - Underground 5F

    Normal
    1 Zombie - Wandering around.
    View location | Show on map
  • Image of B5F Emergency Passage - Underground 5F

    B5F Emergency Passage - Underground 5F

    Hard
    2 Zombies - Wandering around.
    View location | Show on map
  • Image of B5F Emergency Passage - Underground 5F

    B5F Emergency Passage - Underground 5F

    Very Hard
    2 Zombies - Wandering around.
    View location | Show on map
  • Image of B5F Area C Passage - Underground 5F

    B5F Area C Passage - Underground 5F

    Normal
    1 Zombie - Crawls through the vent.
    View location | Show on map
  • Image of B5F Area C Passage - Underground 5F

    B5F Area C Passage - Underground 5F

    Hard
    1 Zombie - Crawls through the vent.
    View location | Show on map
  • Image of B4F Culture Room - Underground 4F

    B4F Culture Room - Underground 4F

    Easy
    1 Zombie - Lying on the floor. Gets up when you pick up the Blowtorch.
    View location | Show on map
  • Image of B4F Culture Room - Underground 4F

    B4F Culture Room - Underground 4F

    Normal
    1 Zombie - Lying on the floor. Gets up when you pick up the Blowtorch.
    View location | Show on map
  • Image of B4F Culture Room - Underground 4F

    B4F Culture Room - Underground 4F

    Hard
    1 Zombie - Lying on the floor. Gets up when you pick up the Blowtorch.
    View location | Show on map
  • Image of B4F Culture Room - Underground 4F

    B4F Culture Room - Underground 4F

    Very Hard
    1 Zombie - Lying on the floor. Gets up when you pick up the Blowtorch.
    View location | Show on map
  • Image of B4F Turn Table - Underground 4F

    B4F Turn Table - Underground 4F

    Easy
    1 Zombie - The dead body rises up after being in the room for several moments.
    1 Zombie - Appears once you have thawed out the laboratory.
    View location | Show on map
  • Image of B4F Turn Table - Underground 4F

    B4F Turn Table - Underground 4F

    Normal
    2 Zombies - The two dead bodies rise up after being in the room for a short amount of time.
    View location | Show on map
  • Image of B4F Turn Table - Underground 4F

    B4F Turn Table - Underground 4F

    Hard
    2 Zombies - The two dead bodies rise up after being in the room for a short amount of time.
    View location | Show on map
  • Image of B4F Turn Table - Underground 4F

    B4F Turn Table - Underground 4F

    Very Hard
    3 Zombies - The dead bodies rise up after being in the room for several moments.
    View location | Show on map
  • Image of Nurses' Center - Hospital 3F

    Nurses' Center - Hospital 3F

    Normal
    1 Zombie - The dead body in the room rises up after the cut-scene where the elevator power gets restored.
    View location | Show on map
  • Image of Nurses' Center - Hospital 3F

    Nurses' Center - Hospital 3F

    Hard
    1 Zombie - The dead body in the room rises up after the cut-scene where the elevator power gets restored.
    View location | Show on map
  • Image of Nurses' Center - Hospital 3F

    Nurses' Center - Hospital 3F

    Very Hard
    1 Zombie - The dead body in the room rises up after the cut-scene where the elevator power gets restored.
    View location | Show on map
  • Image of 3F Passage - Hospital 3F

    3F Passage - Hospital 3F

    Very Hard
    1 Zombie - Emerges from the elevator once the power has been restored by the doctor in the Nurses' Center.
    View location | Show on map
  • Image of Doctors' Station - Hospital 1F

    Doctors' Station - Hospital 1F

    Easy
    1 Zombie - Wandering around.
    View location | Show on map
  • Image of Doctors' Station - Hospital 1F

    Doctors' Station - Hospital 1F

    Normal
    1 Zombie - Wandering around.
    View location | Show on map
  • Image of Doctors' Station - Hospital 1F

    Doctors' Station - Hospital 1F

    Hard
    2 Zombies - Wandering around.
    View location | Show on map
  • Image of Doctors' Station - Hospital 1F

    Doctors' Station - Hospital 1F

    Very Hard
    2 Zombies - Wandering around.
    View location | Show on map
  • Image of Locker Room - Hospital 1F

    Locker Room - Hospital 1F

    Normal
    1 Zombie - In the third openable locker from the right.
    View location | Show on map
  • Image of Locker Room - Hospital 1F

    Locker Room - Hospital 1F

    Hard
    1 Zombie - In the third openable locker from the right.
    View location | Show on map
  • Image of Locker Room - Hospital 1F

    Locker Room - Hospital 1F

    Very Hard
    1 Zombie - Standing next to the lockers.
    View location | Show on map
  • Image of Examination Room - Hospital 1F

    Examination Room - Hospital 1F

    Easy
    1 Zombie - Bursts through the window and attempts to grab you as you pass.
    1 Zombie - The dead nurse sitting at the desk will rise up after being in the room for a small amount of time.
    View location | Show on map
  • Image of Examination Room - Hospital 1F

    Examination Room - Hospital 1F

    Normal
    1 Zombie - Bursts through the window and attempts to grab you as you pass.
    1 Zombie - The dead nurse sitting at the desk will rise up after being in the room for a small amount of time.
    View location | Show on map
  • Image of Examination Room - Hospital 1F

    Examination Room - Hospital 1F

    Hard
    1 Zombie - Bursts through the window and attempts to grab you as you pass.
    1 Zombie - The dead nurse sitting at the desk will rise up after being in the room for a small amount of time.
    View location | Show on map
  • Image of Examination Room - Hospital 1F

    Examination Room - Hospital 1F

    Very Hard
    1 Zombie - Bursts through the window and attempts to grab you as you pass.
    1 Zombie - The dead nurse sitting at the desk will rise up after being in the room for a small amount of time.
    View location | Show on map
  • Image of Central Waiting Room - Hospital 1F

    Central Waiting Room - Hospital 1F

    Easy
    1 Zombie - On the other side of shutter on the south side of the room. He cannot reach you so he is not a threat.
    View location | Show on map
  • Image of Central Waiting Room - Hospital 1F

    Central Waiting Room - Hospital 1F

    Normal
    1 Zombie - On the other side of shutter on the south side of the room. He cannot reach you so he is not a threat.
    View location | Show on map
  • Image of Central Waiting Room - Hospital 1F

    Central Waiting Room - Hospital 1F

    Hard
    1 Zombie - On the other side of shutter on the south side of the room. He cannot reach you so he is not a threat.
    View location | Show on map
  • Image of Central Waiting Room - Hospital 1F

    Central Waiting Room - Hospital 1F

    Very Hard
    1 Zombie - On the other side of shutter on the south side of the room. He cannot reach you so he is not a threat.
    View location | Show on map
  • Image of 2F Passage - Hospital 2F

    2F Passage - Hospital 2F

    Easy
    1 Zombie - Wandering around.
    View location | Show on map
  • Image of 2F Passage - Hospital 2F

    2F Passage - Hospital 2F

    Normal
    1 Zombie - Wandering around.
    View location | Show on map
  • Image of 2F Passage - Hospital 2F

    2F Passage - Hospital 2F

    Hard
    1 Zombie - Wandering around.
    View location | Show on map
  • Image of 2F Passage - Hospital 2F

    2F Passage - Hospital 2F

    Very Hard
    1 Zombie - Wandering around.
    View location | Show on map
  • Image of Room 202 - Hospital 2F

    Room 202 - Hospital 2F

    Hard
    1 Zombie - Wandering around.
    View location | Show on map
  • Image of Room 202 - Hospital 2F

    Room 202 - Hospital 2F

    Very Hard
    1 Zombie - Wandering around.
    View location | Show on map
  • Image of B1F Passage - Hospital B1F

    B1F Passage - Hospital B1F

    Easy
    1 Zombie - Trapped behind the metal fence at the south end of the passage. Will break free when you approach.
    View location | Show on map
  • Image of B1F Passage - Hospital B1F

    B1F Passage - Hospital B1F

    Normal
    1 Zombie - Trapped behind the metal fence at the south end of the passage. Will break free when you approach.
    View location | Show on map
  • Image of B1F Passage - Hospital B1F

    B1F Passage - Hospital B1F

    Hard
    1 Zombie - Trapped behind the metal fence at the south end of the passage. Will break free when you approach.
    1 Zombie - Appears after acquiring the Padlock Key.
    View location | Show on map
  • Image of B1F Passage - Hospital B1F

    B1F Passage - Hospital B1F

    Very Hard
    1 Zombie - Trapped behind the metal fence at the south end of the passage. Will break free when you approach.
    1 Zombie - Appears after acquiring the Padlock Key.
    View location | Show on map
  • Image of Waste Liquid Disposal Room - Hospital B1F

    Waste Liquid Disposal Room - Hospital B1F

    Easy
    1 Zombie - Lying on the ground in the lower level. Will come alive after you pick up the Padlock Key.
    View location | Show on map
  • Image of Waste Liquid Disposal Room - Hospital B1F

    Waste Liquid Disposal Room - Hospital B1F

    Normal
    1 Zombie - Lying on the ground in the lower level. Will come alive after you pick up the Padlock Key.
    View location | Show on map
  • Image of Waste Liquid Disposal Room - Hospital B1F

    Waste Liquid Disposal Room - Hospital B1F

    Hard
    1 Zombie - Lying on the ground in the lower level. Will come alive after you pick up the Padlock Key.
    View location | Show on map
  • Image of Waste Liquid Disposal Room - Hospital B1F

    Waste Liquid Disposal Room - Hospital B1F

    Very Hard
    1 Zombie - Lying on the ground in the lower level. Will come alive after you pick up the Padlock Key.
    View location | Show on map
  • Image of Rooftop - Hospital Rooftop

    Rooftop - Hospital Rooftop

    Very Hard
    2 Zombies - Walking around.
    View location | Show on map
  • Image of B1F South Passage - Hospital B1F

    B1F South Passage - Hospital B1F

    Easy
    1 Zombie - Wandering around.
    View location | Show on map
  • Image of B1F South Passage - Hospital B1F

    B1F South Passage - Hospital B1F

    Normal
    2 Zombies - Wandering around.
    View location | Show on map
  • Image of B1F South Passage - Hospital B1F

    B1F South Passage - Hospital B1F

    Hard
    2 Zombies - Wandering around.
    View location | Show on map
  • Image of B1F South Passage - Hospital B1F

    B1F South Passage - Hospital B1F

    Very Hard
    2 Zombies - Wandering around.
    View location | Show on map
  • Image of B2F Passage - Hospital B2F

    B2F Passage - Hospital B2F

    Hard
    1 Zombie - The body lying on the ground will wake up after killing the Leech Man.
    View location | Show on map
  • Image of B2F Passage - Hospital B2F

    B2F Passage - Hospital B2F

    Very Hard
    1 Zombie - The body lying on the ground will wake up after killing the Leech Man.
    View location | Show on map
  • Image of Apple Inn Square - Apple Inn Hotel 1F

    Apple Inn Square - Apple Inn Hotel 1F

    Easy
    1 Zombie - The dead person resting against the door rises up after you have witnessed the cut-scene in the Boiler Room.
    View location | Show on map
  • Image of Apple Inn Square - Apple Inn Hotel 1F

    Apple Inn Square - Apple Inn Hotel 1F

    Normal
    1 Zombie - The dead person resting against the door rises up after you have witnessed the cut-scene in the Boiler Room.
    View location | Show on map
  • Image of Apple Inn Square - Apple Inn Hotel 1F

    Apple Inn Square - Apple Inn Hotel 1F

    Hard
    1 Zombie - The dead person resting against the door rises up after you have witnessed the cut-scene in the Boiler Room.
    View location | Show on map
  • Image of Apple Inn Square - Apple Inn Hotel 1F

    Apple Inn Square - Apple Inn Hotel 1F

    Very Hard
    1 Zombie - The dead person resting against the door rises up after you have witnessed the cut-scene in the Boiler Room.
    View location | Show on map
  • Image of Corridor - Apple Inn Hotel 1F

    Corridor - Apple Inn Hotel 1F

    Easy
    2 Zombies - Wandering around.
    View location | Show on map
  • Image of Corridor - Apple Inn Hotel 1F

    Corridor - Apple Inn Hotel 1F

    Normal
    2 Zombies - Wandering around.
    View location | Show on map
  • Image of Corridor - Apple Inn Hotel 1F

    Corridor - Apple Inn Hotel 1F

    Hard
    2 Zombies - Wandering around.
    View location | Show on map
  • Image of Corridor - Apple Inn Hotel 1F

    Corridor - Apple Inn Hotel 1F

    Very Hard
    2 Zombies - Wandering around.
    View location | Show on map
  • Image of Room 102 - Apple Inn Hotel 1F

    Room 102 - Apple Inn Hotel 1F

    Very Hard
    1 Zombie - Standing next to the bed.
    View location | Show on map
  • Image of Room 101 - Apple Inn Hotel 1F

    Room 101 - Apple Inn Hotel 1F

    Very Hard
    1 Zombie - Standing between the two beds.
    View location | Show on map
  • Image of Lounge Stairs - Apple Inn Hotel 1F

    Lounge Stairs - Apple Inn Hotel 1F

    Easy
    1 Zombie - Crawling around on the 1F.
    View location | Show on map
  • Image of Lounge Stairs - Apple Inn Hotel 1F

    Lounge Stairs - Apple Inn Hotel 1F

    Normal
    1 Zombie - Crawling around on the 1F.
    View location | Show on map
  • Image of Lounge Stairs - Apple Inn Hotel 1F

    Lounge Stairs - Apple Inn Hotel 1F

    Hard
    1 Zombie - Crawling around on the 1F.
    View location | Show on map
  • Image of Lounge Stairs - Apple Inn Hotel 1F

    Lounge Stairs - Apple Inn Hotel 1F

    Very Hard
    1 Zombie - Crawling around on the 1F.
    View location | Show on map
  • Image of Northwest Passage 1 - Apple Inn Hotel 1F

    Northwest Passage 1 - Apple Inn Hotel 1F

    Easy
    1 Zombie - In the east end of the passage, accessible only from the Lounge Stairs. Lying on the floor and attacks when you get near.
    View location | Show on map
  • Image of Northwest Passage 1 - Apple Inn Hotel 1F

    Northwest Passage 1 - Apple Inn Hotel 1F

    Normal
    1 Zombie - In the east end of the passage, accessible only from the Lounge Stairs. Lying on the floor and attacks when you get near.
    View location | Show on map
  • Image of Northwest Passage 1 - Apple Inn Hotel 1F

    Northwest Passage 1 - Apple Inn Hotel 1F

    Hard
    1 Zombie - In the east end of the passage, accessible only from the Lounge Stairs. Lying on the floor and attacks when you get near.
    View location | Show on map
  • Image of Northwest Passage 1 - Apple Inn Hotel 1F

    Northwest Passage 1 - Apple Inn Hotel 1F

    Very Hard
    1 Zombie - In the east end of the passage, accessible only from the Lounge Stairs. Lying on the floor and attacks when you get near.
    View location | Show on map
  • Image of Room 104 - Apple Inn Hotel 1F

    Room 104 - Apple Inn Hotel 1F

    Easy
    1 Zombie - Standing next to the bed.
    View location | Show on map
  • Image of Room 104 - Apple Inn Hotel 1F

    Room 104 - Apple Inn Hotel 1F

    Normal
    1 Zombie - Standing next to the bed.
    View location | Show on map
  • Image of Room 104 - Apple Inn Hotel 1F

    Room 104 - Apple Inn Hotel 1F

    Hard
    1 Zombie - Standing next to the bed.
    View location | Show on map
  • Image of Room 104 - Apple Inn Hotel 1F

    Room 104 - Apple Inn Hotel 1F

    Very Hard
    1 Zombie - Standing next to the bed.
    View location | Show on map
  • Image of Corridor (2F) - Apple Inn Hotel 2F

    Corridor (2F) - Apple Inn Hotel 2F

    Easy
    Zombies - On the west side of the corridor.
    Zombies - On the east side of the corridor.
    View location | Show on map
  • Image of Corridor (2F) - Apple Inn Hotel 2F

    Corridor (2F) - Apple Inn Hotel 2F

    Normal
    Zombies - On the west side of the corridor.
    Zombies - On the east side of the corridor.
    View location | Show on map
  • Image of Corridor (2F) - Apple Inn Hotel 2F

    Corridor (2F) - Apple Inn Hotel 2F

    Hard
    Zombies - On the west side of the corridor.
    Zombies - On the east side of the corridor.
    View location | Show on map
  • Image of Corridor (2F) - Apple Inn Hotel 2F

    Corridor (2F) - Apple Inn Hotel 2F

    Very Hard
    Zombies - On the west side of the corridor.
    Zombies - On the east side of the corridor.
    View location | Show on map
  • Image of Room 201 - Apple Inn Hotel 2F

    Room 201 - Apple Inn Hotel 2F

    Easy
    1 Zombie - Inside the bathroom.
    View location | Show on map
  • Image of Room 201 - Apple Inn Hotel 2F

    Room 201 - Apple Inn Hotel 2F

    Normal
    1 Zombie - Standing near the first bed.
    View location | Show on map
  • Image of Room 201 - Apple Inn Hotel 2F

    Room 201 - Apple Inn Hotel 2F

    Very Hard
    1 Zombie - Standing near the first bed.
    View location | Show on map
  • Image of Room 202 - Apple Inn Hotel 2F

    Room 202 - Apple Inn Hotel 2F

    Hard
    1 Zombie - Inside the bathroom.
    View location | Show on map
  • Image of Room 202 - Apple Inn Hotel 2F

    Room 202 - Apple Inn Hotel 2F

    Very Hard
    1 Zombie - Standing next to the bed.
    View location | Show on map
  • Image of Northwest Passage 2 - Apple Inn Hotel 2F

    Northwest Passage 2 - Apple Inn Hotel 2F

    Easy
    Zombies - Wandering around.
    View location | Show on map
  • Image of Northwest Passage 2 - Apple Inn Hotel 2F

    Northwest Passage 2 - Apple Inn Hotel 2F

    Normal
    Zombies - Wandering around.
    View location | Show on map
  • Image of Northwest Passage 2 - Apple Inn Hotel 2F

    Northwest Passage 2 - Apple Inn Hotel 2F

    Hard
    Zombies - Wandering around.
    View location | Show on map
  • Image of Northwest Passage 2 - Apple Inn Hotel 2F

    Northwest Passage 2 - Apple Inn Hotel 2F

    Very Hard
    Zombies - Wandering around.
    View location | Show on map
  • Image of Corridor (3F) - Apple Inn Hotel 3F

    Corridor (3F) - Apple Inn Hotel 3F

    Easy
    Zombies - In the north west side of the corridor.
    Zombies - In the north east corner of the corridor.
    View location | Show on map
  • Image of Corridor (3F) - Apple Inn Hotel 3F

    Corridor (3F) - Apple Inn Hotel 3F

    Normal
    Zombies - In the north west side of the corridor.
    Zombies - In the north east corner of the corridor.
    View location | Show on map
  • Image of Corridor (3F) - Apple Inn Hotel 3F

    Corridor (3F) - Apple Inn Hotel 3F

    Hard
    Zombies - In the north west side of the corridor.
    Zombies - In the north east corner of the corridor.
    View location | Show on map
  • Image of Corridor (3F) - Apple Inn Hotel 3F

    Corridor (3F) - Apple Inn Hotel 3F

    Very Hard
    Zombies - In the north west side of the corridor.
    Zombies - In the north east corner of the corridor.
    View location | Show on map
  • Image of Room 301 - Apple Inn Hotel 3F

    Room 301 - Apple Inn Hotel 3F

    Easy
    1 Zombie - In the bathroom.
    View location | Show on map
  • Image of Room 301 - Apple Inn Hotel 3F

    Room 301 - Apple Inn Hotel 3F

    Normal
    1 Zombie - In the bathroom.
    View location | Show on map
  • Image of Room 301 - Apple Inn Hotel 3F

    Room 301 - Apple Inn Hotel 3F

    Hard
    1 Zombie - In the bathroom.
    View location | Show on map
  • Image of Room 30* - Apple Inn Hotel 3F

    Room 30* - Apple Inn Hotel 3F

    Easy
    1 Zombie - In the northern room.
    1 Zombie - In the southern room.
    View location | Show on map
  • Image of Room 30* - Apple Inn Hotel 3F

    Room 30* - Apple Inn Hotel 3F

    Very Hard
    1 Zombie - In the northern room.
    1 Zombie - In the southern room.
    View location | Show on map
  • Image of Room 30* - Apple Inn Hotel 3F

    Room 30* - Apple Inn Hotel 3F

    Normal
    1 Zombie - In the southern room.
    View location | Show on map
  • Image of Room 30* - Apple Inn Hotel 3F

    Room 30* - Apple Inn Hotel 3F

    Hard
    1 Zombie - In the southern room.
    View location | Show on map
  • Image of Student Affairs Office - University 1F

    Student Affairs Office - University 1F

    Easy
    1 Zombie - Wandering around.
    View location | Show on map
  • Image of Student Affairs Office - University 1F

    Student Affairs Office - University 1F

    Normal
    1 Zombie - Wandering around.
    View location | Show on map
  • Image of Student Affairs Office - University 1F

    Student Affairs Office - University 1F

    Hard
    1 Zombie - Wandering around.
    View location | Show on map
  • Image of Student Affairs Office - University 1F

    Student Affairs Office - University 1F

    Very Hard
    1 Zombie - Wandering around.
    View location | Show on map
  • Image of Waiting Room - University 1F

    Waiting Room - University 1F

    Easy
    1 Zombie - Wandering around.
    View location | Show on map
  • Image of Waiting Room - University 1F

    Waiting Room - University 1F

    Normal
    1 Zombie - Wandering around.
    View location | Show on map
  • Image of Waiting Room - University 1F

    Waiting Room - University 1F

    Hard
    1 Zombie - Wandering around.
    View location | Show on map
  • Image of 1F Passage A - University 1F

    1F Passage A - University 1F

    Easy
    1 Zombie - Wandering around.
    View location | Show on map
  • Image of 1F Passage A - University 1F

    1F Passage A - University 1F

    Normal
    1 Zombie - Wandering around.
    View location | Show on map
  • Image of 1F Passage A - University 1F

    1F Passage A - University 1F

    Hard
    1 Zombie - Wandering around.
    View location | Show on map
  • Image of 1F Passage A - University 1F

    1F Passage A - University 1F

    Very Hard
    1 Zombie - Wandering around.
    View location | Show on map
  • Image of 1F Passage B - University 1F

    1F Passage B - University 1F

    Hard
    1 Zombie - Appears here after acquiring the Blue Jewel.
    View location | Show on map
  • Image of 2F Passage - University 2F

    2F Passage - University 2F

    Easy
    1 Zombie - Wandering around.
    View location | Show on map
  • Image of 2F Passage - University 2F

    2F Passage - University 2F

    Normal
    2 Zombies - Wandering around.
    View location | Show on map
  • Image of 2F Passage - University 2F

    2F Passage - University 2F

    Hard
    2 Zombies - Wandering around.
    View location | Show on map
  • Image of 2F Passage - University 2F

    2F Passage - University 2F

    Very Hard
    2 Zombies - Wandering around.
    View location | Show on map
  • Image of Drawing Room - University 2F

    Drawing Room - University 2F

    Very Hard
    1 Zombie - Wandering around.
    View location | Show on map
  • Image of Presidents' Room - University 2F

    Presidents' Room - University 2F

    Easy
    1 Zombie - It will enter the room if you pull the blue cord in the fireplace.
    View location | Show on map
  • Image of Presidents' Room - University 2F

    Presidents' Room - University 2F

    Normal
    1 Zombie - It will enter the room if you pull the blue cord in the fireplace.
    View location | Show on map
  • Image of Presidents' Room - University 2F

    Presidents' Room - University 2F

    Hard
    1 Zombie - It will enter the room if you pull the blue cord in the fireplace.
    View location | Show on map
  • Image of Presidents' Room - University 2F

    Presidents' Room - University 2F

    Very Hard
    1 Zombie - It will enter the room if you pull the blue cord in the fireplace.
    View location | Show on map
  • Image of 2F Passage - University 2F

    2F Passage - University 2F

    Normal
    1 Zombie - Appears after exploring the Presidents' room.
    View location | Show on map
  • Image of 2F Passage - University 2F

    2F Passage - University 2F

    Hard
    1 Zombie - Appears after exploring the Presidents' room.
    View location | Show on map
  • Image of 2F Passage - University 2F

    2F Passage - University 2F

    Very Hard
    1 Zombie - Appears after exploring the Presidents' room.
    View location | Show on map
  • Image of Study Room - University B1F

    Study Room - University B1F

    Very Hard
    1 Zombie - The dead researcher sitting in the chair will stand up and attack after the cut-scene.
    View location | Show on map
  • Image of East Waterway - University B3F

    East Waterway - University B3F

    Normal
    1 Zombie - In the water in the lower waterway.
    1 Zombie - In the passage at the top of the ladder.
    View location | Show on map
  • Image of East Waterway - University B3F

    East Waterway - University B3F

    Hard
    1 Zombie - In the water in the lower waterway.
    1 Zombie - In the passage at the top of the ladder.
    View location | Show on map
  • Image of East Waterway - University B3F

    East Waterway - University B3F

    Easy
    1 Zombie - In the passage at the top of the ladder.
    View location | Show on map
  • Image of Passage A - University B3F

    Passage A - University B3F

    Easy
    2 Zombies - One is standing next to the 'T' junction, the other is further along in the western part of the passage.
    View location | Show on map
  • Image of Passage A - University B3F

    Passage A - University B3F

    Normal
    2 Zombies - One is standing next to the 'T' junction, the other is further along in the western part of the passage.
    View location | Show on map
  • Image of Passage A - University B3F

    Passage A - University B3F

    Very Hard
    2 Zombies - One is standing next to the 'T' junction, the other is further along in the western part of the passage.
    View location | Show on map
  • Image of South Car - Emission Tower Facility

    South Car - Emission Tower Facility

    Easy
    1 Zombie - Wandering around.
    View location | Show on map
  • Image of South Car - Emission Tower Facility

    South Car - Emission Tower Facility

    Normal
    1 Zombie - Wandering around.
    View location | Show on map
  • Image of South Car - Emission Tower Facility

    South Car - Emission Tower Facility

    Hard
    1 Zombie - Wandering around.
    View location | Show on map
  • Image of South Car - Emission Tower Facility

    South Car - Emission Tower Facility

    Very Hard
    1 Zombie - Wandering around.
    View location | Show on map
  • Image of North Car - Emission Tower Facility

    North Car - Emission Tower Facility

    Easy
    1 Zombie - Wandering around.
    View location | Show on map
  • Image of North Car - Emission Tower Facility

    North Car - Emission Tower Facility

    Normal
    2 Zombies - Wandering around.
    View location | Show on map
  • Image of North Car - Emission Tower Facility

    North Car - Emission Tower Facility

    Hard
    2 Zombies - Wandering around.
    View location | Show on map
  • Image of North Car - Emission Tower Facility

    North Car - Emission Tower Facility

    Very Hard
    2 Zombies - Wandering around.
    View location | Show on map
  • Image of T-Shaped Passage - Emission Tower Facility

    T-Shaped Passage - Emission Tower Facility

    Easy
    3 Zombies - Smash through the windows of the inaccessible room.
    View location | Show on map
  • Image of T-Shaped Passage - Emission Tower Facility

    T-Shaped Passage - Emission Tower Facility

    Normal
    3 Zombies - Smash through the windows of the inaccessible room.
    View location | Show on map
  • Image of T-Shaped Passage - Emission Tower Facility

    T-Shaped Passage - Emission Tower Facility

    Hard
    3 Zombies - One is standing at the end of the eastern corridor, the others smash through the windows of the southern inaccessible room.
    View location | Show on map
  • Image of T-Shaped Passage - Emission Tower Facility

    T-Shaped Passage - Emission Tower Facility

    Very Hard
    4 Zombies - One is standing at the end of the eastern corridor, the others smash through the windows of the southern inaccessible room.
    View location | Show on map
  • Image of Spare Power Supply Room - Emission Tower Facility

    Spare Power Supply Room - Emission Tower Facility

    Very Hard
    Zombies - They constantly enter through the door.
    View location | Show on map
  • Image of Storeroom - Emission Tower Facility

    Storeroom - Emission Tower Facility

    Easy
    1 Zombie - Wandering around.
    View location | Show on map
  • Image of Storeroom - Emission Tower Facility

    Storeroom - Emission Tower Facility

    Normal
    1 Zombie - Wandering around.
    View location | Show on map
  • Image of Storeroom - Emission Tower Facility

    Storeroom - Emission Tower Facility

    Hard
    1 Zombie - Wandering around.
    View location | Show on map
  • Image of Storeroom - Emission Tower Facility

    Storeroom - Emission Tower Facility

    Very Hard
    1 Zombie - Wandering around.
    Zombies - They constantly enter through the door.
    View location | Show on map

There are no locations to show for this game mode. The following game modes are applicable:

Related product

Resident Evil Book 6 - Code: Veronica

Resident Evil Book 6 - Code: Veronica

Buy the Resident Evil Book 6 - Code: Veronica by S.D. Perry on Amazon

Explore further