Evil Resource

Zombie (Resident Evil 2)

Image of Zombie
The zombie is the most common enemy in the game, the poor residents of Raccoon City who became infected with the T-Virus.

There are many different types of zombie in the game, from normal men and women, police officers, scientists, and test subjects.

The zombie is an easy enemy, as long as they're in small numbers. The Handgun is enough to keep them at bay. It's possible to decapitate one or many zombies with a single shotgun blast, simply aim up when they come into grabbing range, and fire.

Related product

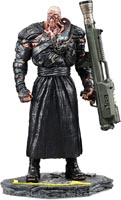
Resident Evil Nemesis Statue

Resident Evil Nemesis Statue

Buy the Resident Evil Nemesis 12-inch Statue on Amazon

Statistics

Game modeSum total
Leon A (Normal)111-129 [1]
Leon B (Normal)94-115 [1]
Claire A (Normal)106-123 [1]
Claire B (Normal)93-115 [1]
[1] Exact number can depend on certain game conditions.

Location

  • Image of West Street - City Area 1

    West Street - City Area 1

    Leon A (Normal)
    7 Zombies - Wandering around. In the PC and Dreamcast versions of the game there are only 6 zombies here.

    View location | Show on map
  • Image of West Street - City Area 1

    West Street - City Area 1

    Claire A (Normal)
    7 Zombies - Wandering around. In the PC and Dreamcast versions of the game there are only 6 zombies here.
    View location | Show on map
  • Image of Kendo Gun Shop - City Area 1

    Kendo Gun Shop - City Area 1

    Leon A (Normal)
    4 Zombies - Burst through the windows after either exploring the shop or exiting and re-entering through the back door.
    View location | Show on map
  • Image of Kendo Gun Shop - City Area 1

    Kendo Gun Shop - City Area 1

    Claire A (Normal)
    4 Zombies - Burst through the windows after either exploring the shop or exiting and re-entering through the back door.
    View location | Show on map
  • Image of Basketball Yard - City Area 1

    Basketball Yard - City Area 1

    Leon A (Normal)
    4 Zombies - Wandering around.
    View location | Show on map
  • Image of Basketball Yard - City Area 1

    Basketball Yard - City Area 1

    Claire A (Normal)
    4 Zombies - Wandering around.
    View location | Show on map
  • Image of Back Alley - City Area 1

    Back Alley - City Area 1

    Leon A (Normal)
    4 Zombies - Wandering around in the west alley section. In the PC and Dreamcast versions of the game there are only 3 zombies here.
    View location | Show on map
  • Image of Back Alley - City Area 1

    Back Alley - City Area 1

    Claire A (Normal)
    4 Zombies - Wandering around in the west alley section. In the PC and Dreamcast versions of the game there are only 3 zombies here.
    View location | Show on map
  • Image of Crashed Bus Area - City Area 1

    Crashed Bus Area - City Area 1

    Leon A (Normal)
    4 Zombies - Crouching down eating a person near the entrance to the bus.
    View location | Show on map
  • Image of Crashed Bus Area - City Area 1

    Crashed Bus Area - City Area 1

    Claire A (Normal)
    4 Zombies - Crouching down eating a person near the entrance to the bus.
    View location | Show on map
  • Image of Bus - City Area 1

    Bus - City Area 1

    Leon A (Normal)
    2 Zombies - One is crawling along the floor, the other is standing at the back of the bus.
    View location | Show on map
  • Image of Bus - City Area 1

    Bus - City Area 1

    Claire A (Normal)
    2 Zombies - One is crawling along the floor, the other is standing at the back of the bus.
    View location | Show on map
  • Image of Courtyard Boulevard - City Area 1

    Courtyard Boulevard - City Area 1

    Leon A (Normal)
    6 Zombies - Wandering around.
    View location | Show on map
  • Image of Courtyard Boulevard - City Area 1

    Courtyard Boulevard - City Area 1

    Claire A (Normal)
    6 Zombies - Wandering around.
    View location | Show on map
  • Image of R.P.D. Courtyard - City Area 1

    R.P.D. Courtyard - City Area 1

    Leon A (Normal)
    2 Zombies - Only appear here if the zombified Brad Vickers is not in the tunnel. If you kill Brad and then exit and re-enter the area, then these zombies will show up.
    View location | Show on map
  • Image of R.P.D. Courtyard - City Area 1

    R.P.D. Courtyard - City Area 1

    Claire A (Normal)
    2 Zombies - Only appear here if the zombified Brad Vickers is not in the tunnel. If you kill Brad and then exit and re-enter the area, then these zombies will show up.
    View location | Show on map
  • Image of West Stairway 1F - Police Station 1F

    West Stairway 1F - Police Station 1F

    Leon A (Normal)
    4 Zombies - Wandering around.
    View location | Show on map
  • Image of West Stairway 1F - Police Station 1F

    West Stairway 1F - Police Station 1F

    Claire A (Normal)
    4 Zombies - Wandering around.
    View location | Show on map
  • Image of Office Corridor - Police Station 2F

    Office Corridor - Police Station 2F

    Leon A (Normal)
    3 Zombies - Wandering around.
    View location | Show on map
  • Image of Winding Corridor - Police Station 1F

    Winding Corridor - Police Station 1F

    Leon A (Normal)
    4 Zombies - They reach through the boarded-up windows and grab you on your way back to the Main Hall after you have acquired the Unicorn Medal.
    View location | Show on map
  • Image of Winding Corridor - Police Station 1F

    Winding Corridor - Police Station 1F

    Claire A (Normal)
    4 Zombies - They reach through the boarded-up windows and grab you on your way back to the Main Hall after you have acquired the Unicorn Medal.
    View location | Show on map
  • Image of Office Corridor - Police Station 2F

    Office Corridor - Police Station 2F

    Claire A (Normal)
    1 Zombie - Appears here after acquiring the Spade Key.
    View location | Show on map
  • Image of East Street - City Area 2

    East Street - City Area 2

    Leon B (Normal)
    7 Zombies - Wandering around. In the PC and Dreamcast versions of the game there are only 6 zombies here.
    View location | Show on map
  • Image of East Street - City Area 2

    East Street - City Area 2

    Claire B (Normal)
    7 Zombies - Wandering around. In the PC and Dreamcast versions of the game there are only 6 zombies here.
    View location | Show on map
  • Image of R.P.D. Backyard - City Area 2

    R.P.D. Backyard - City Area 2

    Leon B (Normal)
    3 Zombies - Wandering around.
    View location | Show on map
  • Image of R.P.D. Backyard - City Area 2

    R.P.D. Backyard - City Area 2

    Claire B (Normal)
    3 Zombies - Wandering around.
    View location | Show on map
  • Image of Outside Shed - City Area 2

    Outside Shed - City Area 2

    Leon B (Normal)
    2 Zombies - Appear if you try and exit back through the west door after exploring the north west area of the shed.
    View location | Show on map
  • Image of Outside Shed - City Area 2

    Outside Shed - City Area 2

    Claire B (Normal)
    2 Zombies - Appear if you try and exit back through the west door after exploring the north west area of the shed.
    View location | Show on map
  • Image of Station Yard - City Area 2

    Station Yard - City Area 2

    Leon B (Normal)
    4 Zombies - Wandering around. In the PC and Dreamcast versions of the game there are only 3 zombies here.
    View location | Show on map
  • Image of Station Yard - City Area 2

    Station Yard - City Area 2

    Claire B (Normal)
    4 Zombies - Wandering around. In the PC and Dreamcast versions of the game there are only 3 zombies here.
    View location | Show on map
  • Image of East Office - Police Station 1F

    East Office - Police Station 1F

    Leon B (Normal)
    5 Zombies - Wandering around.
    View location | Show on map
  • Image of East Office - Police Station 1F

    East Office - Police Station 1F

    Claire B (Normal)
    5 Zombies - Wandering around.
    View location | Show on map
  • Image of Main Hall 2F - Police Station 2F

    Main Hall 2F - Police Station 2F

    Leon B (Normal)
    5 Zombies - Wandering around. In the PC and Dreamcast versions of the game there are only 3 zombies here.
    View location | Show on map
  • Image of Main Hall 2F - Police Station 2F

    Main Hall 2F - Police Station 2F

    Claire B (Normal)
    5 Zombies - Wandering around. In the PC and Dreamcast versions of the game there are only 3 zombies here.
    View location | Show on map
  • Image of R.P.D. Courtyard - City Area 1

    R.P.D. Courtyard - City Area 1

    Leon B (Normal)
    2 Zombies - Only appear here if the zombified Brad Vickers is not in the tunnel (something you can only trigger during Scenario A that then passes into your Scenario B). If you kill Brad and then exit and re-enter the area, then these zombies will show up.
    View location | Show on map
  • Image of R.P.D. Courtyard - City Area 1

    R.P.D. Courtyard - City Area 1

    Claire B (Normal)
    2 Zombies - Only appear here if the zombified Brad Vickers is not in the tunnel (something you can only trigger during Scenario A that then passes into your Scenario B). If you kill Brad and then exit and re-enter the area, then these zombies will show up.
    View location | Show on map
  • Image of Lounge - Police Station 2F

    Lounge - Police Station 2F

    Leon A (Normal)
    5 Zombies - Eating a corpse in the centre of the room. In the PC and Dreamcast versions of the game there are only 4 zombies here.
    View location | Show on map
  • Image of Lounge - Police Station 2F

    Lounge - Police Station 2F

    Claire B (Normal)
    5 Zombies - Eating a corpse in the centre of the room. In the PC and Dreamcast versions of the game there are only 4 zombies here.
    View location | Show on map
  • Image of Main Hall 2F - Police Station 2F

    Main Hall 2F - Police Station 2F

    Leon A (Normal)
    4 Zombies - Wandering around. In the PC and Dreamcast versions of the game there are only 3 zombies here.
    View location | Show on map
  • Image of Main Hall 2F - Police Station 2F

    Main Hall 2F - Police Station 2F

    Claire A (Normal)
    4 Zombies - Wandering around. In the PC and Dreamcast versions of the game there are only 3 zombies here.
    View location | Show on map
  • Image of Helicopter Corridor - Police Station 2F

    Helicopter Corridor - Police Station 2F

    Leon A (Normal)
    2 Zombies - Wandering around.
    View location | Show on map
  • Image of Helicopter Corridor - Police Station 2F

    Helicopter Corridor - Police Station 2F

    Claire A (Normal)
    2 Zombies - Wandering around. They will disappear after extinguishing the fire.
    View location | Show on map
  • Image of Station Yard - City Area 2

    Station Yard - City Area 2

    Leon A (Normal)
    4 Zombies - Wandering around.
    View location | Show on map
  • Image of Station Yard - City Area 2

    Station Yard - City Area 2

    Claire A (Normal)
    4 Zombies - Wandering around.
    View location | Show on map
  • Image of Outside Shed - City Area 2

    Outside Shed - City Area 2

    Leon A (Normal)
    2 Zombies - Appear if you try and exit through the west door.
    View location | Show on map
  • Image of Outside Shed - City Area 2

    Outside Shed - City Area 2

    Claire A (Normal)
    2 Zombies - Appear if you try and exit through the west door.
    View location | Show on map
  • Image of East Office - Police Station 1F

    East Office - Police Station 1F

    Leon A (Normal)
    5 Zombies - Wandering around.
    View location | Show on map
  • Image of East Office - Police Station 1F

    East Office - Police Station 1F

    Claire A (Normal)
    5 Zombies - Wandering around.
    View location | Show on map
  • Image of East Hallway - Police Station 1F

    East Hallway - Police Station 1F

    Leon A (Normal)
    6 Zombies - Wandering around.
    View location | Show on map
  • Image of East Hallway - Police Station 1F

    East Hallway - Police Station 1F

    Leon B (Normal)
    6 Zombies - Wandering around.
    View location | Show on map
  • Image of East Hallway - Police Station 1F

    East Hallway - Police Station 1F

    Claire A (Normal)
    6 Zombies - Wandering around.
    View location | Show on map
  • Image of East Hallway - Police Station 1F

    East Hallway - Police Station 1F

    Claire B (Normal)
    6 Zombies - Wandering around.
    View location | Show on map
  • Image of Interrogation Corridor - Police Station 1F

    Interrogation Corridor - Police Station 1F

    Leon A (Normal)
    4 Zombies - Wandering around.
    View location | Show on map
  • Image of Interrogation Corridor - Police Station 1F

    Interrogation Corridor - Police Station 1F

    Claire A (Normal)
    4 Zombies - Wandering around.
    View location | Show on map
  • Image of Evidence Room - Police Station 1F

    Evidence Room - Police Station 1F

    Leon A (Normal)
    6 Zombies - Wandering around.
    View location | Show on map
  • Image of Evidence Room - Police Station 1F

    Evidence Room - Police Station 1F

    Claire A (Normal)
    6 Zombies - Wandering around.
    View location | Show on map
  • Image of Waiting Room 1F - Police Station 1F

    Waiting Room 1F - Police Station 1F

    Leon B (Normal)
    3 Zombies - Wandering around.
    View location | Show on map
  • Image of Waiting Room 1F - Police Station 1F

    Waiting Room 1F - Police Station 1F

    Claire B (Normal)
    3 Zombies - Wandering around.
    View location | Show on map
  • Image of 'L' Corridor - Police Station 1F

    'L' Corridor - Police Station 1F

    Leon B (Normal)
    6 Zombies - Under certain circumstances, depending on where the Cord was used in Scenario A, they appear here when exploring the Library for the first time before you have acquired the Club Key. Refer to this guide for more information.
    View location | Show on map
  • Image of 'L' Corridor - Police Station 1F

    'L' Corridor - Police Station 1F

    Claire B (Normal)
    6 Zombies - Under certain circumstances, depending on where the Cord was used in Scenario A, they appear here when exploring the Library for the first time before you have acquired the Club Key. Refer to this guide for more information.
    View location | Show on map
  • Image of Winding Corridor - Police Station 1F

    Winding Corridor - Police Station 1F

    Leon B (Normal)
    2 Zombies - They burst through the boarded-up windows in the middle of this corridor as you approach, but only when entering this corridor from the 'L' Corridor. However, under certain circumstances they do not appear at all. Refer to this guide for more information.
    4 Zombies - Under certain circumstances, depending on where the Cord was used in Scenario A, they appear here when exploring the Library for the first time before you have acquired the Club Key. Refer to this guide for more information.
    View location | Show on map
  • Image of Winding Corridor - Police Station 1F

    Winding Corridor - Police Station 1F

    Claire B (Normal)
    2 Zombies - They burst through the boarded-up windows in the middle of this corridor as you approach, but only when entering this corridor from the 'L' Corridor. However, under certain circumstances they do not appear at all. Refer to this guide for more information.
    4 Zombies - Under certain circumstances, depending on where the Cord was used in Scenario A, they appear here when exploring the Library for the first time before you have acquired the Club Key. Refer to this guide for more information.
    View location | Show on map
  • Image of West Stairway 1F - Police Station 1F

    West Stairway 1F - Police Station 1F

    Leon B (Normal)
    5 Zombies - Under certain circumstances, depending on where the Cord was used in Scenario A, they appear here when exploring the Library for the first time before you have acquired the Club Key. Refer to this guide for more information.
    View location | Show on map
  • Image of West Stairway 1F - Police Station 1F

    West Stairway 1F - Police Station 1F

    Claire B (Normal)
    5 Zombies - Under certain circumstances, depending on where the Cord was used in Scenario A, they appear here when exploring the Library for the first time before you have acquired the Club Key. Refer to this guide for more information.
    View location | Show on map
  • Image of Office Corridor - Police Station 2F

    Office Corridor - Police Station 2F

    Leon B (Normal)
    5 Zombies - Wandering around.
    View location | Show on map
  • Image of Office Corridor - Police Station 2F

    Office Corridor - Police Station 2F

    Claire B (Normal)
    1 Zombie - Appears after searching the S.T.A.R.S. Office.
    View location | Show on map
  • Image of West Office - Police Station 1F

    West Office - Police Station 1F

    Leon B (Normal)
    5 Zombies - There are five of them wandering around here if the Marvin Branagh Zombie was killed in Scenario A.
    3 Zombies - There are three of them wandering around here if the Marvin Branagh Zombie is still alive and not killed in Scenario A.
    View location | Show on map
  • Image of West Office - Police Station 1F

    West Office - Police Station 1F

    Claire B (Normal)
    5 Zombies - There are five of them wandering around here if the Marvin Branagh Zombie was killed in Scenario A.
    3 Zombies - There are three of them wandering around here if the Marvin Branagh Zombie is still alive and not killed in Scenario A.
    View location | Show on map
  • Image of East Office - Police Station 1F

    East Office - Police Station 1F

    Leon B (Normal)
    4 Zombies - Under certain circumstances, depending on where the Cord was used in Scenario A, they appear here when exploring the Library for the first time before you have acquired the Club Key. Refer to this guide for more information.
    View location | Show on map
  • Image of East Office - Police Station 1F

    East Office - Police Station 1F

    Claire B (Normal)
    4 Zombies - Under certain circumstances, depending on where the Cord was used in Scenario A, they appear here when exploring the Library for the first time before you have acquired the Club Key. Refer to this guide for more information.
    View location | Show on map
  • Image of Watchman's Corridor - Police Station 1F

    Watchman's Corridor - Police Station 1F

    Leon B (Normal)
    5 Zombies - Under certain circumstances, depending on where the Cord was used in Scenario A, they appear here when exploring the Library for the first time before you have acquired the Club Key. Refer to this guide for more information.
    View location | Show on map
  • Image of Watchman's Corridor - Police Station 1F

    Watchman's Corridor - Police Station 1F

    Claire B (Normal)
    5 Zombies - Under certain circumstances, depending on where the Cord was used in Scenario A, they appear here when exploring the Library for the first time before you have acquired the Club Key. Refer to this guide for more information.
    View location | Show on map
  • Image of Basement Entrance - Police Station B1

    Basement Entrance - Police Station B1

    Leon B (Normal)
    5 Zombies - Under certain circumstances, depending on where the Cord was used in Scenario A, they appear here when exploring the Library for the first time before you have acquired the Club Key. Refer to this guide for more information.
    View location | Show on map
  • Image of Basement Entrance - Police Station B1

    Basement Entrance - Police Station B1

    Claire B (Normal)
    5 Zombies - Under certain circumstances, depending on where the Cord was used in Scenario A, they appear here when exploring the Library for the first time before you have acquired the Club Key. Refer to this guide for more information.
    View location | Show on map
  • Image of Cesspool Walkway - Sewage Disposal

    Cesspool Walkway - Sewage Disposal

    Claire B (Normal)
    3 Zombies - Wandering around.
    View location | Show on map
  • Image of Cesspool Walkway - Sewage Disposal

    Cesspool Walkway - Sewage Disposal

    Leon B (Normal)
    4 Zombies - Three of them are wandering around, one of them is lying on the ground in the middle of the area.
    View location | Show on map
  • Image of Basement Entrance - Police Station B1

    Basement Entrance - Police Station B1

    Leon B (Normal)
    2 Zombies - Under certain circumstances, depending on where the Cord was used in Scenario A and if you've already explored the Library, they appear here after acquiring the Club Key. Refer to this guide for more information.
    View location | Show on map
  • Image of Basement Entrance - Police Station B1

    Basement Entrance - Police Station B1

    Claire B (Normal)
    2 Zombies - Under certain circumstances, depending on where the Cord was used in Scenario A and if you've already explored the Library, they appear here after acquiring the Club Key. Refer to this guide for more information.
    View location | Show on map
  • Image of Autopsy Room - Police Station B1

    Autopsy Room - Police Station B1

    Leon A (Normal)
    5 Zombies - Scattered throughout the room. They come to life after you pick up the Red Card Key from the cabinet. In the PC and Dreamcast versions of the game there are only 4 zombies here.
    View location | Show on map
  • Image of Autopsy Room - Police Station B1

    Autopsy Room - Police Station B1

    Claire A (Normal)
    5 Zombies - Scattered throughout the room. They come to life after you pick up the Red Card Key from the cabinet. In the PC and Dreamcast versions of the game there are only 4 zombies here.
    View location | Show on map
  • Image of East Office - Police Station 1F

    East Office - Police Station 1F

    Leon B (Normal)
    4 Zombies - Under certain circumstances, depending on where the Cord was used in Scenario A and if you've already acquired the Club Key, they appear here when exploring the Library for the first time. Refer to this guide for more information.
    View location | Show on map
  • Image of East Office - Police Station 1F

    East Office - Police Station 1F

    Claire B (Normal)
    4 Zombies - Under certain circumstances, depending on where the Cord was used in Scenario A and if you've already acquired the Club Key, they appear here when exploring the Library for the first time. Refer to this guide for more information.
    View location | Show on map
  • Image of Watchman's Corridor - Police Station 1F

    Watchman's Corridor - Police Station 1F

    Leon A (Normal)
    5 Zombies - Under certain circumstances, depending on where the Cord was used, they appear here when exploring the Library for the first time after acquiring the Club Key. Refer to this guide for more information.
    View location | Show on map
  • Image of Watchman's Corridor - Police Station 1F

    Watchman's Corridor - Police Station 1F

    Claire A (Normal)
    5 Zombies - Under certain circumstances, depending on where the Cord was used, they appear here when exploring the Library for the first time after acquiring the Club Key. Refer to this guide for more information.
    View location | Show on map
  • Image of Watchman's Corridor - Police Station 1F

    Watchman's Corridor - Police Station 1F

    Leon B (Normal)
    5 Zombies - Under certain circumstances, depending on where the Cord was used in Scenario A and if you've already explored the Library, they appear here after acquiring the Club Key. Refer to this guide for more information.
    5 Zombies - Under certain circumstances, depending on where the Cord was used in Scenario A and if you've already acquired the Club Key, they appear here when exploring the Library for the first time. Refer to this guide for more information.
    View location | Show on map
  • Image of Watchman's Corridor - Police Station 1F

    Watchman's Corridor - Police Station 1F

    Claire B (Normal)
    5 Zombies - Under certain circumstances, depending on where the Cord was used in Scenario A and if you've already explored the Library, they appear here after acquiring the Club Key. Refer to this guide for more information.
    5 Zombies - Under certain circumstances, depending on where the Cord was used in Scenario A and if you've already acquired the Club Key, they appear here when exploring the Library for the first time. Refer to this guide for more information.
    View location | Show on map
  • Image of Basement Entrance - Police Station B1

    Basement Entrance - Police Station B1

    Leon B (Normal)
    2 Zombies - Under certain circumstances, depending on where the Cord was used in Scenario A and if you've already acquired the Club Key, they appear here when exploring the Library for the first time. Refer to this guide for more information.
    View location | Show on map
  • Image of Basement Entrance - Police Station B1

    Basement Entrance - Police Station B1

    Claire B (Normal)
    2 Zombies - Under certain circumstances, depending on where the Cord was used in Scenario A and if you've already acquired the Club Key, they appear here when exploring the Library for the first time. Refer to this guide for more information.
    View location | Show on map
  • Image of 'L' Corridor - Police Station 1F

    'L' Corridor - Police Station 1F

    Leon A (Normal)
    6 Zombies - Under certain circumstances, depending on where the Cord was used, they appear here when exploring the Library for the first time after acquiring the Club Key. Refer to this guide for more information.
    View location | Show on map
  • Image of 'L' Corridor - Police Station 1F

    'L' Corridor - Police Station 1F

    Claire A (Normal)
    6 Zombies - Under certain circumstances, depending on where the Cord was used, they appear here when exploring the Library for the first time after acquiring the Club Key. Refer to this guide for more information.
    View location | Show on map
  • Image of 'L' Corridor - Police Station 1F

    'L' Corridor - Police Station 1F

    Leon B (Normal)
    3 Zombies - Under certain circumstances, depending on where the Cord was used in Scenario A and if you've already explored the Library, they appear here after acquiring the Club Key. Refer to this guide for more information.
    3 Zombies - Under certain circumstances, depending on where the Cord was used in Scenario A and if you've already acquired the Club Key, they appear here when exploring the Library for the first time. Refer to this guide for more information.
    View location | Show on map
  • Image of 'L' Corridor - Police Station 1F

    'L' Corridor - Police Station 1F

    Claire B (Normal)
    3 Zombies - Under certain circumstances, depending on where the Cord was used in Scenario A and if you've already explored the Library, they appear here after acquiring the Club Key. Refer to this guide for more information.
    3 Zombies - Under certain circumstances, depending on where the Cord was used in Scenario A and if you've already acquired the Club Key, they appear here when exploring the Library for the first time. Refer to this guide for more information.
    View location | Show on map
  • Image of Winding Corridor - Police Station 1F

    Winding Corridor - Police Station 1F

    Leon B (Normal)
    1 Zombie - Under certain circumstances, depending on where the Cord was used in Scenario A and if you've already explored the Library, it appears here after acquiring the Club Key. Refer to this guide for more information.
    1 Zombie - Under certain circumstances, depending on where the Cord was used in Scenario A and if you've already acquired the Club Key, it appears here when exploring the Library for the first time. Refer to this guide for more information.
    View location | Show on map
  • Image of Winding Corridor - Police Station 1F

    Winding Corridor - Police Station 1F

    Claire B (Normal)
    1 Zombie - Under certain circumstances, depending on where the Cord was used in Scenario A and if you've already explored the Library, it appears here after acquiring the Club Key. Refer to this guide for more information.
    1 Zombie - Under certain circumstances, depending on where the Cord was used in Scenario A and if you've already acquired the Club Key, it appears here when exploring the Library for the first time. Refer to this guide for more information.
    View location | Show on map
  • Image of West Stairway 1F - Police Station 1F

    West Stairway 1F - Police Station 1F

    Leon B (Normal)
    2 Zombies - Under certain circumstances, depending on where the Cord was used in Scenario A and if you've already explored the Library, they appear here after acquiring the Club Key. Refer to this guide for more information.
    2 Zombies - Under certain circumstances, depending on where the Cord was used in Scenario A and if you've already acquired the Club Key, they appear here when exploring the Library for the first time. Refer to this guide for more information.
    View location | Show on map
  • Image of West Stairway 1F - Police Station 1F

    West Stairway 1F - Police Station 1F

    Claire B (Normal)
    2 Zombies - Under certain circumstances, depending on where the Cord was used in Scenario A and if you've already explored the Library, they appear here after acquiring the Club Key. Refer to this guide for more information.
    2 Zombies - Under certain circumstances, depending on where the Cord was used in Scenario A and if you've already acquired the Club Key, they appear here when exploring the Library for the first time. Refer to this guide for more information.
    View location | Show on map
  • Image of Warehouse 1 - Sewer B2

    Warehouse 1 - Sewer B2

    Leon B (Normal)
    1 Zombie - Wandering around.
    View location | Show on map
  • Image of Warehouse 1 - Sewer B2

    Warehouse 1 - Sewer B2

    Claire A (Normal)
    1 Zombie - Wandering around.
    View location | Show on map
  • Image of Warehouse 1 - Sewer B2

    Warehouse 1 - Sewer B2

    Claire B (Normal)
    1 Zombie - Wandering around.
    View location | Show on map
  • Image of Sewer North Passage - Sewer B1

    Sewer North Passage - Sewer B1

    Claire B (Normal)
    3 Zombies - Wandering around.
    View location | Show on map
  • Image of Sewer South Passage - Sewer B1

    Sewer South Passage - Sewer B1

    Leon B (Normal)
    3 Zombies - Wandering around.
    View location | Show on map
  • Image of Sewer Passage 1 - Sewer B2

    Sewer Passage 1 - Sewer B2

    Leon A (Normal)
    3 Zombies - Emerge from the water as you pass, after you have acquired the Eagle Medal.
    View location | Show on map
  • Image of Sewer Passage 1 - Sewer B2

    Sewer Passage 1 - Sewer B2

    Leon B (Normal)
    3 Zombies - Emerge from the water as you pass, after you have acquired the Eagle Medal.
    View location | Show on map
  • Image of Sewer Passage 1 - Sewer B2

    Sewer Passage 1 - Sewer B2

    Claire A (Normal)
    3 Zombies - Emerge from the water as you pass, after you have acquired the Eagle Medal.
    View location | Show on map
  • Image of Sewer Passage 1 - Sewer B2

    Sewer Passage 1 - Sewer B2

    Claire B (Normal)
    3 Zombies - Emerge from the water as you pass, after you have acquired the Eagle Medal.
    View location | Show on map
  • Image of Factory Tunnel 1 - Vacant Factory B1

    Factory Tunnel 1 - Vacant Factory B1

    Leon A (Normal)
    4 Zombies - Wandering around.
    View location | Show on map
  • Image of Factory Tunnel 1 - Vacant Factory B1

    Factory Tunnel 1 - Vacant Factory B1

    Leon B (Normal)
    4 Zombies - Wandering around.
    View location | Show on map
  • Image of Factory Tunnel 1 - Vacant Factory B1

    Factory Tunnel 1 - Vacant Factory B1

    Claire A (Normal)
    4 Zombies - Wandering around.
    View location | Show on map
  • Image of Factory Tunnel 1 - Vacant Factory B1

    Factory Tunnel 1 - Vacant Factory B1

    Claire B (Normal)
    4 Zombies - Wandering around.
    View location | Show on map
  • Image of Factory Tunnel 2 - Vacant Factory B1

    Factory Tunnel 2 - Vacant Factory B1

    Leon A (Normal)
    4 Zombies - Wandering around.
    View location | Show on map
  • Image of Factory Tunnel 2 - Vacant Factory B1

    Factory Tunnel 2 - Vacant Factory B1

    Leon B (Normal)
    4 Zombies - Wandering around.
    View location | Show on map
  • Image of Factory Tunnel 2 - Vacant Factory B1

    Factory Tunnel 2 - Vacant Factory B1

    Claire A (Normal)
    4 Zombies - Wandering around.
    View location | Show on map
  • Image of Factory Tunnel 2 - Vacant Factory B1

    Factory Tunnel 2 - Vacant Factory B1

    Claire B (Normal)
    4 Zombies - Wandering around.
    View location | Show on map
  • Image of Elevator Area - Laboratory B4

    Elevator Area - Laboratory B4

    Leon B (Normal)
    5 Zombies - Wandering around.
    View location | Show on map
  • Image of Elevator Area - Laboratory B4

    Elevator Area - Laboratory B4

    Claire B (Normal)
    5 Zombies - Wandering around.
    View location | Show on map
  • Image of Sleeping Quarters A - Laboratory B4

    Sleeping Quarters A - Laboratory B4

    Leon B (Normal)
    3 Zombies - Appear only if the Vines in the south west corner were destroyed in Scenario A.
    View location | Show on map
  • Image of Sleeping Quarters A - Laboratory B4

    Sleeping Quarters A - Laboratory B4

    Claire B (Normal)
    3 Zombies - Appear only if the Vines in the south west corner were destroyed in Scenario A.
    View location | Show on map
  • Image of P-4 Laboratory - Laboratory B5

    P-4 Laboratory - Laboratory B5

    Leon A (Normal)
    5 Zombies - Wandering around.
    View location | Show on map
  • Image of P-4 Laboratory - Laboratory B5

    P-4 Laboratory - Laboratory B5

    Leon B (Normal)
    5 Zombies - Wandering around.
    View location | Show on map
  • Image of P-4 Laboratory - Laboratory B5

    P-4 Laboratory - Laboratory B5

    Claire A (Normal)
    5 Zombies - Wandering around.
    View location | Show on map
  • Image of P-4 Laboratory - Laboratory B5

    P-4 Laboratory - Laboratory B5

    Claire B (Normal)
    5 Zombies - Wandering around.
    View location | Show on map
  • Image of Active Treatment Experimentation Room - Laboratory B4

    Active Treatment Experimentation Room - Laboratory B4

    Leon A (Normal)
    5 Zombies - Wandering around.
    View location | Show on map
  • Image of Active Treatment Experimentation Room - Laboratory B4

    Active Treatment Experimentation Room - Laboratory B4

    Claire A (Normal)
    5 Zombies - Wandering around.
    View location | Show on map
  • Image of Elevator Area - Laboratory B4

    Elevator Area - Laboratory B4

    Leon A (Normal)
    5 Zombies - Appear here after exploring the Main Shaft.
    View location | Show on map
  • Image of Elevator Area - Laboratory B4

    Elevator Area - Laboratory B4

    Claire A (Normal)
    5 Zombies - Appear here after exploring the Main Shaft.
    View location | Show on map
  • Image of Central Corridor - Laboratory B5

    Central Corridor - Laboratory B5

    Leon A (Normal)
    5 Zombies - Appear here after the self-destruct sequence has been activated.
    View location | Show on map
  • Image of Central Corridor - Laboratory B5

    Central Corridor - Laboratory B5

    Claire A (Normal)
    5 Zombies - Appear here after the self-destruct sequence has been activated.
    View location | Show on map
  • Image of Gate Platform - Transport

    Gate Platform - Transport

    Leon B (Normal)
    5 Zombies - Appear here after supplying power to the train.
    View location | Show on map
  • Image of Gate Platform - Transport

    Gate Platform - Transport

    Claire B (Normal)
    5 Zombies - Appear here after supplying power to the train.
    View location | Show on map

There are no locations to show for this game mode. The following game modes are applicable:

Related product

Resident Evil 2 Board Game

Resident Evil 2 Board Game

Buy the Resident Evil 2 Board Game on Amazon

Explore further